FSA1018 | Installation Instructions |
Mount Installation
After determining the site meets the installation requirements:
1.Identify desired mounting location on wall.
2.Using a stud finder or similar method locate studs.
3.Align mounting holes in mount with studs making sure mounting holes are centered on studs.
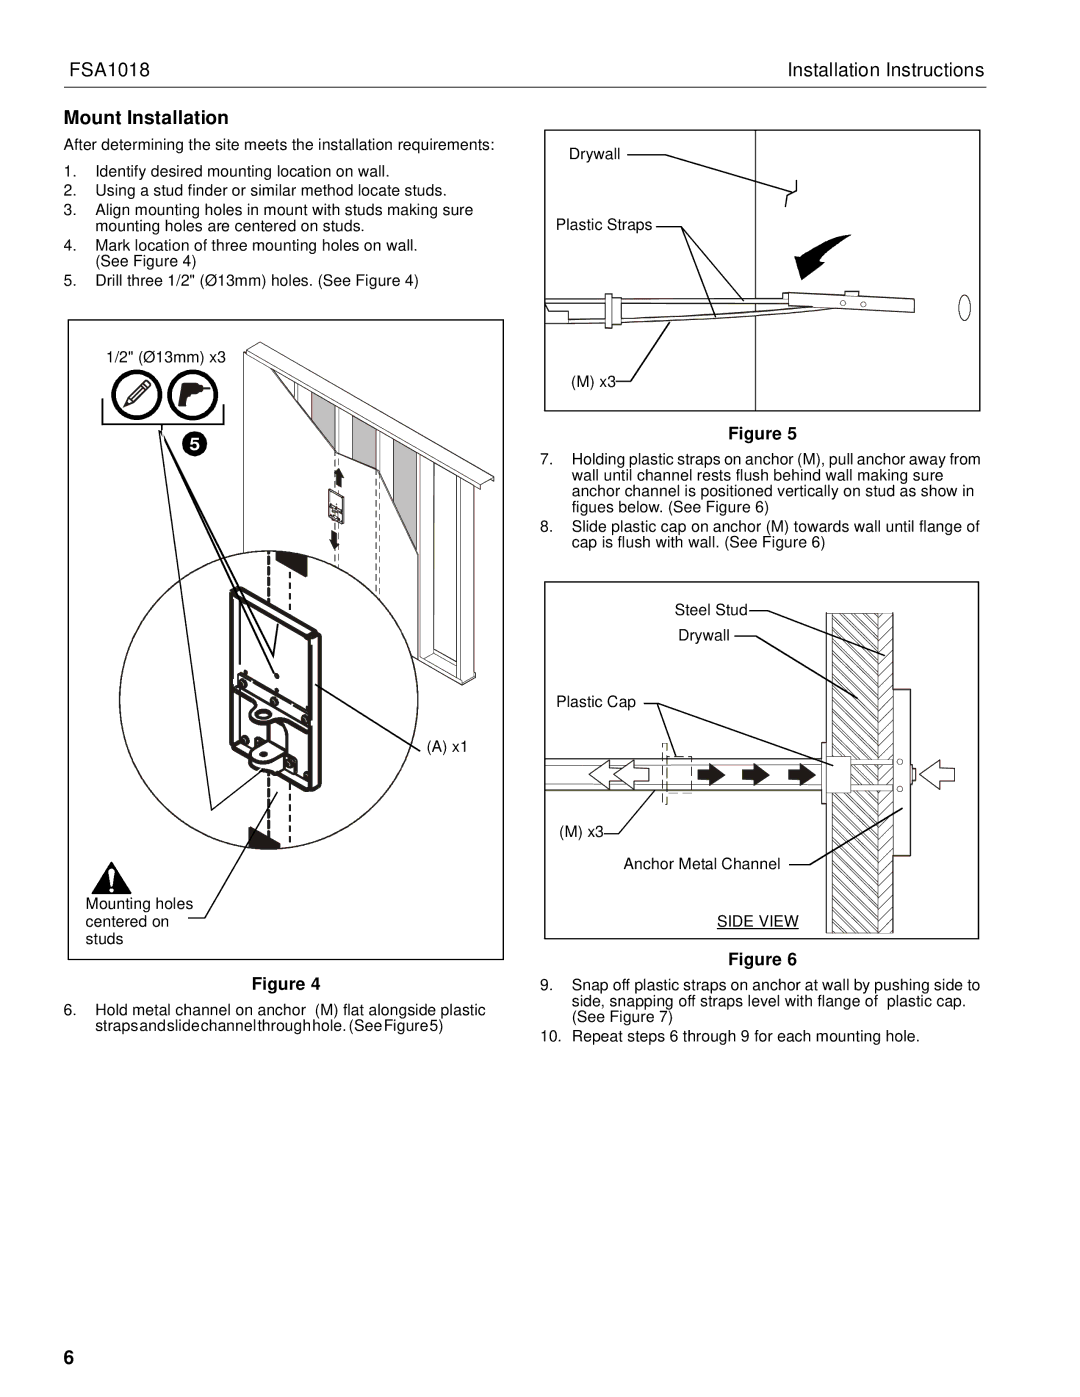
4.Mark location of three mounting holes on wall. (See Figure 4)
5.Drill three 1/2" (Ø13mm) holes. (See Figure 4)
1/2" (Ø13mm) x3 |
5 |
(A) x1 |
Mounting holes |
centered on |
studs |
Figure 4
6.Hold metal channel on anchor (M) flat alongside plastic strapsandslidechannelthroughhole.(SeeFigure5)
Drywall |
Plastic Straps |
(M) x3 |
Figure 5
7.Holding plastic straps on anchor (M), pull anchor away from wall until channel rests flush behind wall making sure anchor channel is positioned vertically on stud as show in figues below. (See Figure 6)
8.Slide plastic cap on anchor (M) towards wall until flange of cap is flush with wall. (See Figure 6)
Steel Stud |
Drywall |
Plastic Cap |
(M) x3 |
Anchor Metal Channel |
SIDE VIEW |
Figure 6
9.Snap off plastic straps on anchor at wall by pushing side to side, snapping off straps level with flange of plastic cap. (See Figure 7)
10.Repeat steps 6 through 9 for each mounting hole.
6