PAC501 specifications
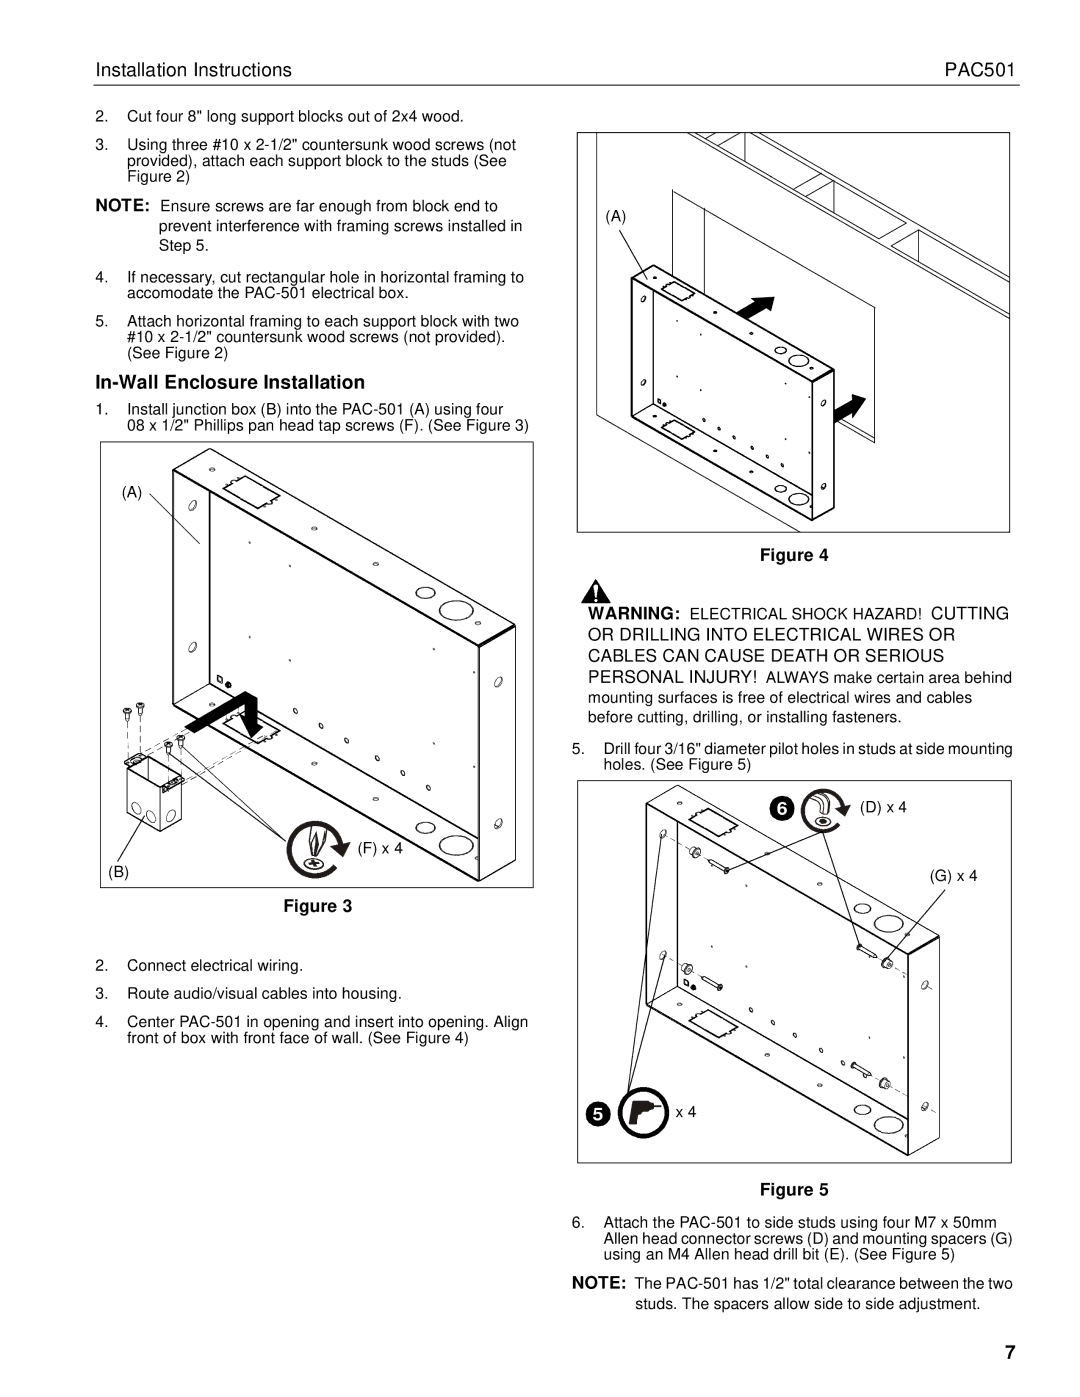
The Chief Manufacturing PAC501 is a notable addition to the lineup of innovative solutions tailored for modern audiovisual needs. This product showcases a meticulous design that caters to both functionality and aesthetics, making it an ideal choice for various environments, including corporate settings, educational institutions, and public spaces.One of the standout features of the PAC501 is its robust construction, which is designed to accommodate a range of display sizes and weights. This versatility ensures that users can securely mount their displays without concerns about stability. Its adaptability is further enhanced by a range of mounting options, allowing for both horizontal and vertical configurations, which can easily fit into different spatial constraints and design preferences.
The PAC501 incorporates advanced technology for effortless installation and maintenance. Its innovative Quick-Connect system drastically reduces installation time, ensuring that professionals can set up displays without unnecessary delays. This system allows for easy integration with existing infrastructure, making it a convenient choice for upgrades and retrofits.
Another significant characteristic of the PAC501 is its cable management system. Keeping the workspace organized is crucial, and this product offers comprehensive solutions to hide unsightly cables. This not only enhances aesthetics but also improves safety by reducing the risk of tripping hazards.
The PAC501 is designed with user convenience in mind. It includes features such as tilt and swivel options, enabling users to adjust the display for optimal viewing angles. This flexibility is particularly beneficial in multi-use spaces where users may have varying sightlines. Additionally, the PAC501 supports tools for easy adjustment post-installation, ensuring that users can refine the position of their display without needing to dismount it.
In terms of compatibility, the PAC501 supports a wide array of audiovisual equipment, making it an excellent option for those looking to enhance their video conferencing, presentations, or streaming experiences. Its neutral finish allows it to blend seamlessly into diverse environments while maintaining a sleek and professional appearance.
Overall, the Chief Manufacturing PAC501 stands out for its combination of strength, adaptability, and thoughtful design. It is an exemplary solution for any space requiring reliable and visually appealing display mounts, ensuring that technology can be utilized effectively and efficiently.

