PL2 | Installation Instructions |
SECURITY ENCLOSURE FOR MOUNT
NOTE: Projector not shown in Figures
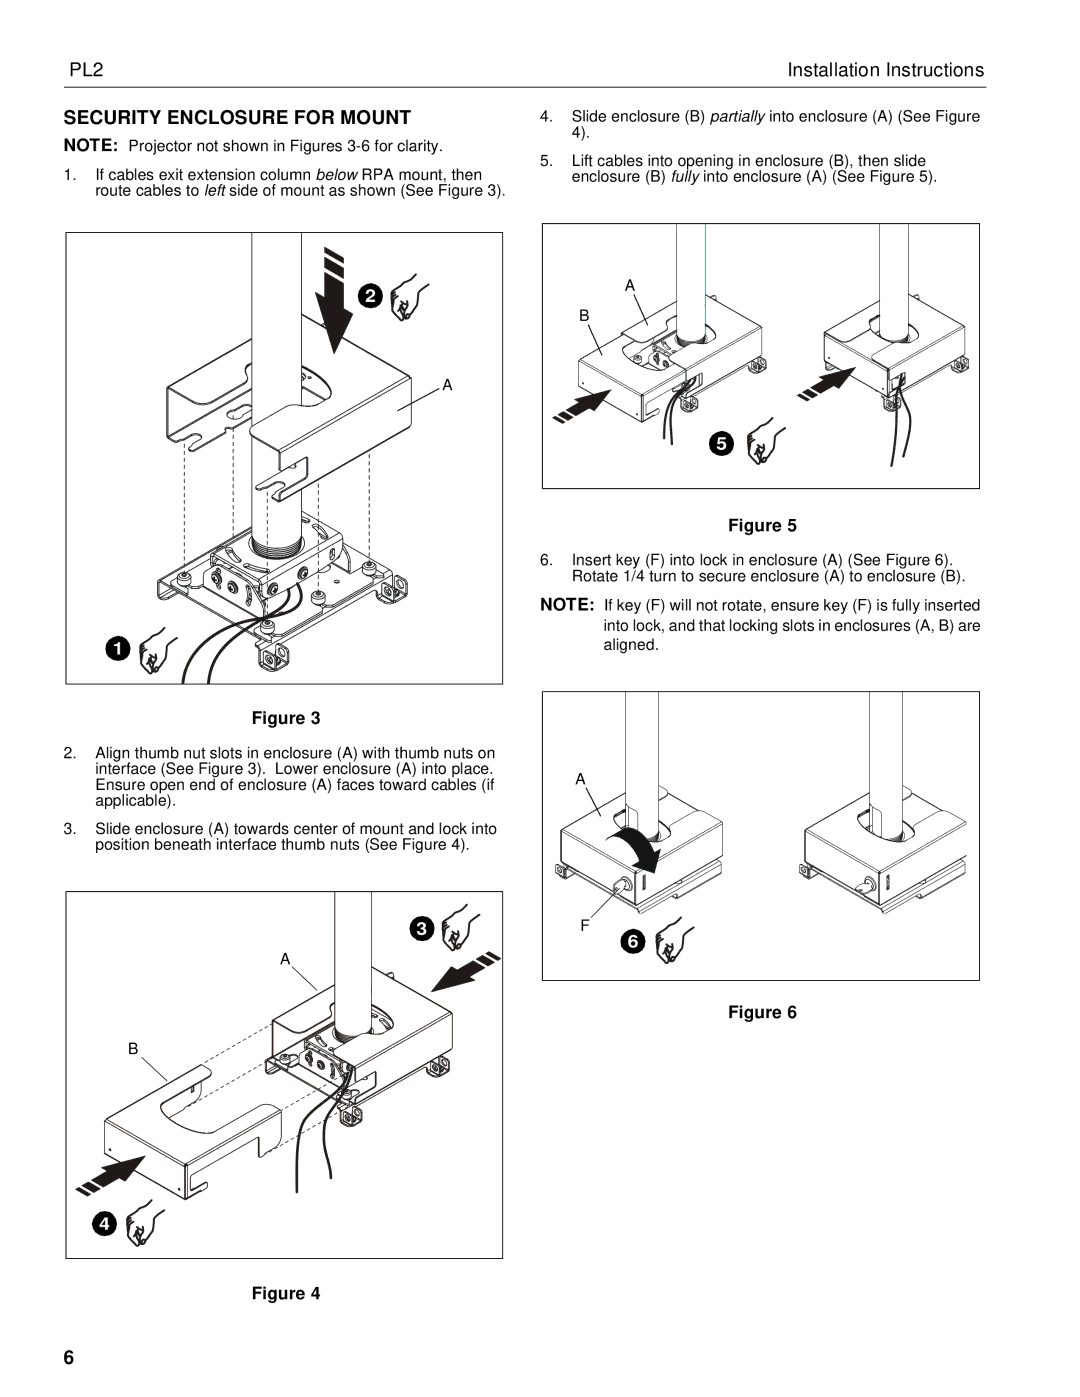
1.If cables exit extension column below RPA mount, then route cables to left side of mount as shown (See Figure 3).
2 |
A |
1 |
Figure 3
2.Align thumb nut slots in enclosure (A) with thumb nuts on interface (See Figure 3). Lower enclosure (A) into place. Ensure open end of enclosure (A) faces toward cables (if applicable).
3.Slide enclosure (A) towards center of mount and lock into position beneath interface thumb nuts (See Figure 4).
3 |
A |
B |
4 |
Figure 4
4.Slide enclosure (B) partially into enclosure (A) (See Figure 4).
5.Lift cables into opening in enclosure (B), then slide enclosure (B) fully into enclosure (A) (See Figure 5).
A |
B |
5 |
Figure 5
6.Insert key (F) into lock in enclosure (A) (See Figure 6). Rotate 1/4 turn to secure enclosure (A) to enclosure (B).
NOTE: If key (F) will not rotate, ensure key (F) is fully inserted into lock, and that locking slots in enclosures (A, B) are
aligned. |
A |
F |
6 |
Figure 6
6