PSMH2458 specifications
The Chief Manufacturing PSMH2458 is a cutting-edge mounting solution designed to provide an efficient and adaptable platform for displays. Designed for commercial and residential applications, the PSMH2458 stands out due to its versatility and user-friendly features.One of the primary features of the PSMH2458 is its robust construction, enabling it to support a wide range of flat-panel displays. This model is engineered to accommodate screens ranging in size from 24 to 58 inches, making it an ideal choice for various environments such as conference rooms, retail spaces, and home theaters. The PSMH2458 boasts a durable finish that not only enhances its aesthetic appeal but also protects against wear and tear.
An impressive characteristic of this mounting solution is its tilt and swivel capabilities. This allows users to adjust the viewing angle for optimal visibility, catering to different seating arrangements and ensuring that everyone in the room can enjoy an unobstructed view. The tilt range often exceeds 15 degrees, providing significant flexibility in positioning.
Another noteworthy technological feature of the PSMH2458 is its innovative cable management system. This system helps maintain a clean and organized installation by concealing cables and wires, reducing clutter and enhancing the visual appeal of the display setup. The thoughtful design simplifies installation and ensures that the display remains free from unsightly tangles.
The PSMH2458 is engineered with user convenience in mind. Its leveling feature allows for quick adjustments to ensure that displays are perfectly aligned. Additionally, the mount provides easy access to the back of the display, making it simple to connect or disconnect cables when necessary.
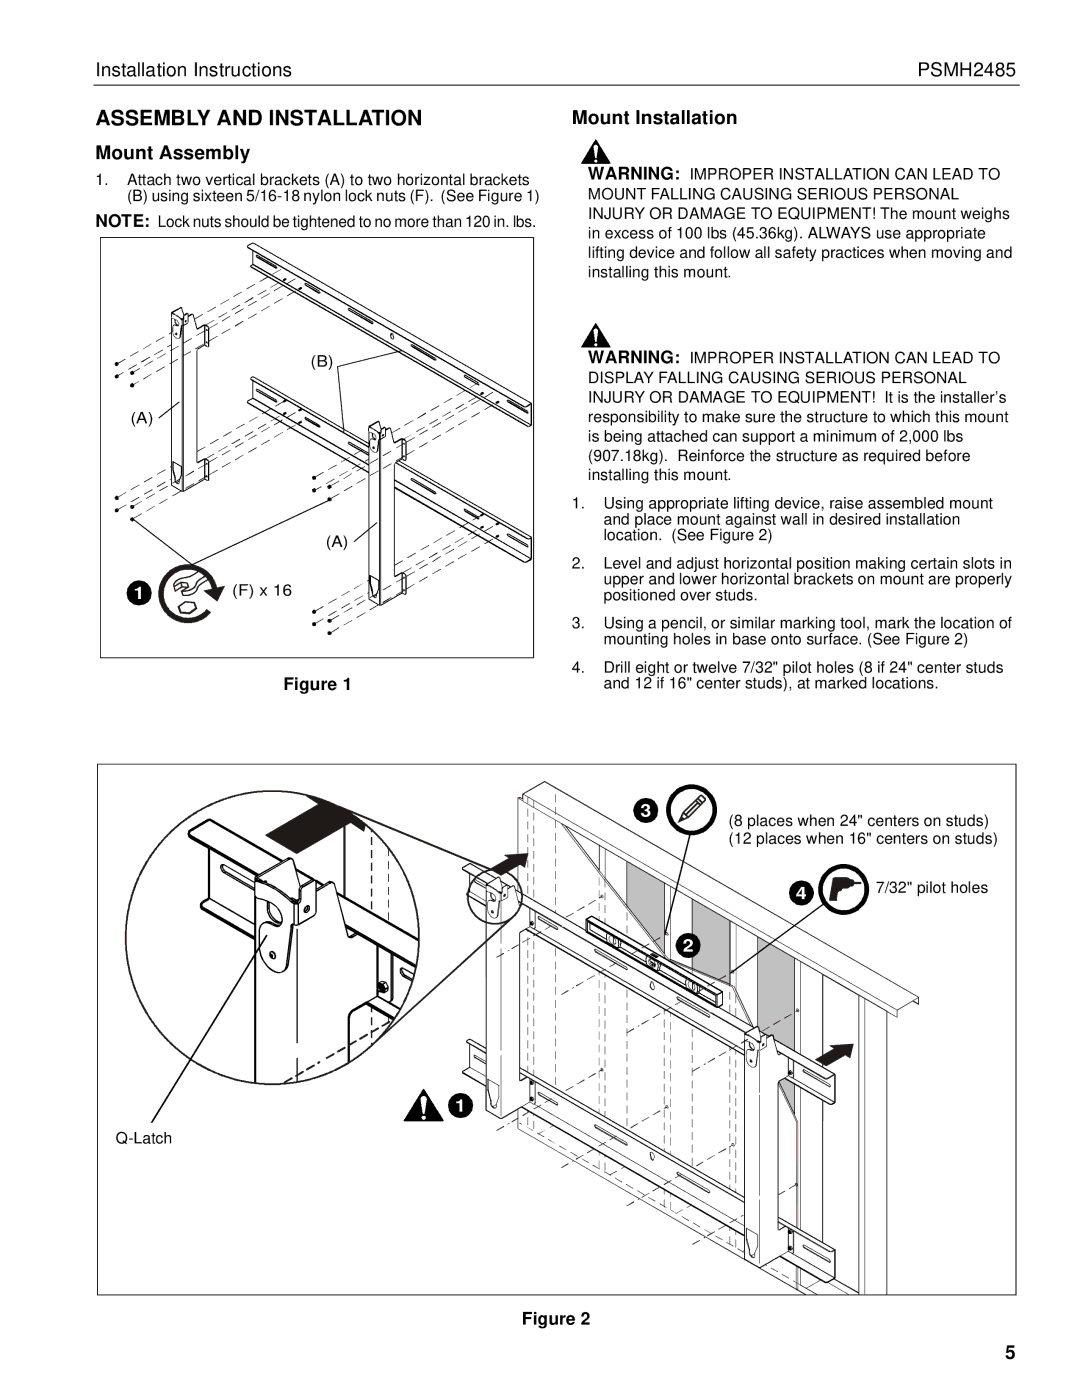
Installation of the PSMH2458 is straightforward, thanks to the included mounting hardware and user-friendly instructions. The universal design allows it to be compatible with a variety of VESA patterns, providing a comprehensive solution for any workspace.
Chief Manufacturing’s commitment to quality is evident in the PSMH2458, as it undergoes rigorous testing to ensure reliability and safety. Overall, the Chief Manufacturing PSMH2458 combines versatility, durability, and advanced features, making it an excellent choice for mounting displays in any setting.

