Manuals
/
Chief Manufacturing
/
Household Appliance
/
Indoor Furnishings
Chief Manufacturing
TPP
instruction manual
Degree
Models:
TPP
1
6
7
7
Download
7 pages
59.17 Kb
1
2
3
4
5
6
7
Install
Page 6
Image 6
Page 5
Page 7
Page 6
Image 6
Page 5
Page 7
Contents
Truss Pitch-AdjustableTPP Mount
BEFORE YOU BEGIN
CHIEF MANUFACTURING INC
I N S T R U C T I O N M A N U A L
TOOLS REQUIRED FOR INSTALLATION
CONTENTS
IMPORTANT WARNINGS AND CAUTIONS
PARTS
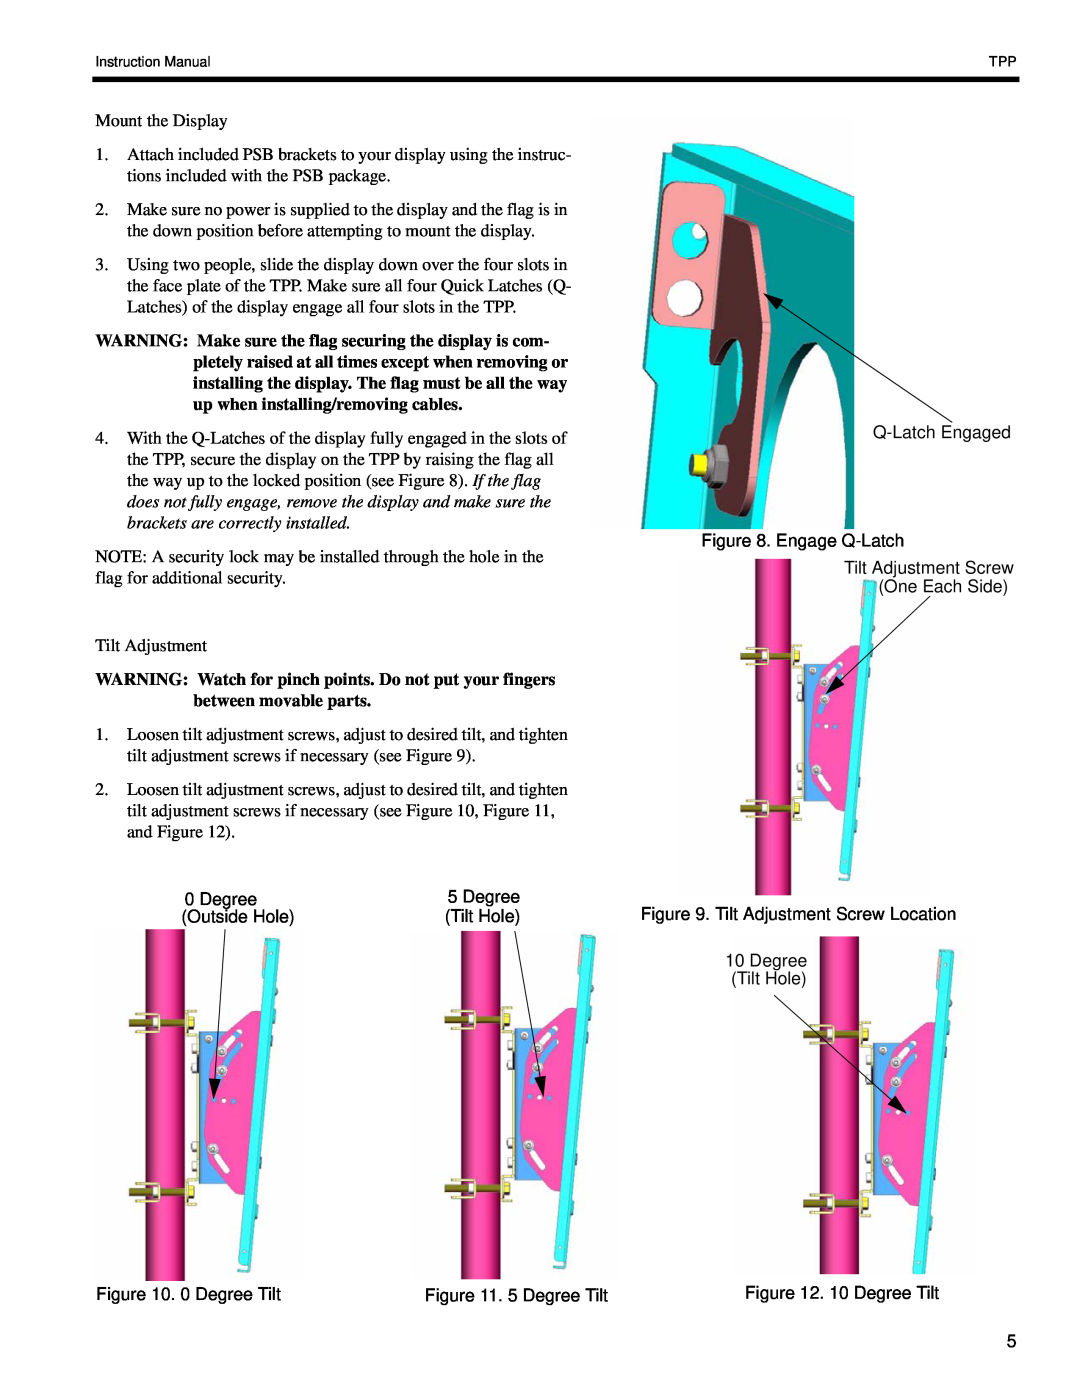
10-24Nut Nylon Spacer Figure 1. Install Flag
INSPECT THE MOUNT BEFORE INSTALLING
TPP INSTALLATION
Figure 3. Pitch-AdjustablePlate to Back Plate
3/8-16Nylock Nuts and Washers
0 Degree
Remove the Display
Top
Page
Image
Contents