
38-VIV207-01 specifications
Christie Digital Systems, a leader in digital projection technology, offers a remarkable solution for professional installations with the 38-VIV207-01 model. This innovative display is designed to cater to a wide range of applications, from corporate environments to entertainment venues, enhancing visual experiences with advanced features and technologies.One of the standout characteristics of the Christie 38-VIV207-01 is its impressive resolution. Sporting a high-definition display, it ensures that users enjoy crisp, vibrant visuals that are essential for any professional setting. The clarity and accuracy of the images make it ideal for presentations, video conferencing, and immersive media experiences, allowing for detailed content to be appreciated as intended.
In terms of brightness, the 38-VIV207-01 delivers outstanding performance. With a significant brightness level, it ensures visibility in various lighting conditions, making it a versatile choice for both dimly lit and well-lit environments. This feature is particularly beneficial for settings such as trade shows or large auditoriums, where ambient light can often detract from the viewing experience.
The model is also equipped with a range of connectivity options, allowing it to integrate seamlessly with different systems and devices. Whether connecting to a laptop, media player, or other sources, the 38-VIV207-01 offers flexibility that caters to diverse user needs. This versatility is further enhanced by compatibility with various input formats, ensuring that it meets the demands of modern technology.
For users looking for reliability, Christie has built the 38-VIV207-01 with durability in mind. Designed for long-term operation, it features enhanced cooling and energy-efficient components that minimize downtime. This makes it an ideal choice for installations that require consistent performance over extended periods.
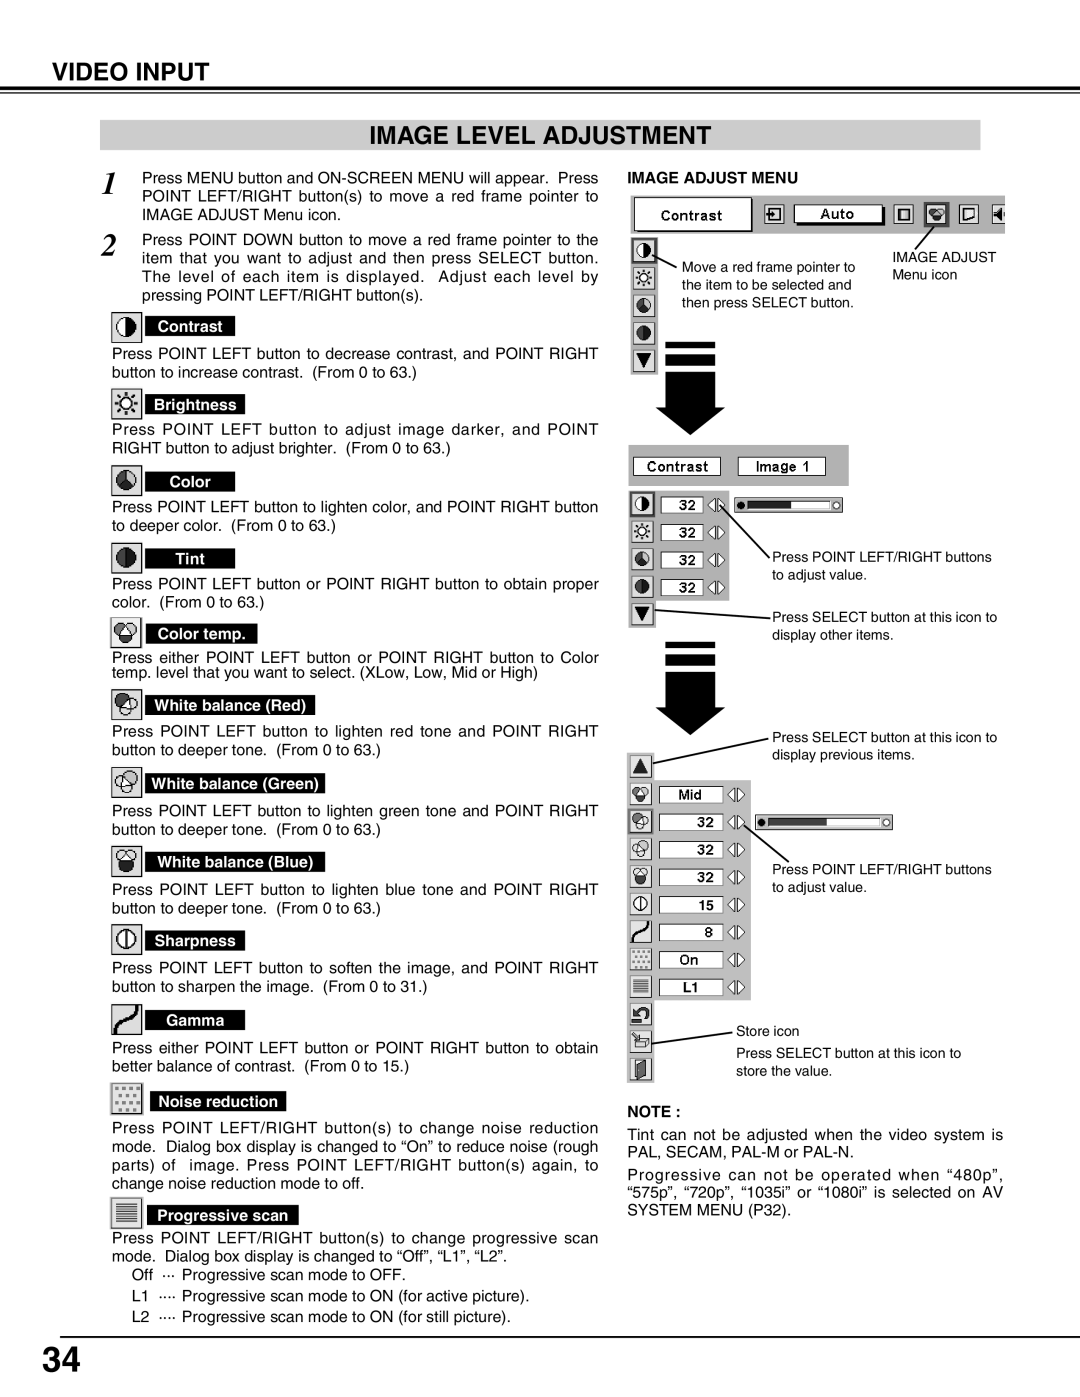
Additionally, the model boasts advanced color calibration capabilities, ensuring that the display maintains accurate color reproduction. This is essential for applications where color fidelity is critical, such as graphic design, video production, and medical imaging.
Overall, the Christie Digital Systems 38-VIV207-01 stands out as a top-tier display solution, combining high definition, brightness, connectivity, and reliability. Whether for corporate or entertainment use, its array of features and technical advancements make it a worthy investment for those seeking superior visual performance.