Basic Operation
Keystone Adjustment
If a projected picture still has keystone distortion after pressing the AUTO SET UP button on the top control or the AUTO SET on the remote control, correct the image manually as follows:
1 | Press the KEYSTONE button on the remote control or select |
| Keystone in the Setting Menu (p42). The keystone dialog |
| box appears. |
2 | Correct keystone distortion by pressing the Point ed78 |
| button. |
Keystone adjustment can be memorized. (p42)
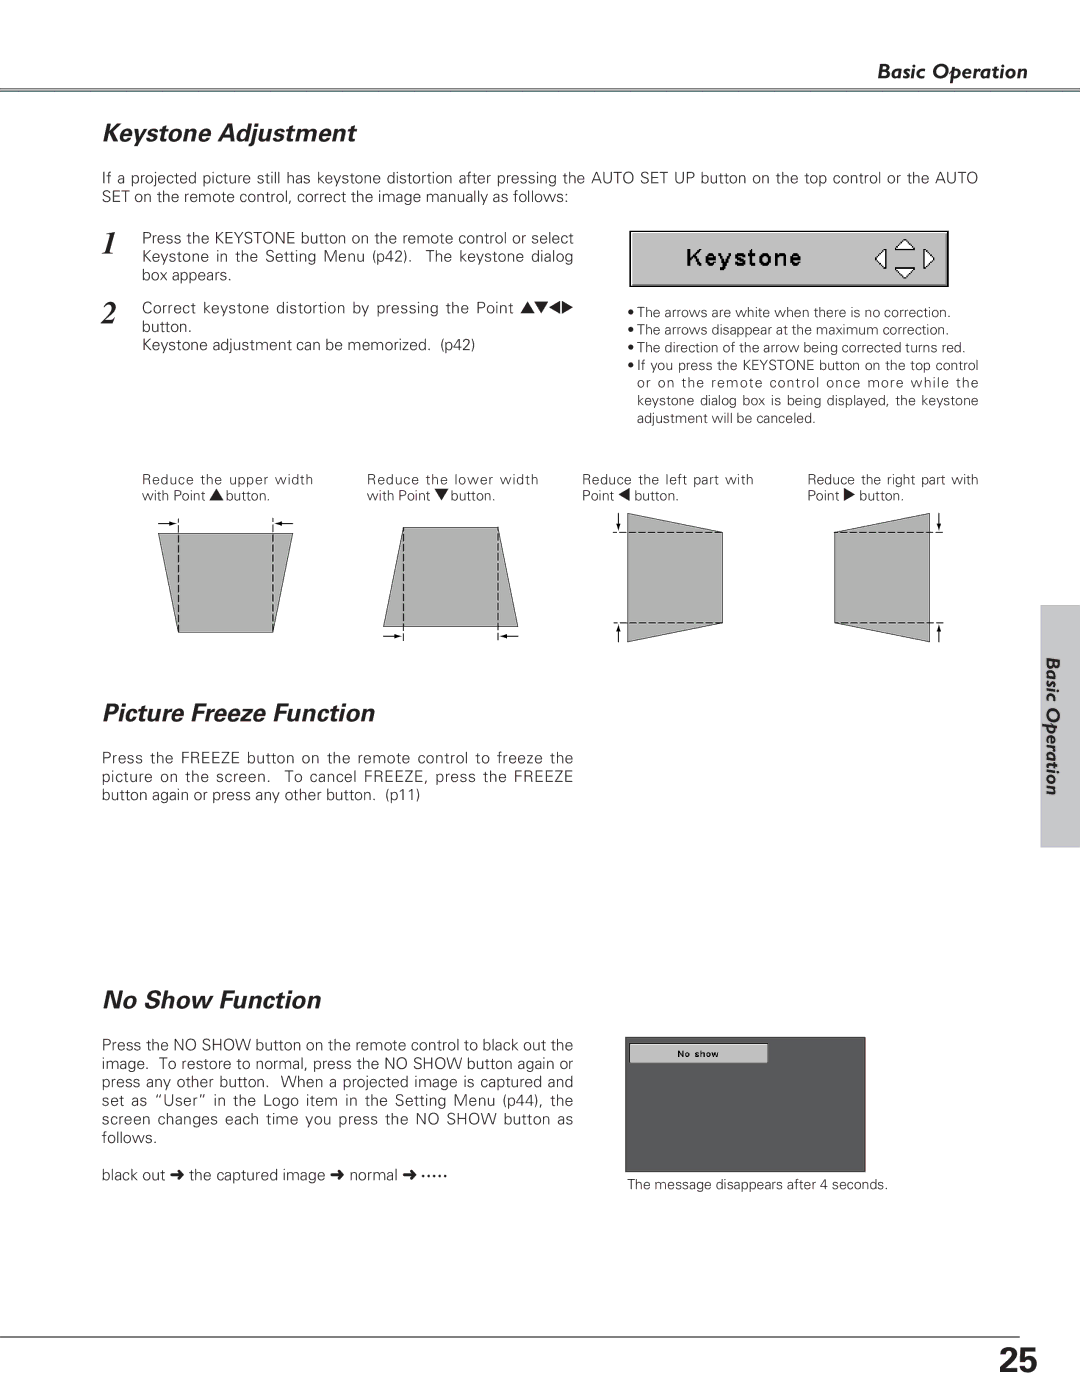
•The arrows are white when there is no correction.
•The arrows disappear at the maximum correction.
•The direction of the arrow being corrected turns red.
•If you press the KEYSTONE button on the top control or on the remote control once more while the keystone dialog box is being displayed, the keystone adjustment will be canceled.
Reduce the upper width | Reduce the lower width | Reduce the left part with | |||||
with Point ebutton. | with Point dbutton. | Point 7 button. | |||||
|
|
|
|
|
|
|
|
|
|
|
|
|
|
|
|
Reduce the right part with Point 8 button.
Picture Freeze Function
Press the FREEZE button on the remote control to freeze the picture on the screen. To cancel FREEZE, press the FREEZE button again or press any other button. (p11)
No Show Function
Press the NO SHOW button on the remote control to black out the image. To restore to normal, press the NO SHOW button again or press any other button. When a projected image is captured and set as “User” in the Logo item in the Setting Menu (p44), the screen changes each time you press the NO SHOW button as follows.
black out ➜ the captured image ➜ normal ➜ • • • • •
The message disappears after 4 seconds.
Basic Operation
25
