For detailed instructions, refer to online help or the Software User Guide (Part No. 21022081). Ciprico manuals are available at: www.ciprico.com> Customer Support> Tech Pub Library.
DiMeda 10G Getting Started
Step 1. Unpack Appliance
Unpack DiMeda. Move it to the place of operation. Warning: DiMeda is heavy; use care in lifting it. Save packaging materials. To transport DiMeda, use the original packaging.
Step 2. Insert drives
The system was configured with the drives in a set order. Each drive is labeled. It is important that you insert the 24 drives into the front of the array in the following order:
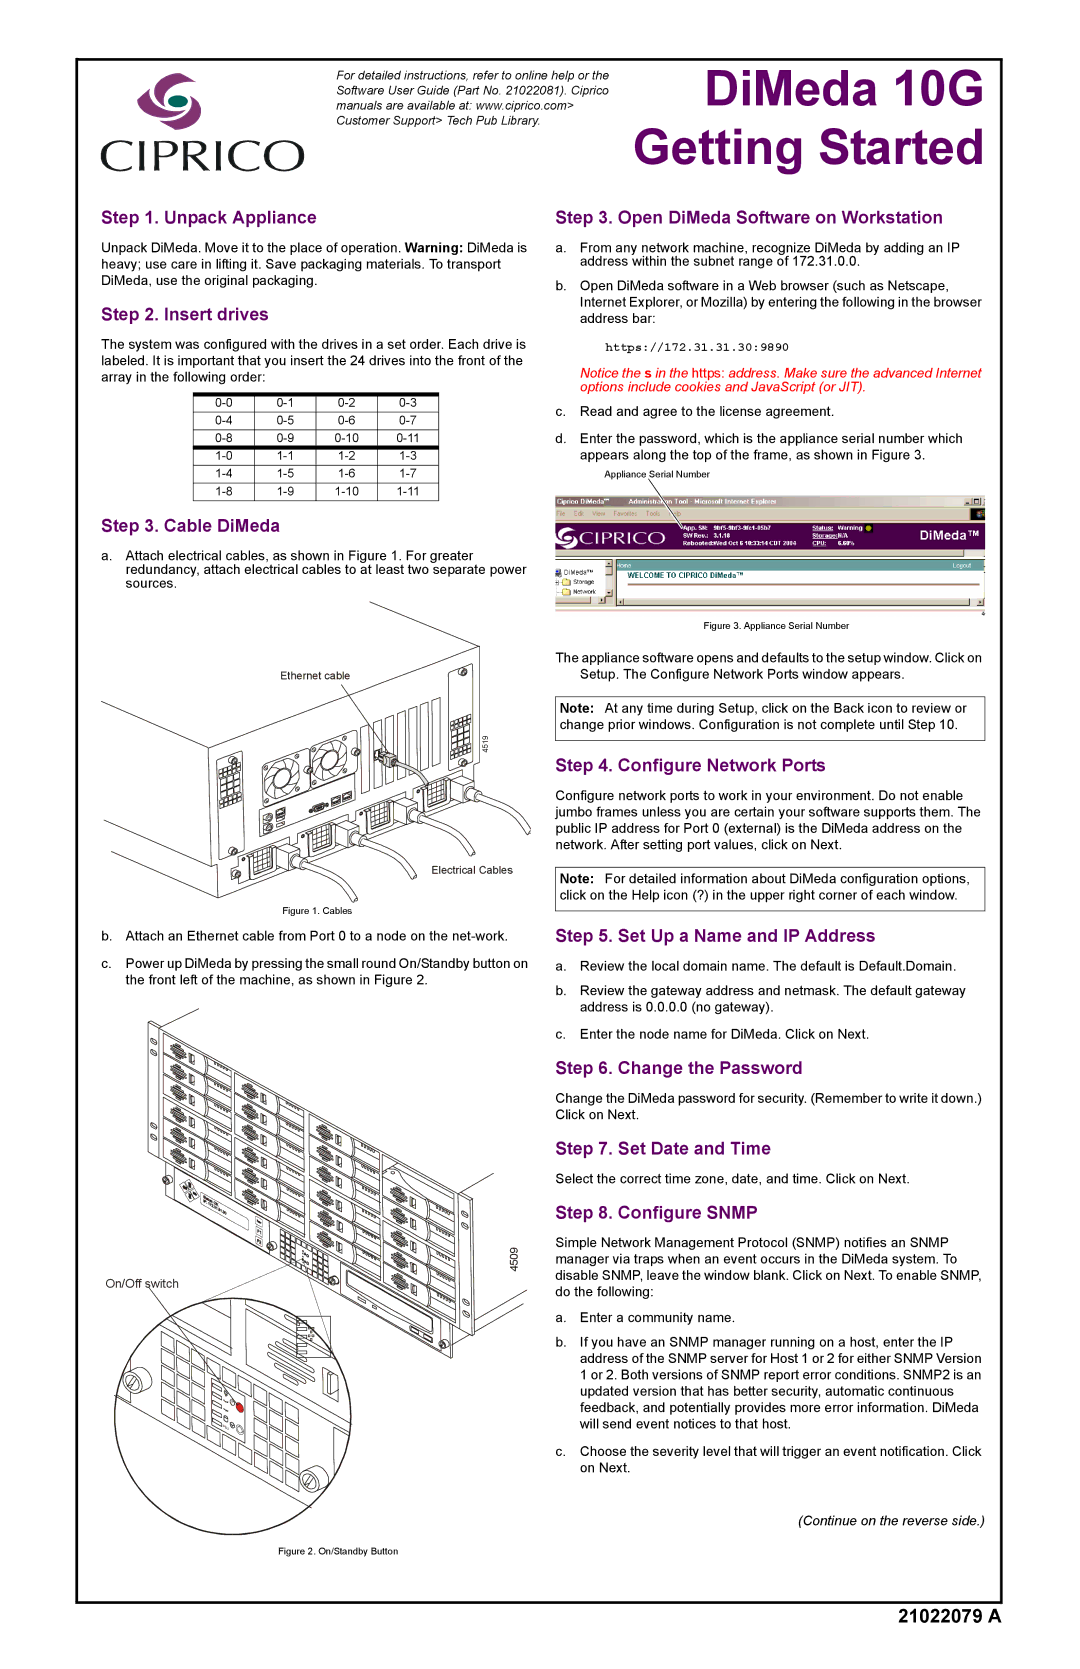
Step 3. Cable DiMeda
a.Attach electrical cables, as shown in Figure 1. For greater redundancy, attach electrical cables to at least two separate power sources.
Step 3. Open DiMeda Software on Workstation
a.From any network machine, recognize DiMeda by adding an IP address within the subnet range of 172.31.0.0.
b.Open DiMeda software in a Web browser (such as Netscape, Internet Explorer, or Mozilla) by entering the following in the browser address bar:
https://172.31.31.30:9890
Notice the s in the https: address. Make sure the advanced Internet options include cookies and JavaScript (or JIT).
c.Read and agree to the license agreement.
d.Enter the password, which is the appliance serial number which appears along the top of the frame, as shown in Figure 3.
Appliance Serial Number
Figure 3. Appliance Serial Number
Ethernet cable
4519
Electrical Cables
Figure 1. Cables
b.Attach an Ethernet cable from Port 0 to a node on the
c.Power up DiMeda by pressing the small round On/Standby button on the front left of the machine, as shown in Figure 2.
4509
On/Off switch
Figure 2. On/Standby Button
The appliance software opens and defaults to the setup window. Click on Setup. The Configure Network Ports window appears.
Note: At any time during Setup, click on the Back icon to review or change prior windows. Configuration is not complete until Step 10.
Step 4. Configure Network Ports
Configure network ports to work in your environment. Do not enable jumbo frames unless you are certain your software supports them. The public IP address for Port 0 (external) is the DiMeda address on the network. After setting port values, click on Next.
Note: For detailed information about DiMeda configuration options, click on the Help icon (?) in the upper right corner of each window.
Step 5. Set Up a Name and IP Address
a.Review the local domain name. The default is Default.Domain.
b.Review the gateway address and netmask. The default gateway address is 0.0.0.0 (no gateway).
c.Enter the node name for DiMeda. Click on Next.
Step 6. Change the Password
Change the DiMeda password for security. (Remember to write it down.) Click on Next.
Step 7. Set Date and Time
Select the correct time zone, date, and time. Click on Next.
Step 8. Configure SNMP
Simple Network Management Protocol (SNMP) notifies an SNMP manager via traps when an event occurs in the DiMeda system. To disable SNMP, leave the window blank. Click on Next. To enable SNMP, do the following:
a.Enter a community name.
b.If you have an SNMP manager running on a host, enter the IP address of the SNMP server for Host 1 or 2 for either SNMP Version 1 or 2. Both versions of SNMP report error conditions. SNMP2 is an updated version that has better security, automatic continuous feedback, and potentially provides more error information. DiMeda will send event notices to that host.
c.Choose the severity level that will trigger an event notification. Click on Next.
(Continue on the reverse side.)