GENERAL MAINTENANCE
AERATOR MAINTENANCE
TO KEEP THE AERATOR IN GOOD OPERATING CONDITION, PERFORM THE FOLLOWING:
•When replacement parts are required, use genuine Classen parts or parts with equivalent characteristics including type, strength, and material. Failure to do so may result in product malfunction and possible injury to the operator and/or bystanders.
•Any warning decal that becomes illegible should be replaced immediately. (See Pg. 5.)
•Do not operate equipment without shield(s) in place. Do not make any adjustments or perform any maintenance while the engine is running.
•Thoroughly clean all tines inside and out when aerating is completed and apply a light coat of oil to prevent rust on tines.
•Always lubricate Aerator each time it is put into service. Wipe off lubrication fittings before and after each lubrication. The number of lubrication fittings vary depending on model of Aerator.
Model
Models
Models
Models
![]() Pulley Guard
Pulley Guard
Idler Clutch Arm
(Right Side)
Fig. 2
•Keep drive belt(s) free of oil and dirt.
Models
•Check roller chain(s) for wear. Apply a light coat of No. 30 oil or penetrating chain lubricant to keep the chain(s) clean and in proper running order.
•Check roller chain(s) for tightness. Follow these steps:
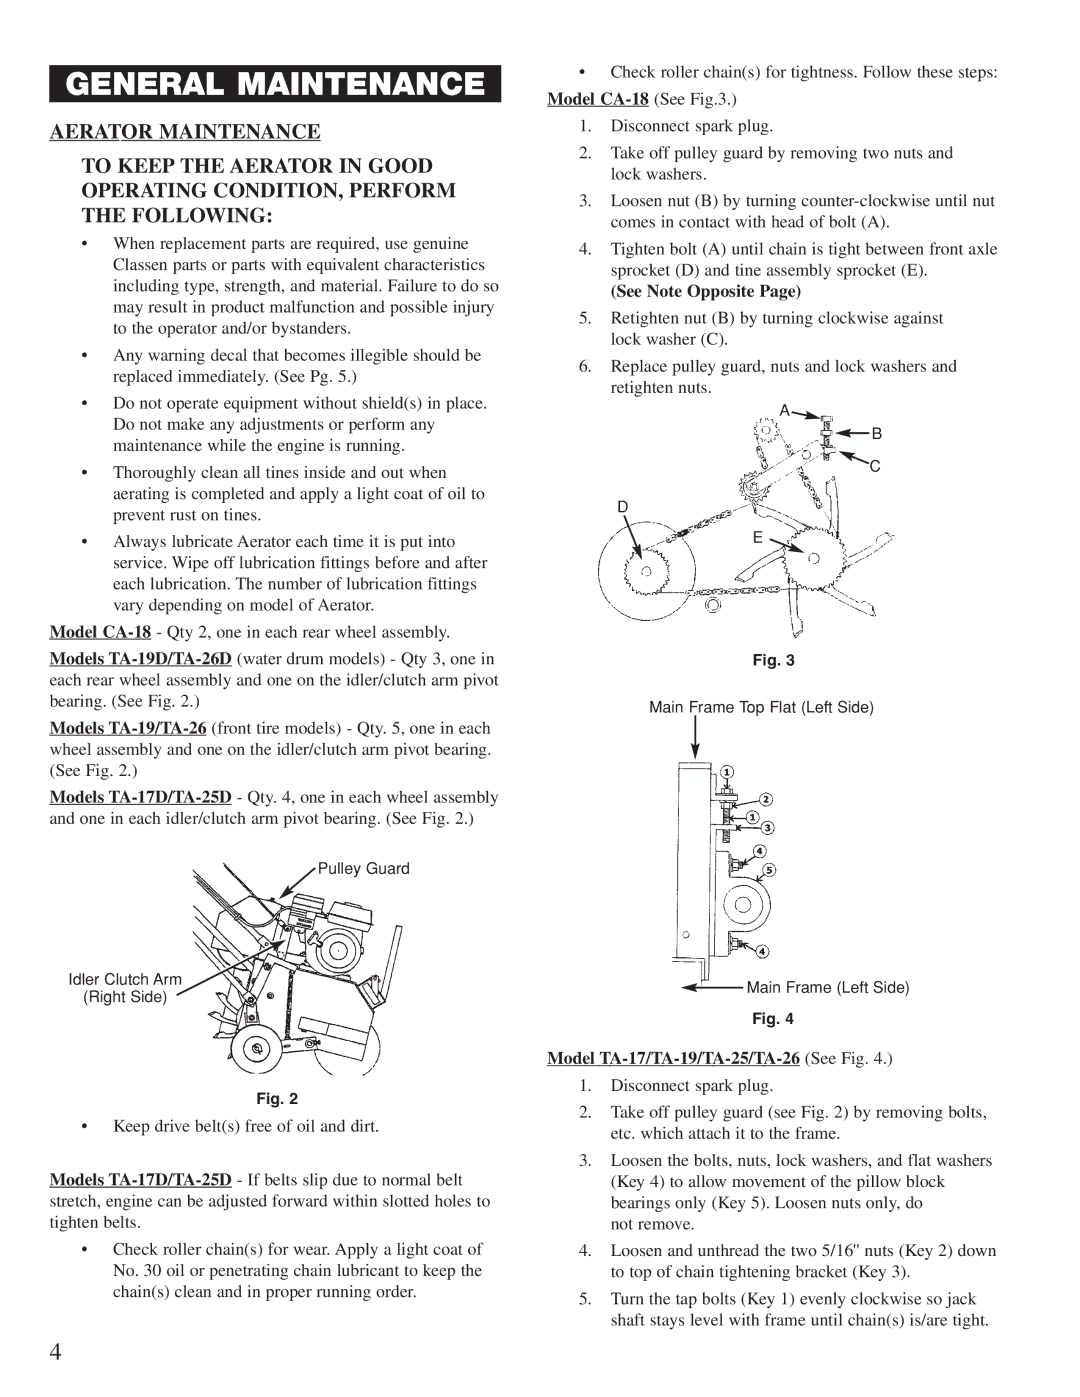
Model
1.Disconnect spark plug.
2.Take off pulley guard by removing two nuts and lock washers.
3.Loosen nut (B) by turning
4.Tighten bolt (A) until chain is tight between front axle sprocket (D) and tine assembly sprocket (E).
(See Note Opposite Page)
5.Retighten nut (B) by turning clockwise against lock washer (C).
6.Replace pulley guard, nuts and lock washers and retighten nuts.
A![]()
![]() B
B
C
D
E ![]()
Fig. 3
Main Frame Top Flat (Left Side)
![]() Main Frame (Left Side)
Main Frame (Left Side)
Fig. 4
Model TA-17/TA-19/TA-25/TA-26 (See Fig. 4.)
1.Disconnect spark plug.
2.Take off pulley guard (see Fig. 2) by removing bolts, etc. which attach it to the frame.
3.Loosen the bolts, nuts, lock washers, and flat washers (Key 4) to allow movement of the pillow block bearings only (Key 5). Loosen nuts only, do
not remove.
4.Loosen and unthread the two 5/16'' nuts (Key 2) down to top of chain tightening bracket (Key 3).
5.Turn the tap bolts (Key 1) evenly clockwise so jack shaft stays level with frame until chain(s) is/are tight.
4