4 | Installation |
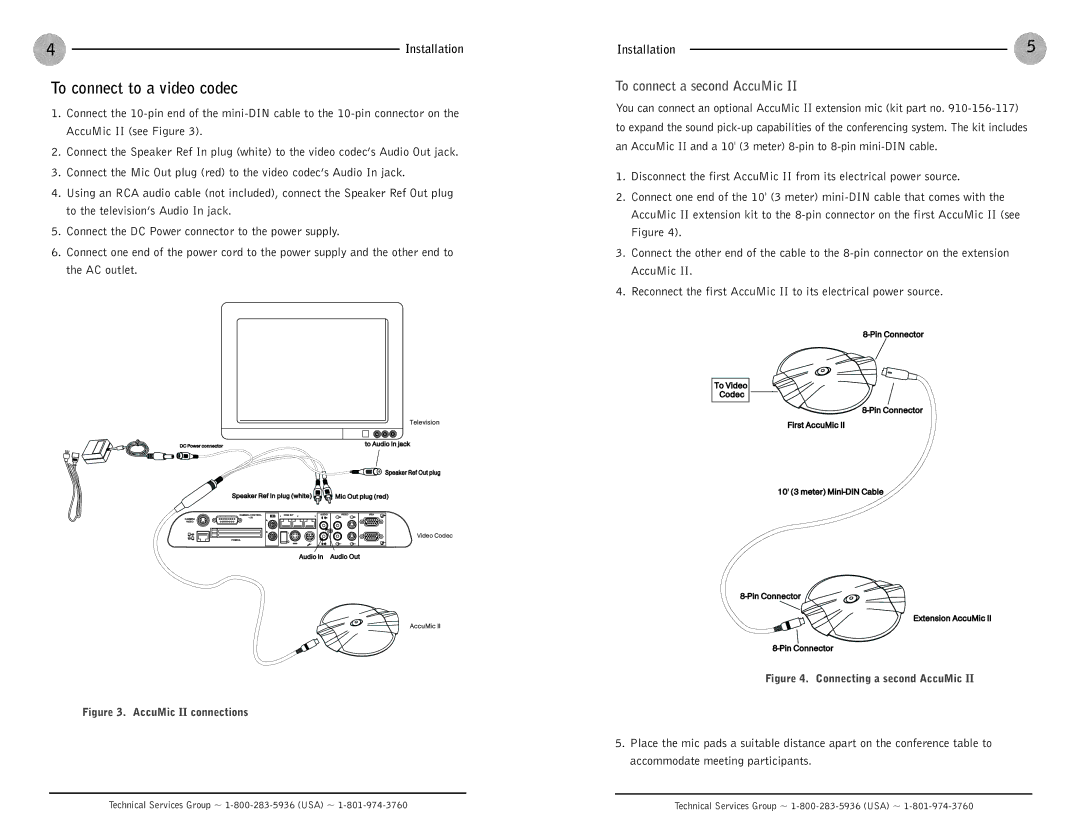
To connect to a video codec
1.Connect the
2.Connect the Speaker Ref In plug (white) to the video codec’s Audio Out jack.
3.Connect the Mic Out plug (red) to the video codec’s Audio In jack.
4.Using an RCA audio cable (not included), connect the Speaker Ref Out plug to the television’s Audio In jack.
5.Connect the DC Power connector to the power supply.
6.Connect one end of the power cord to the power supply and the other end to the AC outlet.
Television
DC Power connector | to Audio In jack |
![]() Speaker Ref Out plug
Speaker Ref Out plug
Speaker Ref In plug (white) | Mic Out plug (red) |
Video Codec
Audio In Audio Out
AccuMic II
Figure 3. AccuMic II connections
Installation | 5 |
To connect a second AccuMic II
You can connect an optional AccuMic II extension mic (kit part no.
1.Disconnect the first AccuMic II from its electrical power source.
2.Connect one end of the 10' (3 meter)
3.Connect the other end of the cable to the
4.Reconnect the first AccuMic II to its electrical power source.
To Video
Codec
First AccuMic II
10' (3 meter)
Extension AccuMic II
Figure 4. Connecting a second AccuMic II
5.Place the mic pads a suitable distance apart on the conference table to accommodate meeting participants.
Technical Services Group ~ | Technical Services Group ~ |
