6601
1
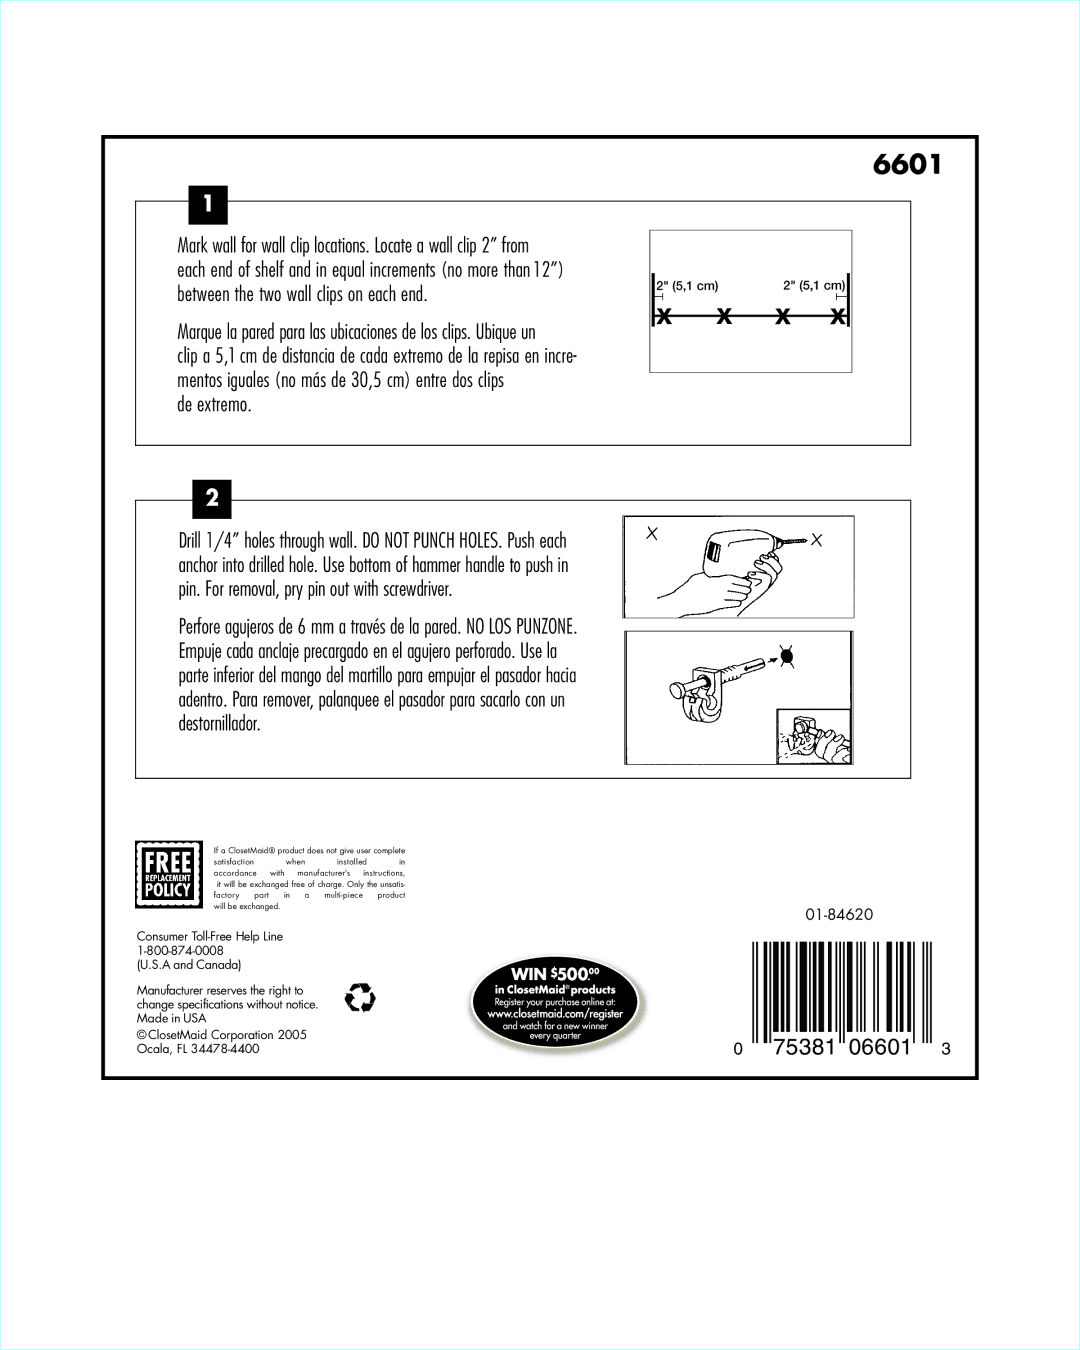
Mark wall for wall clip locations. Locate a wall clip 2” from
each end of shelf and in equal increments (no more than 12”) between the two wall clips on each end.
Marque la pared para las ubicaciones de los clips. Ubique un
clip a 5,1 cm de distancia de cada extremo de la repisa en incre- mentos iguales (no más de 30,5 cm) entre dos clips
de extremo.
2
Drill 1/4” holes through wall. DO NOT PUNCH HOLES. Push each anchor into drilled hole. Use bottom of hammer handle to push in pin. For removal, pry pin out with screwdriver.
Perfore agujeros de 6 mm a través de la pared. NO LOS PUNZONE. Empuje cada anclaje precargado en el agujero perforado. Use la parte inferior del mango del martillo para empujar el pasador hacia adentro. Para remover, palanquee el pasador para sacarlo con un destornillador.
If a ClosetMaid® product does not give user complete
satisfaction when installed in accordance with manufacturer's instructions, it will be exchanged free of charge. Only the unsatis-
factory | part | in | a | product | |
will be exchanged. |
|
|
|
| |
Consumer
(U.S.A and Canada)
Manufacturer reserves the right to change specifications without notice. Made in USA
© ClosetMaid Corporation 2005 Ocala, FL
0 75381 06601 3
