Installation
Location
Plan the location of the transceiver and microphone bracket before starting the installation. Select a location that is convenient for operation and does not inter- fere with the driver or passengers in the vehicle. In automobiles, the transceiver is usually mounted to the underneath of the dash panel, with the microphone bracket beside it.
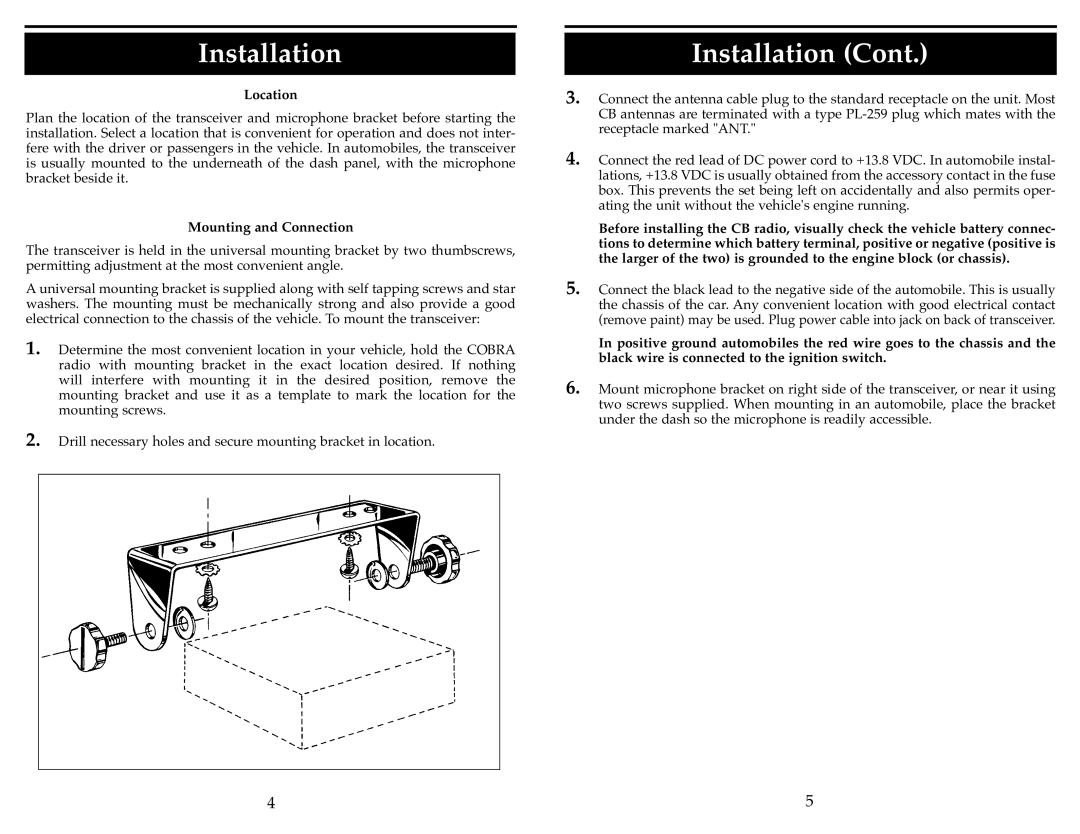
Mounting and Connection
The transceiver is held in the universal mounting bracket by two thumbscrews, permitting adjustment at the most convenient angle.
A universal mounting bracket is supplied along with self tapping screws and star washers. The mounting must be mechanically strong and also provide a good electrical connection to the chassis of the vehicle. To mount the transceiver:
1. Determine the most convenient location in your vehicle, hold the COBRA radio with mounting bracket in the exact location desired. If nothing will interfere with mounting it in the desired position, remove the mounting bracket and use it as a template to mark the location for the mounting screws.
2. Drill necessary holes and secure mounting bracket in location.
4
Installation (Cont.)
3. Connect the antenna cable plug to the standard receptacle on the unit. Most CB antennas are terminated with a type
4. Connect the red lead of DC power cord to +13.8 VDC. In automobile instal- lations, +13.8 VDC is usually obtained from the accessory contact in the fuse box. This prevents the set being left on accidentally and also permits oper- ating the unit without the vehicle's engine running.
Before installing the CB radio, visually check the vehicle battery connec- tions to determine which battery terminal, positive or negative (positive is the larger of the two) is grounded to the engine block (or chassis).
5. Connect the black lead to the negative side of the automobile. This is usually the chassis of the car. Any convenient location with good electrical contact (remove paint) may be used. Plug power cable into jack on back of transceiver.
In positive ground automobiles the red wire goes to the chassis and the black wire is connected to the ignition switch.
6. Mount microphone bracket on right side of the transceiver, or near it using two screws supplied. When mounting in an automobile, place the bracket under the dash so the microphone is readily accessible.
5