Coleman 9'x7 manual Connect Frame to Tent, Layout & Positioning of Tent, Pole Assembly

Models: 9'x7

1 2
Download 2 pages 46.74 Kb
Page 1
Image 1
Fossil Creek™ II 9’x7’

Fossil CreekII 9’x7’

Instructions apply to Part Number 2000001378

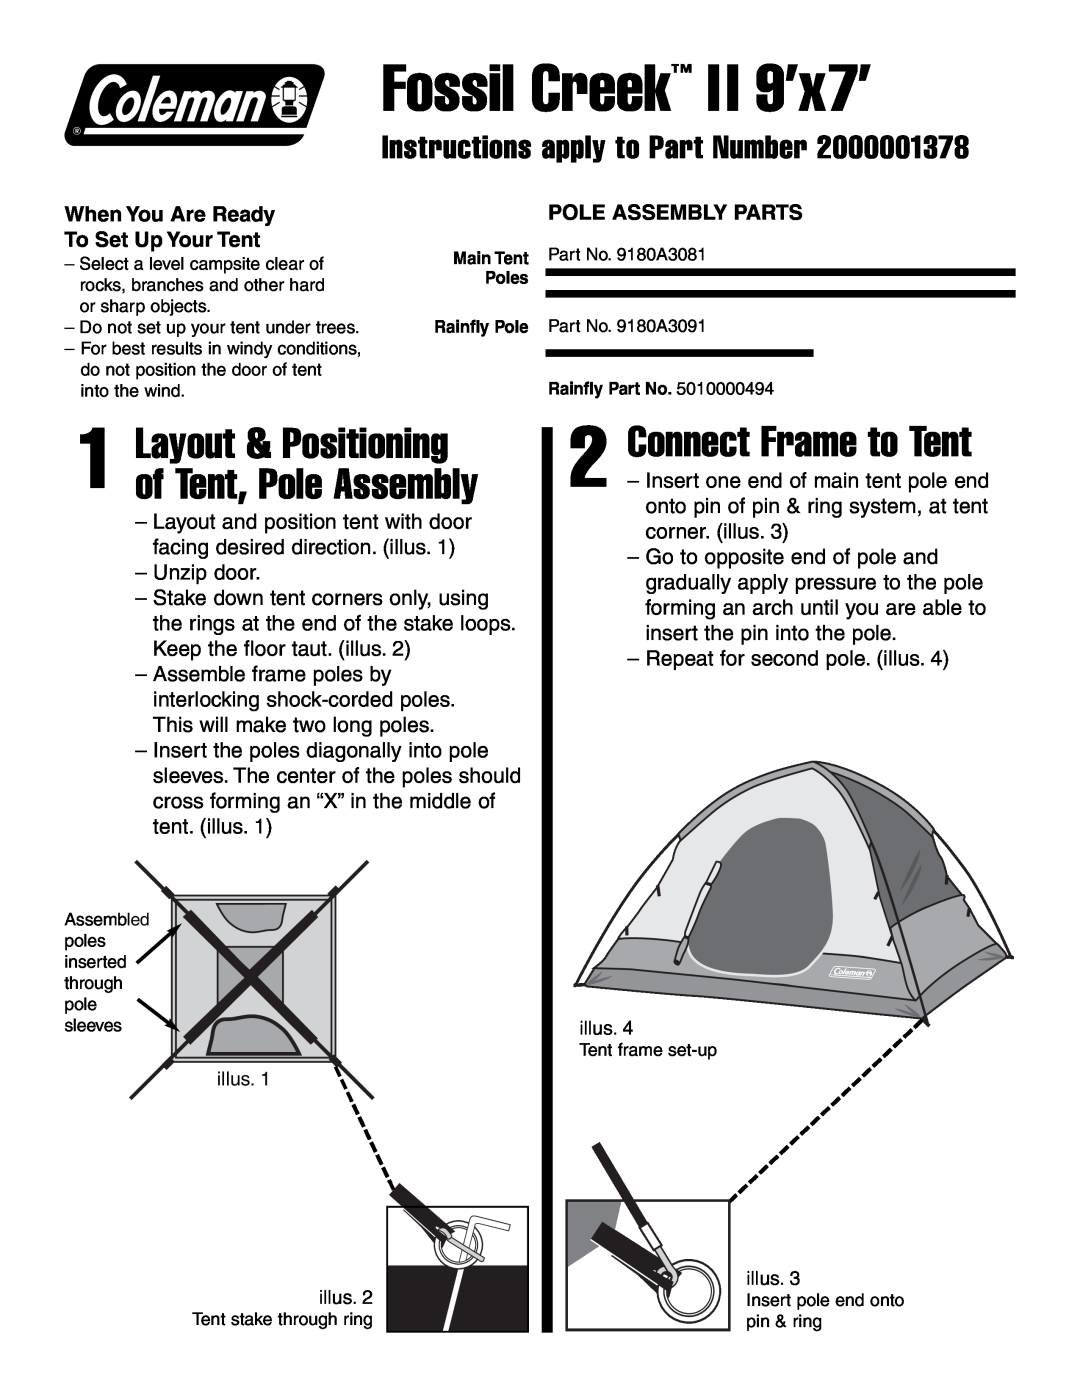
When You Are Ready

To Set Up Your Tent

Select a level campsite clear of rocks, branches and other hard or sharp objects.

Do not set up your tent under trees.

For best results in windy conditions, do not position the door of tent into the wind.

POLE ASSEMBLY PARTS

Main Tent Part No. 9180A3081

Poles

Rainfly Pole Part No. 9180A3091

Rainfly Part No. 5010000494

1 Layout & Positioning of Tent, Pole Assembly

Layout and position tent with door facing desired direction. (illus. 1)

Unzip door.

Stake down tent corners only, using the rings at the end of the stake loops. Keep the floor taut. (illus. 2)

Assemble frame poles by interlocking shock-corded poles. This will make two long poles.

Insert the poles diagonally into pole sleeves. The center of the poles should cross forming an “X” in the middle of tent. (illus. 1)

Assembled poles inserted through pole sleeves

illus. 1

2 Connect Frame to Tent

– Insert one end of main tent pole end onto pin of pin & ring system, at tent corner. (illus. 3)

– Go to opposite end of pole and gradually apply pressure to the pole forming an arch until you are able to insert the pin into the pole.

– Repeat for second pole. (illus. 4)

illus. 4

Tent frame set-up

illus. 2

Tent stake through ring

illus. 3

Insert pole end onto pin & ring

Page 1
Image 1
Coleman 9'x7 manual Connect Frame to Tent, Layout & Positioning of Tent, Pole Assembly, Pole Assembly Parts