
Hs 1r, HS1R-C specifications
Cooper Lighting's HS1R-C, also known as the HS1R series, is a cutting-edge lighting solution designed for warehouses, industrial applications, and large commercial spaces. This innovation embodies a combination of advanced technology, energy efficiency, and superior performance, making it an optimal choice for various lighting needs.One of the standout features of the HS1R-C is its exceptional lumen output. With the capability of delivering over 40,000 lumens, this fixture ensures bright, uniform illumination across extensive areas. Such high performance is essential in environments where visibility is paramount, enhancing safety and productivity in workspaces.
The HS1R-C utilizes LED technology, which not only contributes to its high lumen output but also offers remarkable energy savings. Compared to traditional lighting options, the HS1R series can significantly reduce energy consumption, resulting in lower utility bills and a smaller carbon footprint. This characteristic aligns with the growing demand for sustainable and environmentally friendly lighting solutions.
Durability is another key aspect of the HS1R-C. Built with robust materials, its construction is designed to withstand harsh industrial conditions, including exposure to dust, moisture, and impacts. This rugged design ensures longevity and reduces the need for frequent replacements, thus maximizing return on investment over time.
The HS1R-C also incorporates advanced thermal management techniques, which help maintain optimal performance and increase the lifespan of the LEDs. This feature minimizes overheating, ensuring that the fixture operates effectively even in temperature-sensitive environments.
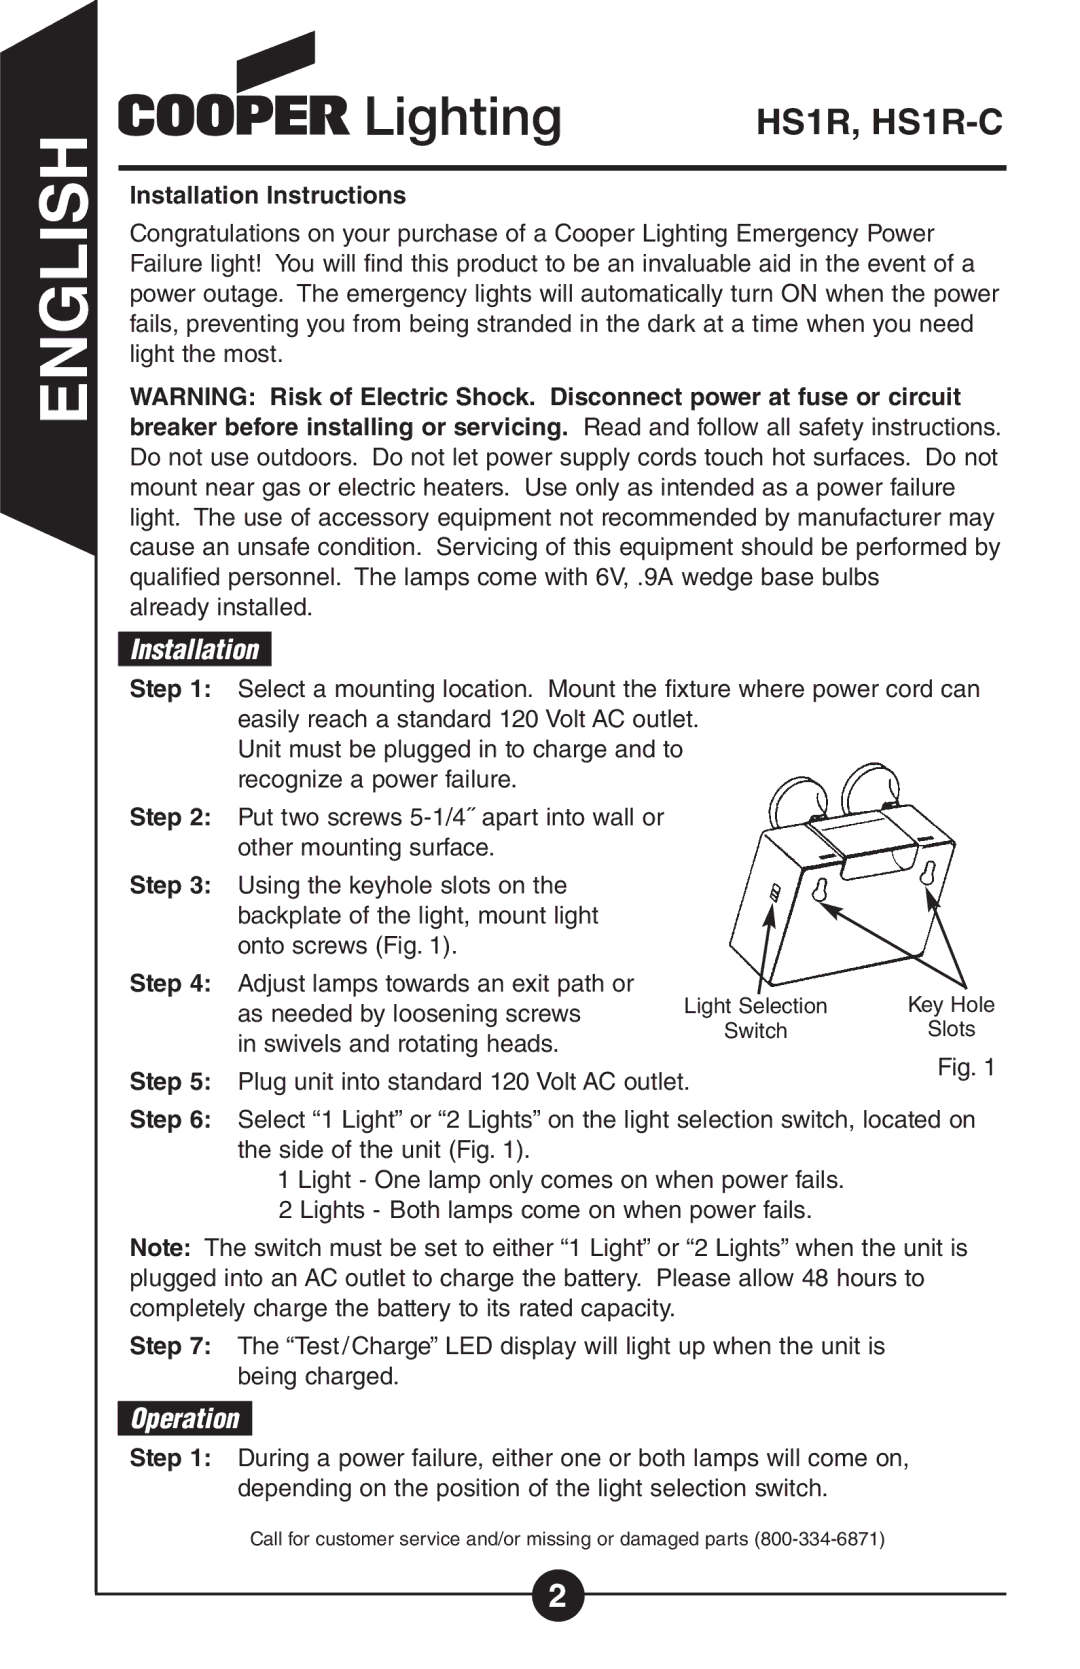
Furthermore, the HS1R-C includes various mounting options, making installation flexible and convenient. Users can choose between surface, chain, or pendant mounting based on their specific requirements, allowing for versatility in different settings.
In addition to its powerful performance and durability, the HS1R-C is compatible with various control systems, enabling users to take advantage of smart lighting technologies. This functionality supports features like dimming and motion sensing, providing both convenience and further energy savings.
Overall, the Cooper Lighting HS1R-C represents a forward-thinking approach to industrial lighting. Its impressive lumen output, energy efficiency, durability, and adaptability make it a top choice for optimizing illumination in challenging environments. As industries continue to prioritize safety, efficiency, and sustainability, the HS1R-C stands out as an exemplary lighting solution designed to meet these essential needs.