Continuous Flow Icemaker Service Manual
AUGER AND EXTRUDING HEAD REMOVAL
1.Disconnect unit from power supply.
2.Remove storage container cover and put aside.
3.Turn off water supply to icemaker.
4.After ice has melted from head take hold of the auger nut and lift straight up to disengage from icemaker.
5.When replacing the auger assembly, make certain that both the auger engages the output shaft drive and the extruding head ribs engage the evaporator tube.
INSTALLATION AND SHAFT SEAL REPLACEMENT
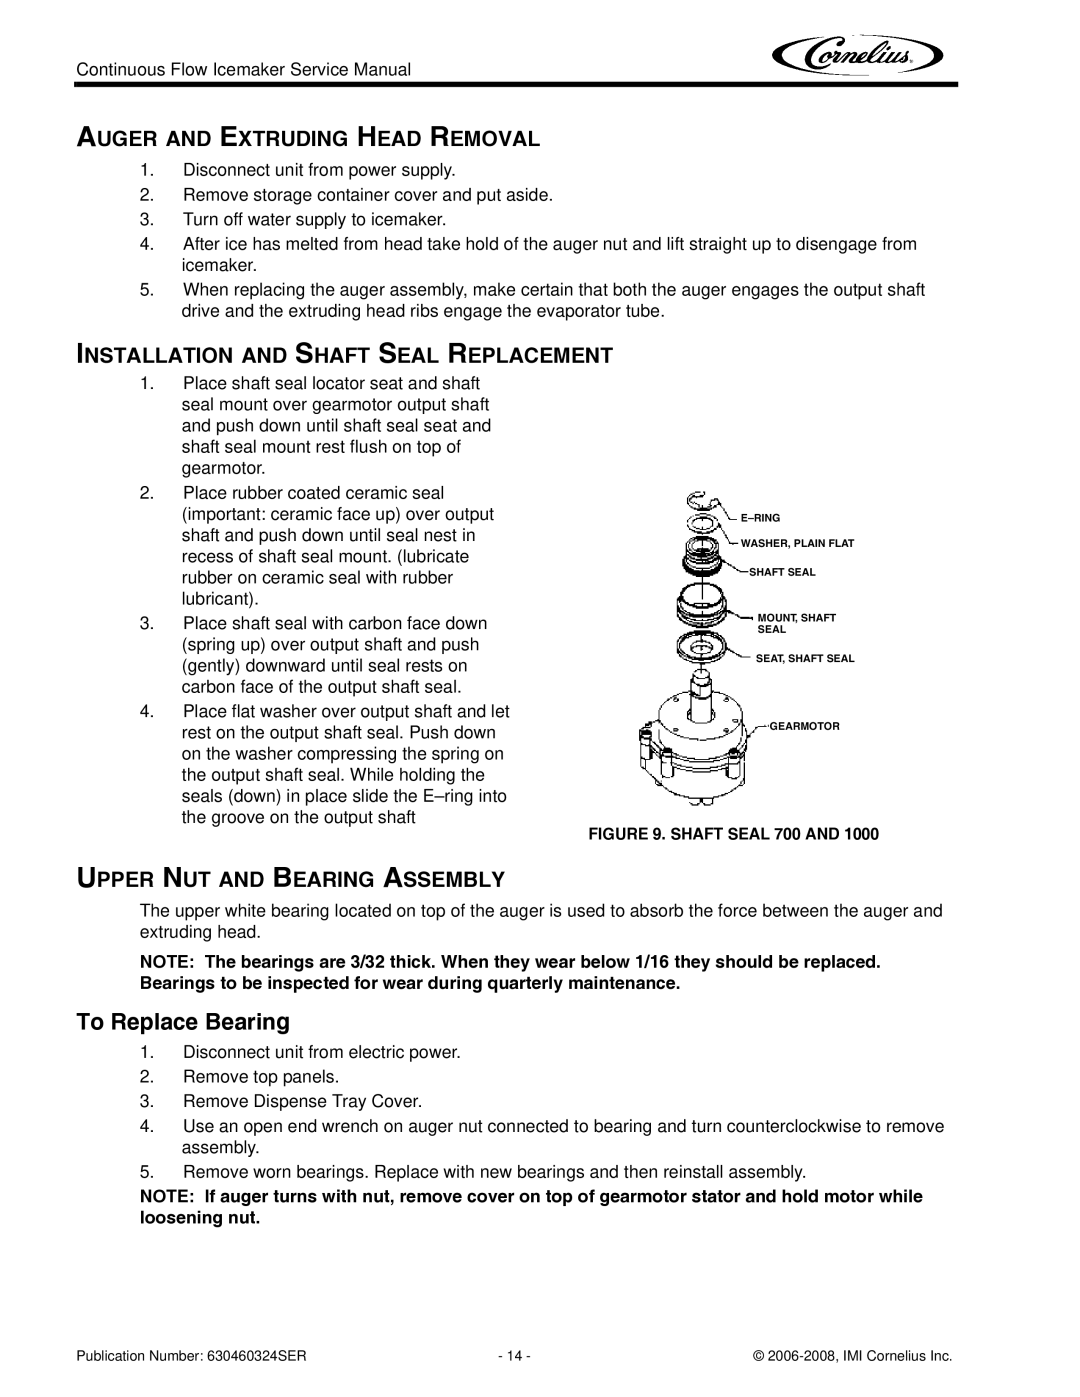
1.Place shaft seal locator seat and shaft seal mount over gearmotor output shaft and push down until shaft seal seat and shaft seal mount rest flush on top of gearmotor.
2.Place rubber coated ceramic seal (important: ceramic face up) over output shaft and push down until seal nest in recess of shaft seal mount. (lubricate rubber on ceramic seal with rubber lubricant).
3.Place shaft seal with carbon face down (spring up) over output shaft and push (gently) downward until seal rests on carbon face of the output shaft seal.
4.Place flat washer over output shaft and let rest on the output shaft seal. Push down on the washer compressing the spring on the output shaft seal. While holding the seals (down) in place slide the
WASHER, PLAIN FLAT
SHAFT SEAL
MOUNT, SHAFT
SEAL
SEAT, SHAFT SEAL
GEARMOTOR
FIGURE 9. SHAFT SEAL 700 AND 1000
UPPER NUT AND BEARING ASSEMBLY
The upper white bearing located on top of the auger is used to absorb the force between the auger and extruding head.
NOTE: The bearings are 3/32 thick. When they wear below 1/16 they should be replaced. Bearings to be inspected for wear during quarterly maintenance.
To Replace Bearing
1.Disconnect unit from electric power.
2.Remove top panels.
3.Remove Dispense Tray Cover.
4.Use an open end wrench on auger nut connected to bearing and turn counterclockwise to remove assembly.
5.Remove worn bearings. Replace with new bearings and then reinstall assembly.
NOTE: If auger turns with nut, remove cover on top of gearmotor stator and hold motor while loosening nut.
Publication Number: 630460324SER | - 14 - | © |