139.53625SR, 139.53315SR, 139.53699SR specifications
The Craftsman garage door openers 139.53699SR, 139.53315SR, and 139.53625SR stand out in the market for their reliability, advanced features, and user-friendly design. These models are equipped with powerful motors that ensure smooth and efficient operation, making garage door opening and closing a hassle-free experience.One of the main features of these garage door openers is their compatibility with various types of garage doors, including sectional and single-panel doors. This versatility makes them suitable for different households and garage configurations. Additionally, they offer a lifting capacity that can handle heavy doors, providing peace of mind for users with weighty garage door installations.
The Craftsman 139 series incorporates advanced technologies such as the Security+ 2.0 system. This technology enhances security by generating a new code each time the remote control is used, ensuring that unauthorized access is virtually eliminated. Furthermore, the integrated safety sensors of these openers prevent accidents by reversing the door's direction if an object is detected in its path, safeguarding both people and property.
Another notable characteristic of these models is their quiet operation. The motor design minimizes noise, making them ideal for homes with living spaces near the garage. This feature ensures that the door opens and closes without disturbing family members or neighbors, making it particularly appealing for residential use.
User convenience is a priority with the Craftsman 139 series. These openers include features such as remote control operation, allowing users to open or close their garage door from a distance. Additionally, some models come with a smartphone app integration, enabling remote access and control via mobile devices. This capability adds a layer of convenience, especially for those with busy lifestyles.
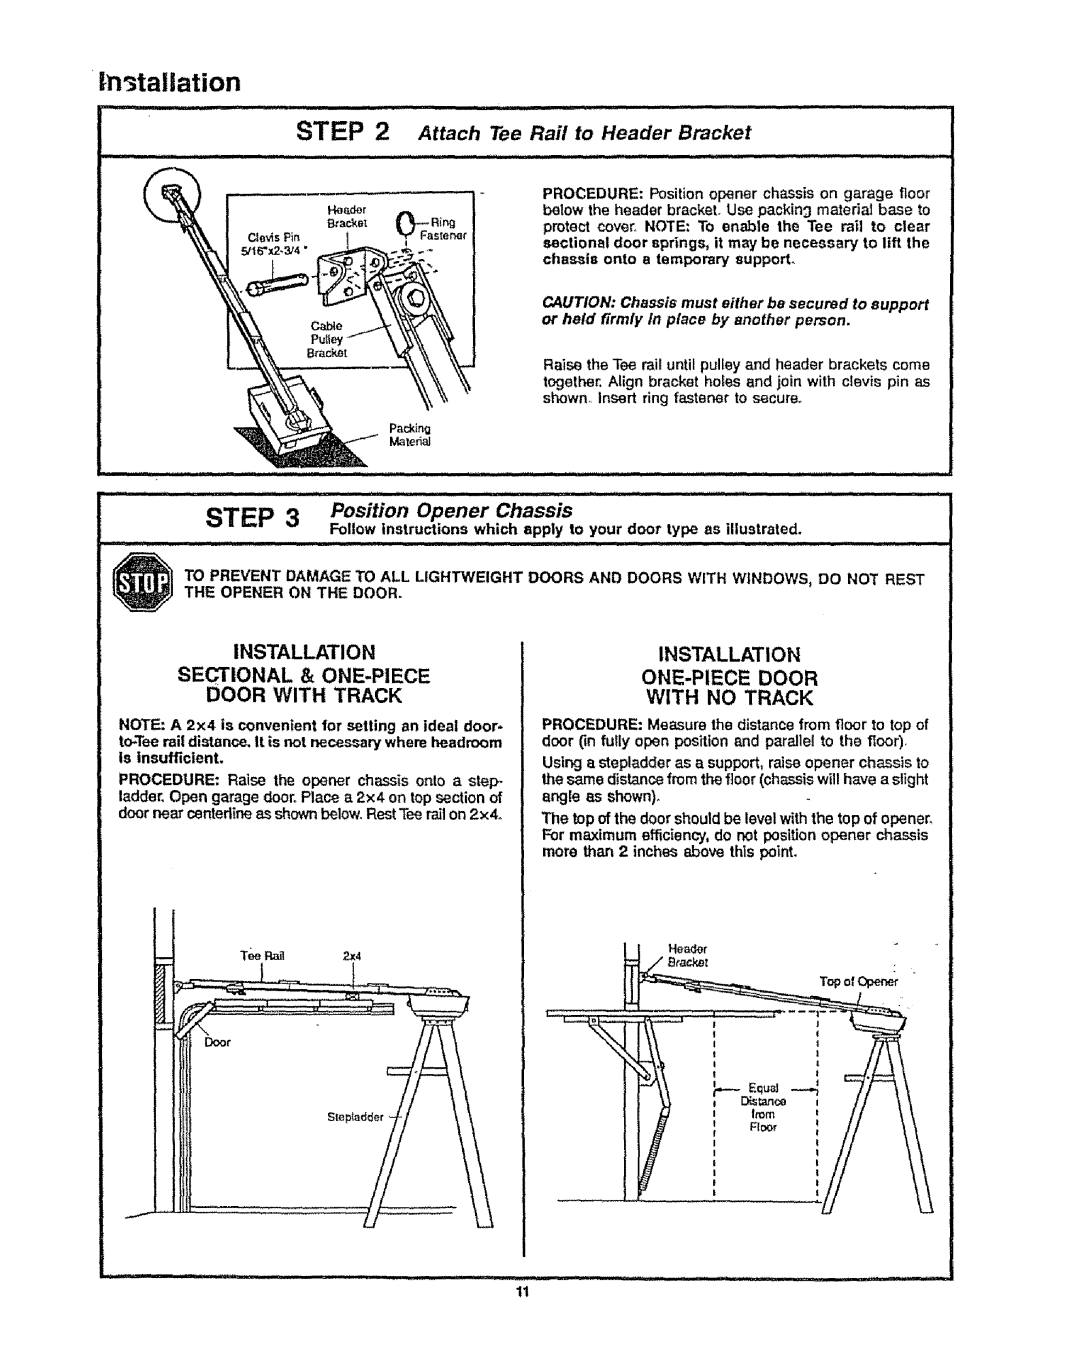
Installation of the Craftsman garage door openers is straightforward, thanks to detailed instructions and comprehensive support from the manufacturer. Many users appreciate the step-by-step guidance, making DIY installation manageable for those with basic tools and skills.
In summary, the Craftsman 139.53699SR, 139.53315SR, and 139.53625SR garage door openers are exemplary models that merge technology with functionality. They offer robust performance, enhanced security features, quiet operation, and user-friendly controls, catering to the needs of modern homeowners. Whether for new installations or upgrades, these garage door openers represent a solid choice for reliable home access solutions.