OPERATING THE BENCH GRINDER
USING THE WHEEL DRESSER (Fig. J)
The Bench Grinder is designed for hand held grinding, sharpening, and cleaning operations.
ALWAYS WEAR EYE PROTECTION! Hot sparks are produced during grinding operations.
1. | The Power Switch must be in the “OFF” position. |
2. | Stand to the side of the Bench Grinder and plug in |
| the power cord to the correct power source. |
3. | Remain to the side of the Bench Grinder and turn it |
| “ON” by moving the power switch to the up position. |
4. | Allow the grinding wheels to come up to a steady |
| speed for at least one minute. |
5. | The Flexible Work Light may be turned “ON” if |
| desired. |
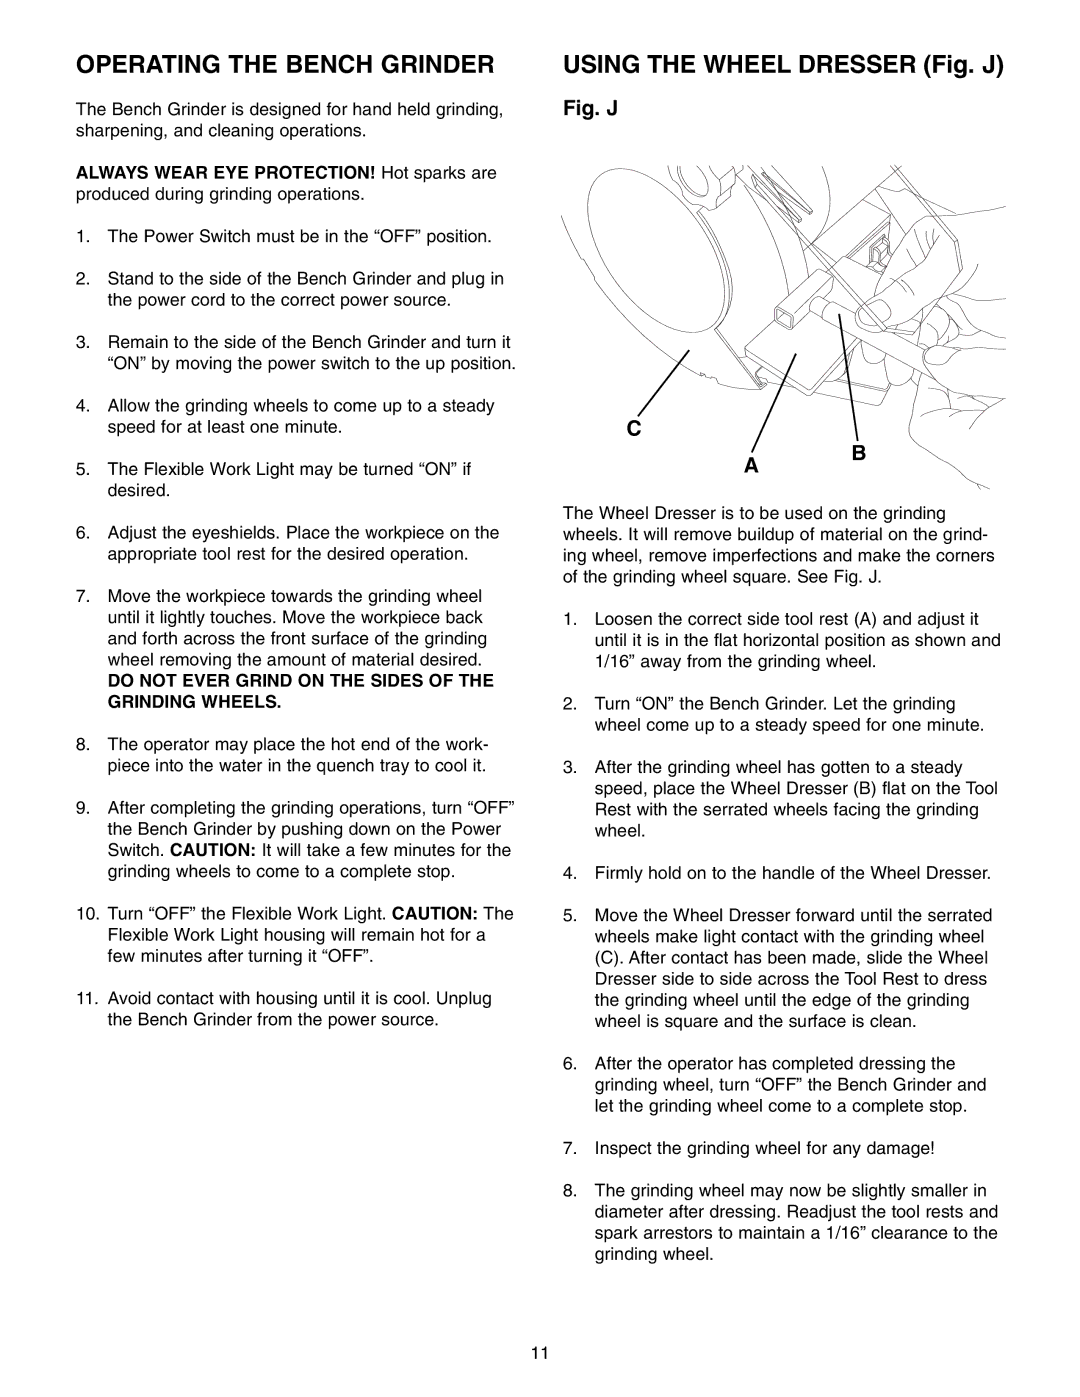
Fig. J
C
A
B
6. | Adjust the eyeshields. Place the workpiece on the |
| appropriate tool rest for the desired operation. |
7. | Move the workpiece towards the grinding wheel |
| until it lightly touches. Move the workpiece back |
| and forth across the front surface of the grinding |
| wheel removing the amount of material desired. |
| DO NOT EVER GRIND ON THE SIDES OF THE |
| GRINDING WHEELS. |
8. | The operator may place the hot end of the work- |
| piece into the water in the quench tray to cool it. |
9. | After completing the grinding operations, turn “OFF” |
| the Bench Grinder by pushing down on the Power |
| Switch. CAUTION: It will take a few minutes for the |
| grinding wheels to come to a complete stop. |
10. | Turn “OFF” the Flexible Work Light. CAUTION: The |
| Flexible Work Light housing will remain hot for a |
| few minutes after turning it “OFF”. |
11. | Avoid contact with housing until it is cool. Unplug |
| the Bench Grinder from the power source. |
The Wheel Dresser is to be used on the grinding wheels. It will remove buildup of material on the grind- ing wheel, remove imperfections and make the corners of the grinding wheel square. See Fig. J.
1.Loosen the correct side tool rest (A) and adjust it until it is in the flat horizontal position as shown and 1/16” away from the grinding wheel.
2.Turn “ON” the Bench Grinder. Let the grinding wheel come up to a steady speed for one minute.
3.After the grinding wheel has gotten to a steady speed, place the Wheel Dresser (B) flat on the Tool Rest with the serrated wheels facing the grinding wheel.
4.Firmly hold on to the handle of the Wheel Dresser.
5.Move the Wheel Dresser forward until the serrated wheels make light contact with the grinding wheel
(C). After contact has been made, slide the Wheel Dresser side to side across the Tool Rest to dress the grinding wheel until the edge of the grinding wheel is square and the surface is clean.
6.After the operator has completed dressing the grinding wheel, turn “OFF” the Bench Grinder and let the grinding wheel come to a complete stop.
7.Inspect the grinding wheel for any damage!
8.The grinding wheel may now be slightly smaller in diameter after dressing. Readjust the tool rests and spark arrestors to maintain a 1/16” clearance to the grinding wheel.
11