ASSEMBLY
ATTACHING THE HOSE ASSEMBLY
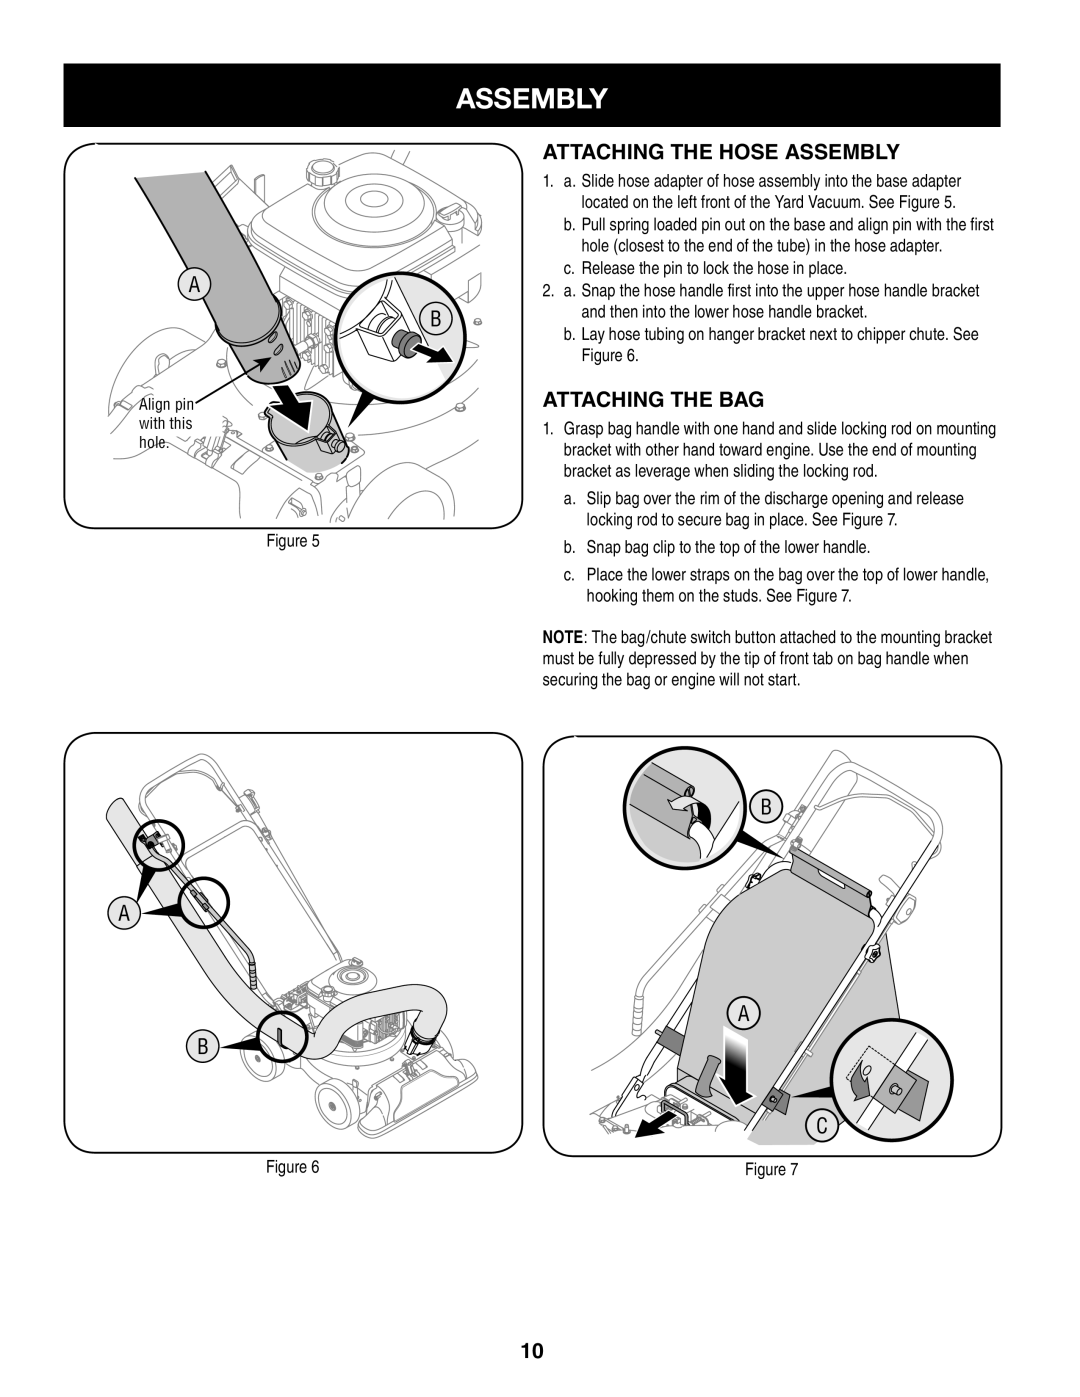
| 1. | a. Slide hose adapter of hose assembly into the base adapter | |
|
| located on the left front of the Yard Vacuum. See Figure 5. | |
|
| b. Pull spring loaded pin out on the base and align pin with the first | |
|
| hole (closest to the end of the tube) in the hose adapter. | |
A |
| c. Release the pin to lock the hose in place. | |
2. | a. Snap the hose handle first into the upper hose handle bracket | ||
| B | and then into the lower hose handle bracket. | |
| b. Lay hose tubing on hanger bracket next to chipper chute. See | ||
|
| ||
|
| Figure 6. | |
Align pin | ATTACHING THE BAG | ||
with this | 1. | Grasp bag handle with one hand and slide locking rod on mounting | |
hole. | |||
| bracket with other hand toward engine. Use the end of mounting | ||
|
| ||
| bracket as leverage when sliding the locking rod. | |
| a. | Slip bag over the rim of the discharge opening and release |
|
| locking rod to secure bag in place. See Figure 7. |
Figure 5 | b. Snap bag clip to the top of the lower handle. | |
| ||
| c. | Place the lower straps on the bag over the top of lower handle, |
|
| hooking them on the studs. See Figure 7. |
NOTE: The bag/chute switch button attached to the mounting bracket must be fully depressed by the tip of front tab on bag handle when securing the bag or engine will not start.
B
A
![]() A
A
B ![]()
C
Figure 6 | Figure 7 |
10