ASSEMBLY
ATTACHING THE BLOWER CHUTE
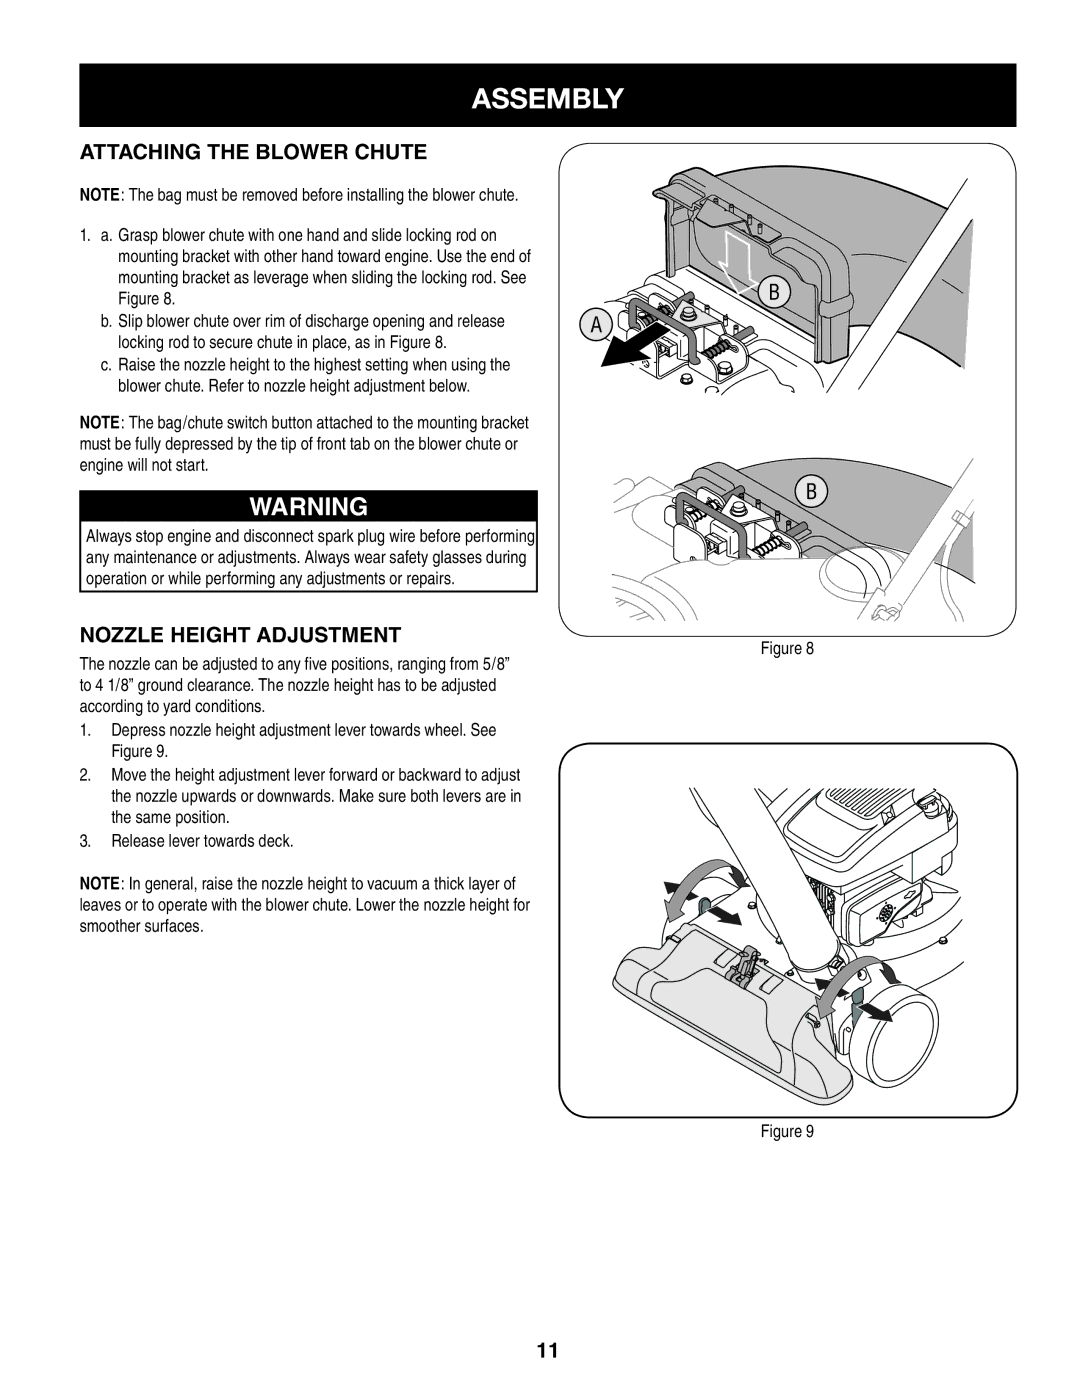
NOTE: The bag must be removed before installing the blower chute.
1.a. Grasp blower chute with one hand and slide locking rod on mounting bracket with other hand toward engine. Use the end of mounting bracket as leverage when sliding the locking rod. See Figure 8.
b.Slip blower chute over rim of discharge opening and release locking rod to secure chute in place, as in Figure 8.
c.Raise the nozzle height to the highest setting when using the blower chute. Refer to nozzle height adjustment below.
NOTE: The bag/chute switch button attached to the mounting bracket must be fully depressed by the tip of front tab on the blower chute or engine will not start.
A
![]() B
B
![]() WARNING
WARNING
Always stop engine and disconnect spark plug wire before performing any maintenance or adjustments. Always wear safety glasses during operation or while performing any adjustments or repairs.
NOZZLE HEIGHT ADJUSTMENT
The nozzle can be adjusted to any five positions, ranging from 5/8” to 4 1/8” ground clearance. The nozzle height has to be adjusted according to yard conditions.
1.Depress nozzle height adjustment lever towards wheel. See Figure 9.
2.Move the height adjustment lever forward or backward to adjust the nozzle upwards or downwards. Make sure both levers are in the same position.
3.Release lever towards deck.
NOTE: In general, raise the nozzle height to vacuum a thick layer of leaves or to operate with the blower chute. Lower the nozzle height for smoother surfaces.
B
Figure 8
Figure 9
11