ASSEMBLY
TO REMOVE BLADE
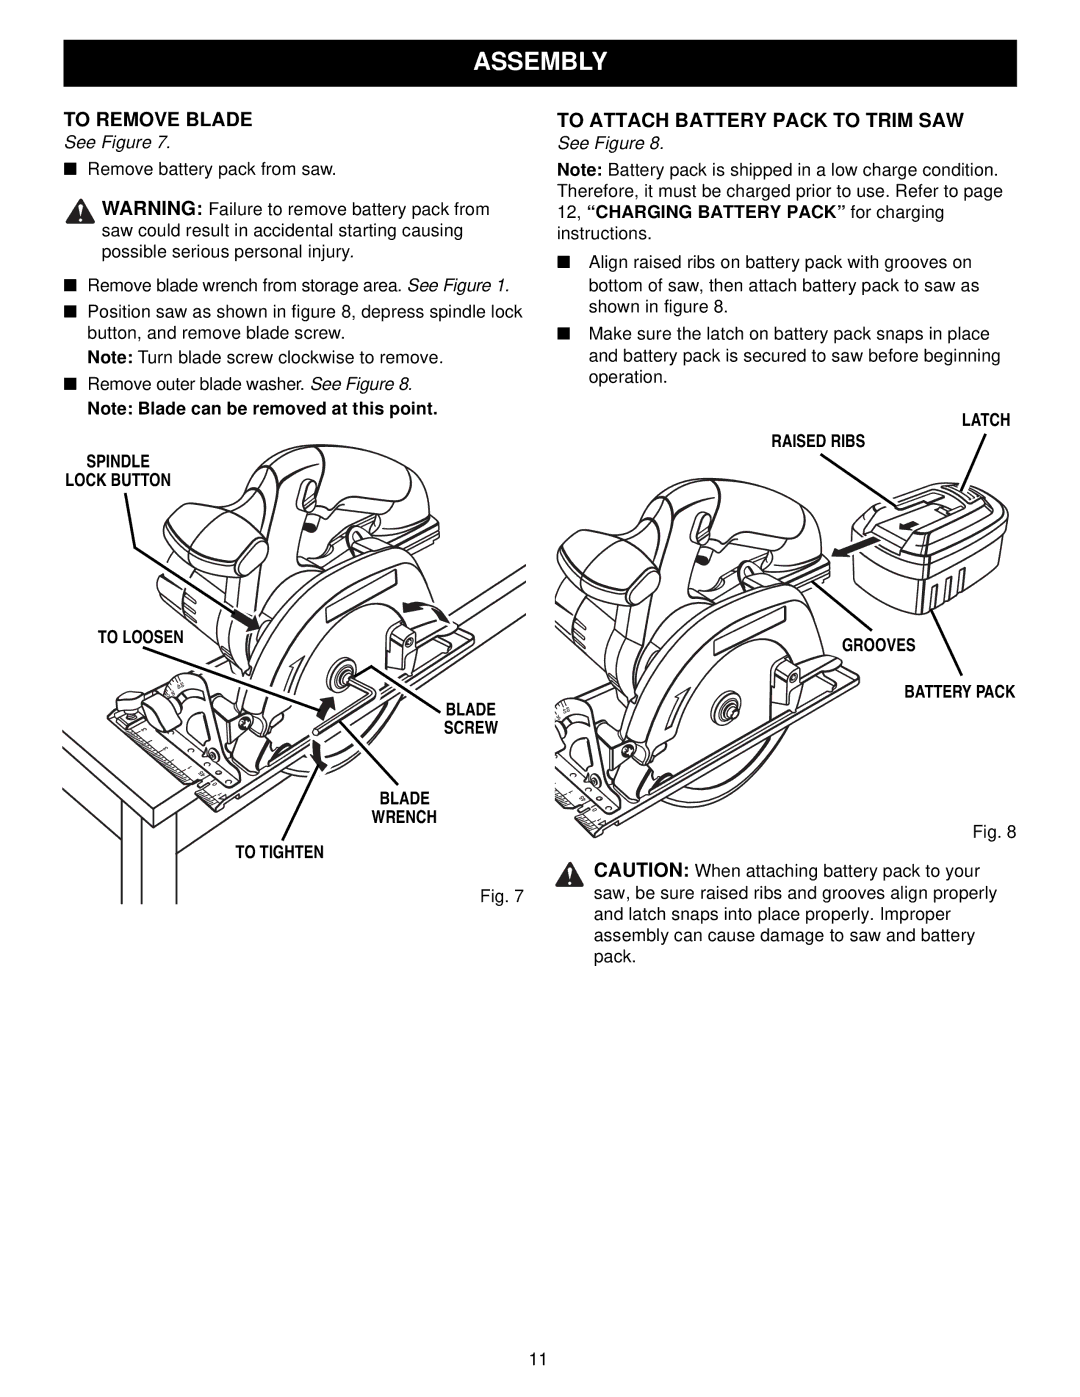
See Figure 7.
■Remove battery pack from saw.
![]() WARNING: Failure to remove battery pack from saw could result in accidental starting causing possible serious personal injury.
WARNING: Failure to remove battery pack from saw could result in accidental starting causing possible serious personal injury.
■Remove blade wrench from storage area. See Figure 1.
■Position saw as shown in figure 8, depress spindle lock button, and remove blade screw.
Note: Turn blade screw clockwise to remove.
■Remove outer blade washer. See Figure 8.
Note: Blade can be removed at this point.
SPINDLE
LOCK BUTTON
TO LOOSEN
50 45
30
2
| BLADE |
3 | SCREW |
3![]()
1
45 |
|
0 | BLADE |
1 |
WRENCH
TO TIGHTEN
Fig. 7
TO ATTACH BATTERY PACK TO TRIM SAW
See Figure 8.
Note: Battery pack is shipped in a low charge condition. Therefore, it must be charged prior to use. Refer to page 12, “CHARGING BATTERY PACK” for charging instructions.
■Align raised ribs on battery pack with grooves on bottom of saw, then attach battery pack to saw as shown in figure 8.
■Make sure the latch on battery pack snaps in place and battery pack is secured to saw before beginning operation.
LATCH
RAISED RIBS
GROOVES
BATTERY PACK
50 45
30 2
1
45 ![]()
![]() 0
0 ![]()
1
Fig. 8
CAUTION: When attaching battery pack to your saw, be sure raised ribs and grooves align properly and latch snaps into place properly. Improper assembly can cause damage to saw and battery pack.
11