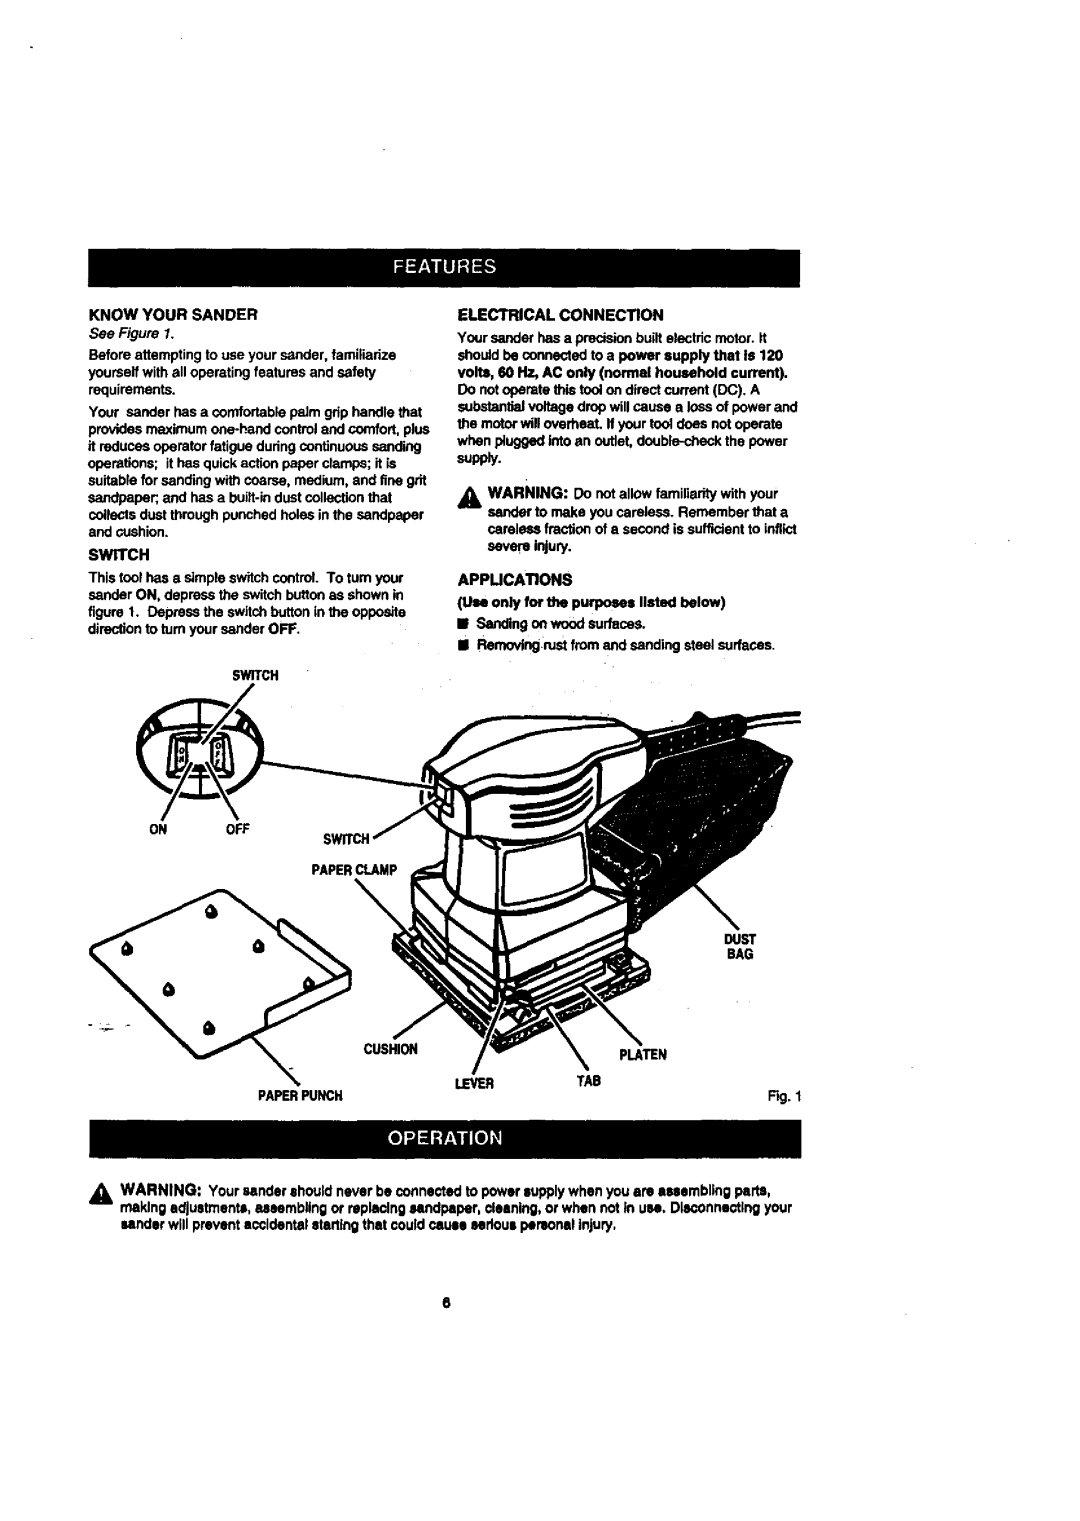
KNOWYOURSANDER
See Figure 1.
Before attempting to use your sander, familiarize yourseit with all operating features and safely
requirements.
Your sander has a comfortable paJmgdp handle that provides maximum
collects dust through punched holes in the sandpaper and oushion.
SWITCH
This tool has a simple switch control. To tum your sander ON, depress the switch button as shown in figure 1. Depress the switch button in the opposite direction to turn your sander OFF.
SWITCH
ELECTRICAL CONNECTION
Your sander has a precision built electric motor. It should be connected to a power supply that ts 120 volts, 60 Hz, AC only (normal household current). De not operate this tool on direct current (DC). A substantial voltage drop will cause a Ioes of power and the motor will overheat. If your tool does not operate when plugged into an outlet,
supply.
AWARNING: Do not allow familiarity with your sander to make you careless. Remember that a careless fraction of a second is sufficient to inflict severe injury.
APPUCATIONS
(Use only for the purposes listed below) El Sandingon woodsurfaces.
•Removingrestfromand sanding steel surfaces.
ON OFF
SWITCH
PAPERCLAMP
DUST
BAG
CUSHION |
|
LEVER | TAB |
PAPERPUNCH | Fig. 1 |
_k WARNING: Yoursander should neverbe connectedto powersupply whenyou am assembling peha, makingadjustments, assemblingor raplanlng_ndpeper, cleaning,or whennot In usa. Disconnectingyour
sander will preventaccidentalstarting that couldcausesedous personalinjury,
8
