INSTALUNG SANDPAPER
See F_Jres E end 3,
The cushion on your sander gives you the option of using either
pressure sensitive adhesive backing that sticks to the cushion,
INSTALUNG NON-ADHESIVE SANDPAPER
See Figure2.
Inspectsandpaper beforeinstallingDo. not use if brokenor defective.
•Unplug yoursender.
WARNING: Failure to unplug your sander could resuR in accidental starting causing possible serious personal injury.
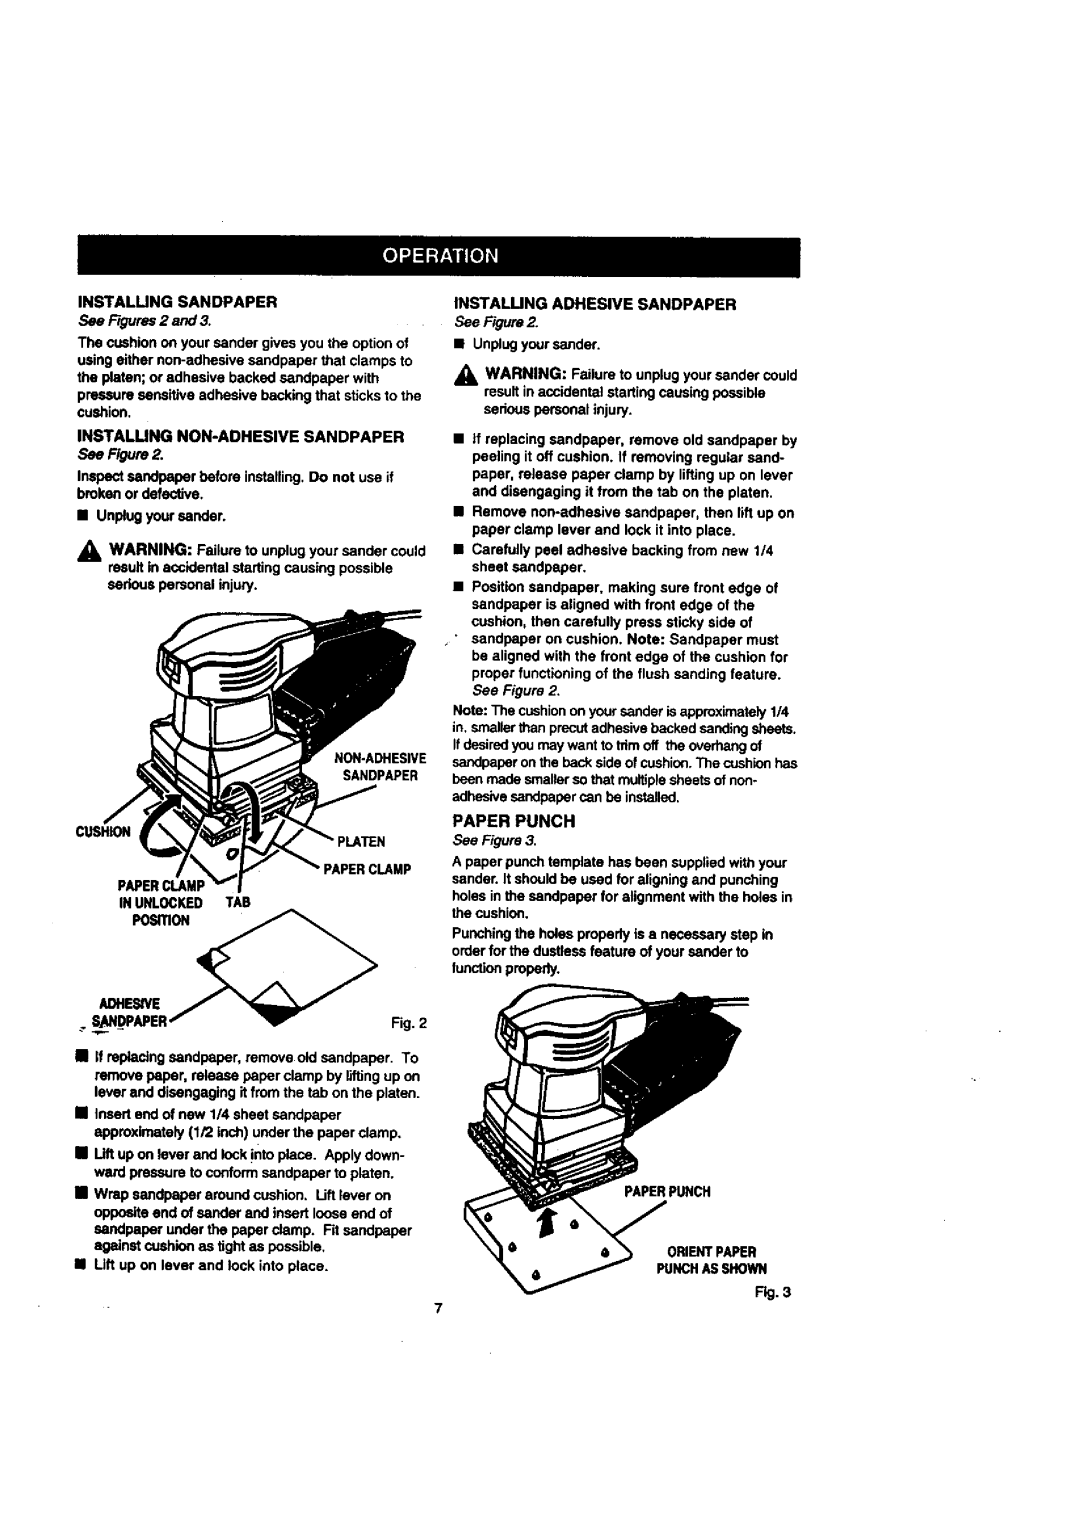
SANDPAPER
CUSHION
PAPERCLAMP
PAPER CLAMP
IN UNLOCKED TAB
POSITION _
INSTALUNG ADHESIVE SANDPAPER
See Figure 2.
•Unplug your sender.
_, WARNING: Failure to unplug your sender could result in accidental starting causing possible serious personal injury.
•if replacing sandpaper, remove old sandpaper by peeling it off cushion. If removing regular send- paper, release paper clamp by lifting up on lever and disengaging it from the tab on the platen.
•Remove
•Carefully peel adhesive backing from new 1/4 sheet sandpaper.
•Position sandpaper, making sure front edge of sandpaper is aligned with front edge of the
cushion, then carefully press sticky side of
"sandpaper on cushion. Note: Sandpaper must be aligned with the front edge of the cushion for proper functioning of the flush sanding feature.
See Figure 2.
Note: The cushion on your sander is approximately 1/4 in, smaller than precut adhesive backed sanding sheets. Ifdesired you may want to trim off the overhang of sandpaper on the back side of cushion. The cushion has been made smaller so that multiple sheets of non. adhesive sandpeper san he installed,
PAPER PUNCH
See Figure 3.
A paper punch template has been supplied with your sander. It should be used for aligning and punching
holes in the sandpaper for alignment with the hales in the cushion.
Punching the holes properly is a necessary step in order for the dustless feature of your sender to function properly.
.. SL.AN_DPAPER"" | _ | Fig. 2 |
•If replacing sandpaper, remove old sandpaper. To remove paper, release paper clamp by lifting up on lever and disengaging it from the tab on the platen.
•Insert end of new 114 sheet sandpaper approximately (1/2 inch) under the paper clamp.
•Lift up on lever and lock !nto place. Apply down- ward pressure to conform sandpaper to platen.
•Wrap sandpaper around cushion, Uft lever on opposite and of sander and insert loose end of sandpaper under the paper clamp. Fit sandpaper against cushion as tight as possible,
•Lift up on lever and lock into place.
PAPERPUNCH
ORIENTPAPER
PUNCHASSHOWN
Fig. 3
7