Single port KVM over IP switch
1. The quick installation guide
Installation
IP-KVM switch redirects local keyboard, mouse and video data to a remote administration console. All data is transmitted via IP. IP-KVM switch can be used in a multi administrator and multi server environment as well. Besides this, IP-KVM switch is a KVM switch, which can also be used with a local console.
IP-KVM switch hardware installation
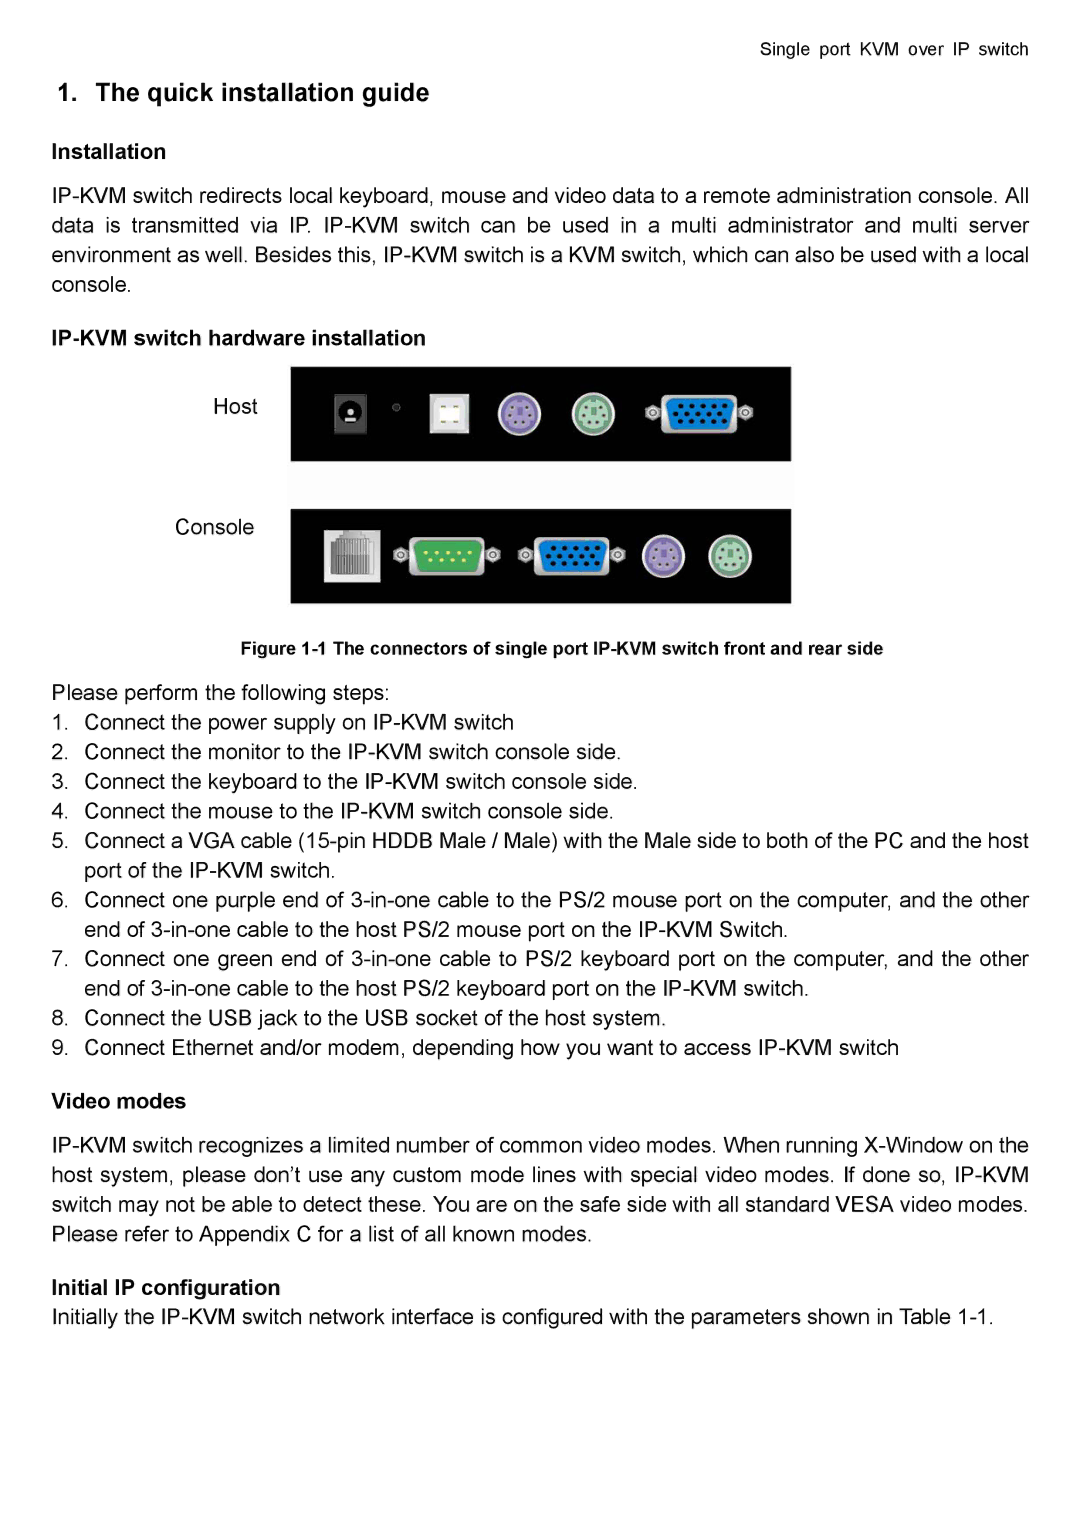
Host
Console
Figure 1-1 The connectors of single port IP-KVM switch front and rear side
Please perform the following steps:
1.Connect the power supply on IP-KVM switch
2.Connect the monitor to the IP-KVM switch console side.
3.Connect the keyboard to the IP-KVM switch console side.
4.Connect the mouse to the IP-KVM switch console side.
5.Connect a VGA cable (15-pin HDDB Male / Male) with the Male side to both of the PC and the host port of the IP-KVM switch.
6.Connect one purple end of 3-in-one cable to the PS/2 mouse port on the computer, and the other end of 3-in-one cable to the host PS/2 mouse port on the IP-KVM Switch.
7.Connect one green end of 3-in-one cable to PS/2 keyboard port on the computer, and the other end of 3-in-one cable to the host PS/2 keyboard port on the IP-KVM switch.
8.Connect the USB jack to the USB socket of the host system.
9.Connect Ethernet and/or modem, depending how you want to access IP-KVM switch
Video modes
IP-KVM switch recognizes a limited number of common video modes. When running X-Window on the host system, please don’t use any custom mode lines with special video modes. If done so, IP-KVM switch may not be able to detect these. You are on the safe side with all standard VESA video modes. Please refer to Appendix C for a list of all known modes.
Initial IP configuration
Initially the IP-KVM switch network interface is configured with the parameters shown in Table 1-1.