Single port KVM over IP switch
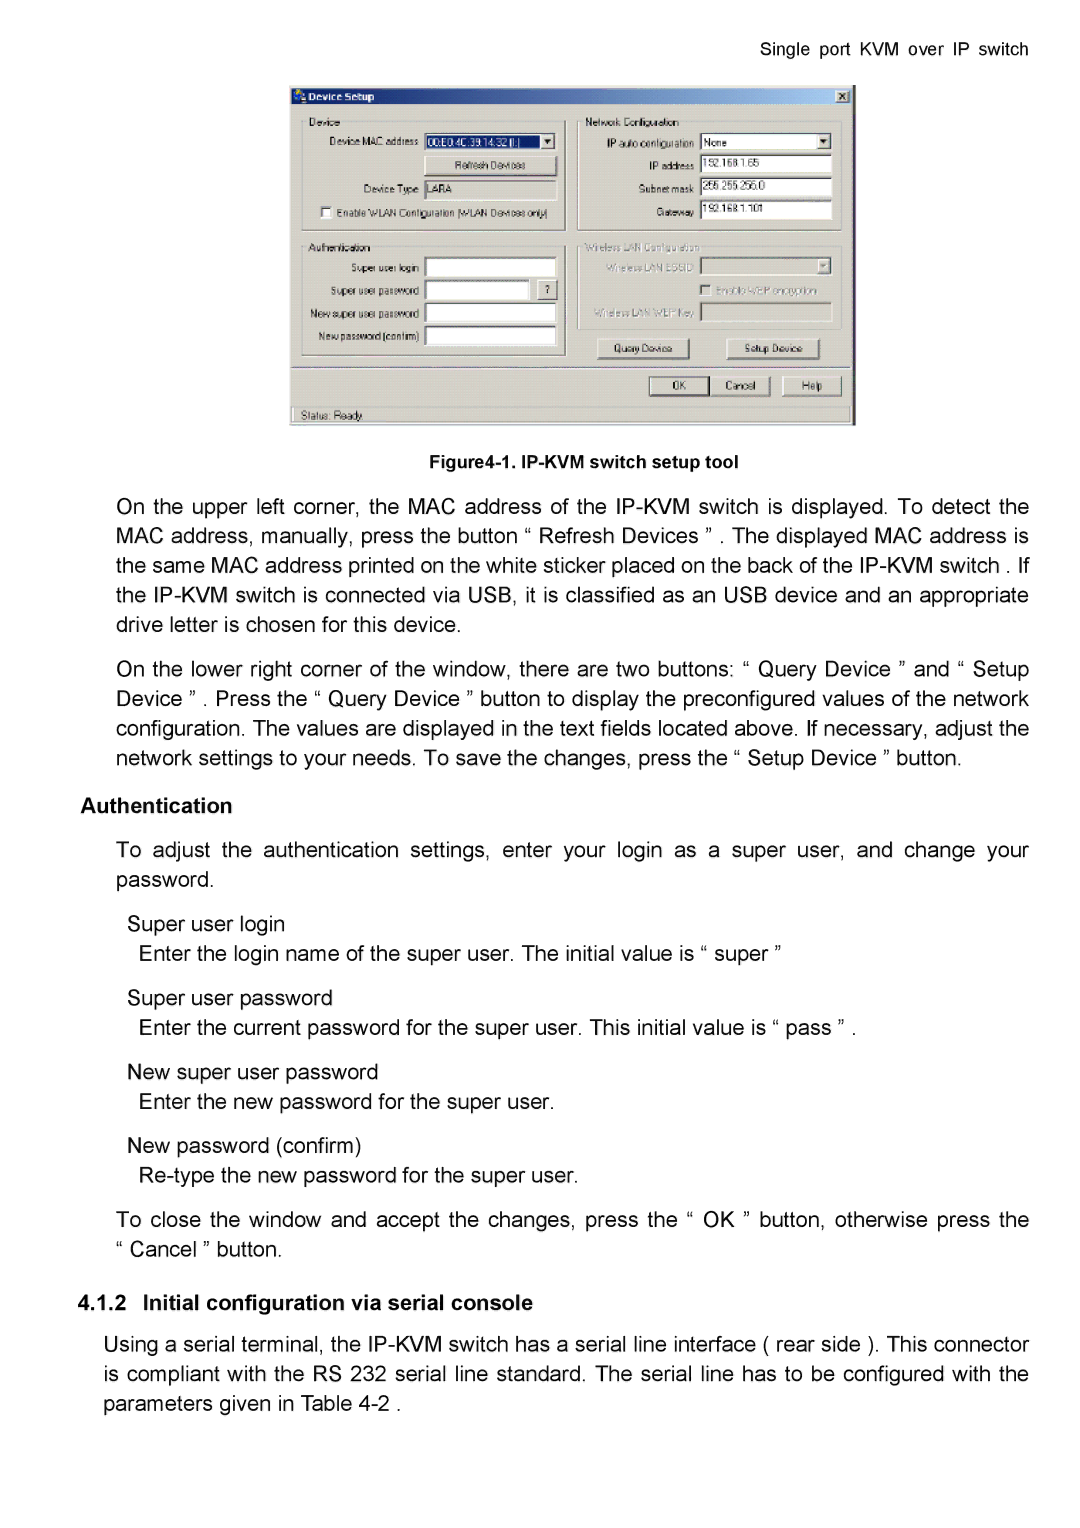
Figure4-1. IP-KVM switch setup tool
On the upper left corner, the MAC address of the
On the lower right corner of the window, there are two buttons: “ Query Device ” and “ Setup Device ” . Press the “ Query Device ” button to display the preconfigured values of the network configuration. The values are displayed in the text fields located above. If necessary, adjust the network settings to your needs. To save the changes, press the “ Setup Device ” button.
Authentication
To adjust the authentication settings, enter your login as a super user, and change your password.
Super user login
Enter the login name of the super user. The initial value is “ super ”
Super user password
Enter the current password for the super user. This initial value is “ pass ” .
New super user password
Enter the new password for the super user.
New password (confirm)
To close the window and accept the changes, press the “ OK ” button, otherwise press the “ Cancel ” button.
4.1.2 Initial configuration via serial console
Using a serial terminal, the