then tighten the
FIGURE 3
4.Once the handle is secured, the blower tube with - handle can be twisted and swiveled. Ensure that
the throttle cable does not become pinched or trapped when swiveling handle.
.5. Installthe extension tube (if desired) onto blower tube by aligningthe tab on the extension with the correspondingarea on blower tube; then push togetherand twist to secure.
6.Installthe curved nozzle tube in the same manner. Twist to secure.
KNOW YOUR BACKPACK AIR BLOWER
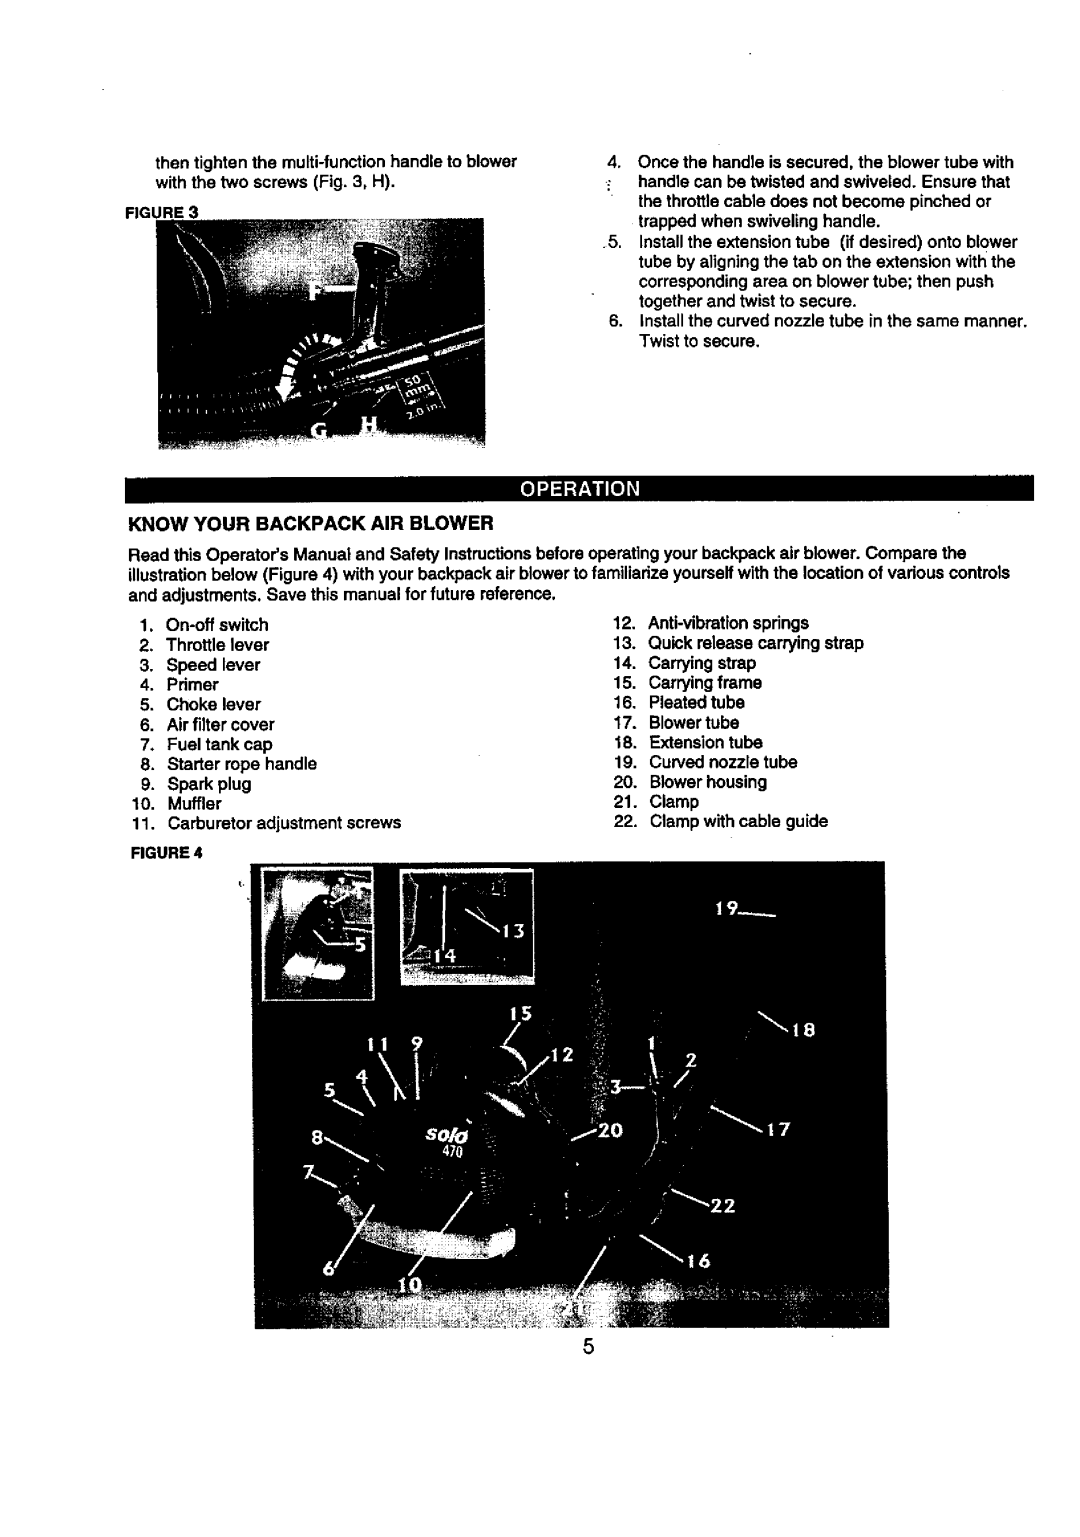
Read this Operator'sManual and Safety Instructionsbefore operatingyour backpack air blower. Compare the illustrationbelow (Figure 4) with your backpack air blower to familiarize yourselfwith the locationof various controls and adjustments. Save this manual for future reference.
1. | 12. | |||
2. | Throttle lever | 13. | Quick release carryingstrep | |
3. | Speed lever | 14. | Carryingstrap | |
4. | Pdmer | 15. | Carryingfreme | |
5. | Choke lever | 16. | Pleated tube | |
6. | Airfilter cover | 17. | Blower tube | |
7. | Fuel tank cap | 18. | Extensiontube | |
8. | Starter rope handle | 19. | Curved nozzletube | |
20. | Blowerhousing | |||
9. | Spark plug | |||
10. | Muffler | 21. | Clamp | |
11. | Carburetor adjustment screws | 22. | Clamp with cable guide |
FIGURE 4
5
