&CAUTION: The spike disks have sharp points. To avoid injury, use extra care
when handling the disks and when assembling the aerator.
TOOLS REQUIRED FOR ASSEMBLY
(2)I/2" open or boxed end wrench
(1)Hammer
Lay out and identify all garts and hardware as shown in
Carton Contents and Hardware Pack illustrations.
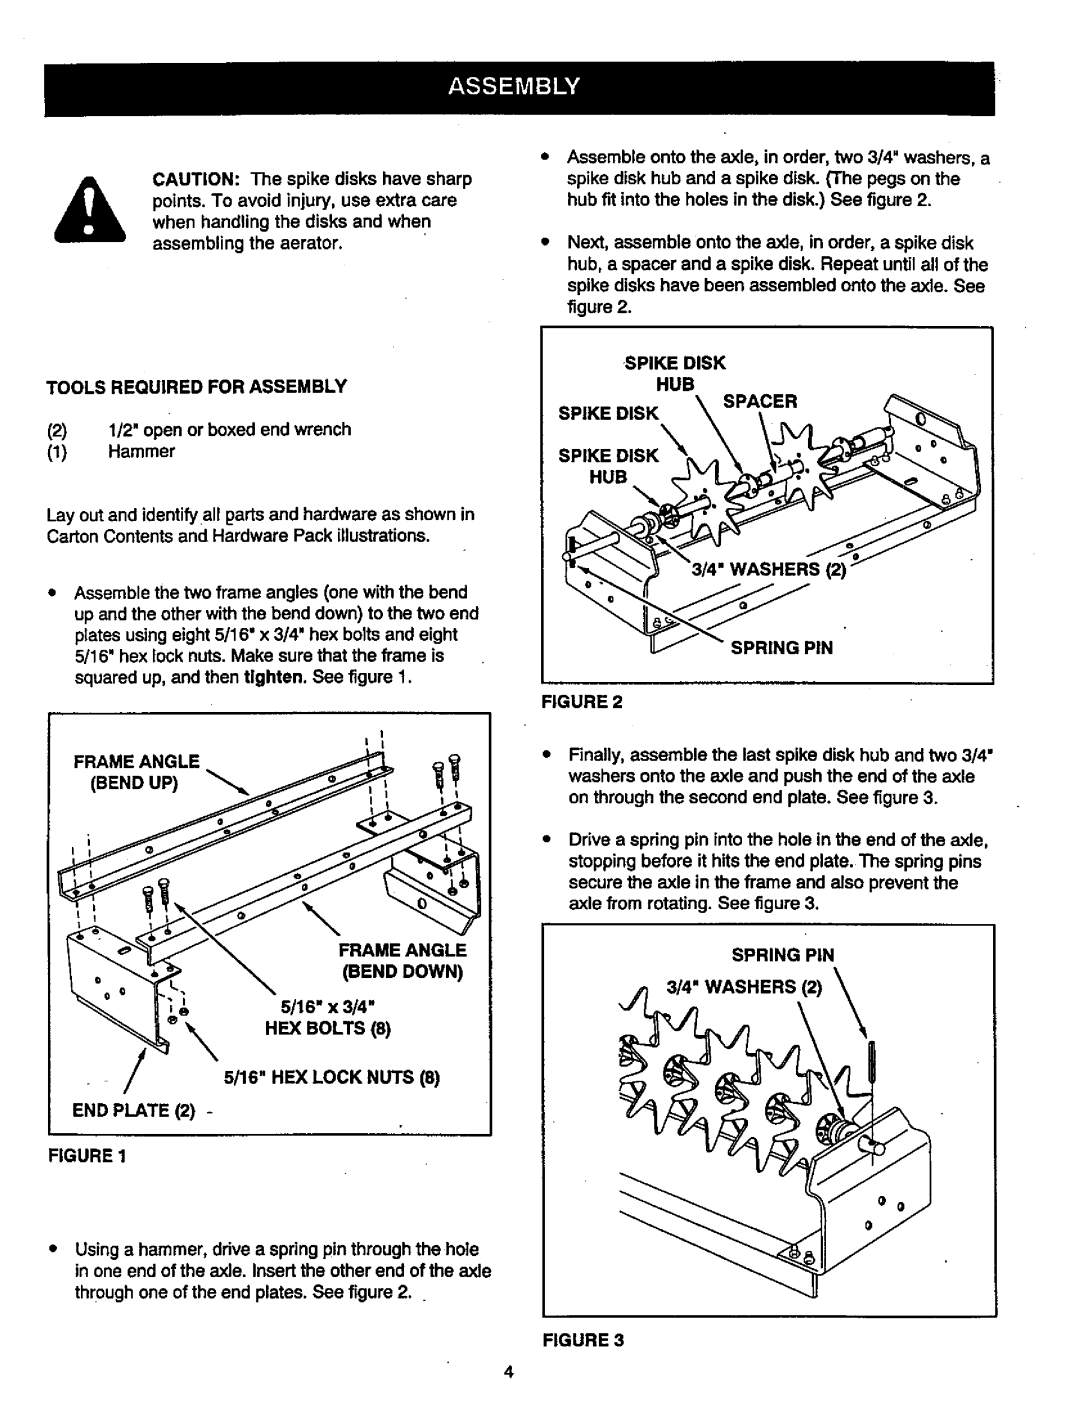
Assemble the two frame angles (one with the bend up and the other with the bend down) to the two end plates using eight 5/16" x 3/4" hex bolts and eight 5/16'hex lock nuts. Make sure that the frame is squared up, and then tighten. See figure 1.
I t I
FRAME ANGLE
(BEND UP) "_
FRAME ANGLE (BEND DOWN)
5/16" x 3/4" HEX BOLTS (8)
5/16" HEX LOCK NUTS (8)
END PLATE (2) -
FIGURE 1
Assemble onto the axle, in order, two 3/4" washers, a spike disk hub and a spike disk. (The pegs on the hub fit into the holes in the disk.) See figure 2.
Next, assemble onto the axle, in order, a spike disk hub, a spacer and a spike disk. Repeat until all of the spike disks have been assembled onto the axle. See figure 2.
SPIKE DISK
HUB
SPACER
SPIKE DISK
SPIKE DISK _
HUB
SPRING PIN
FIGURE 2
•Finally, assemble the last spike disk hub and two 3/4" washers onto the axle and push the end of the axle on through the second end plate. See figure 3.
•Drive a spring pin into the hole in the end of the axle, stopping before it hits the end plate. The spring pins secure the axle in the frame and also prevent the axle from rotating. See figure 3.
SPRING PIN
3/4" WASHERS (2)
•Using a hammer, drive a spring pin through the hole in one end of the axle. Insert the other end of the axle
through one of the end plates. See figure 2.
FIGURE 3
4