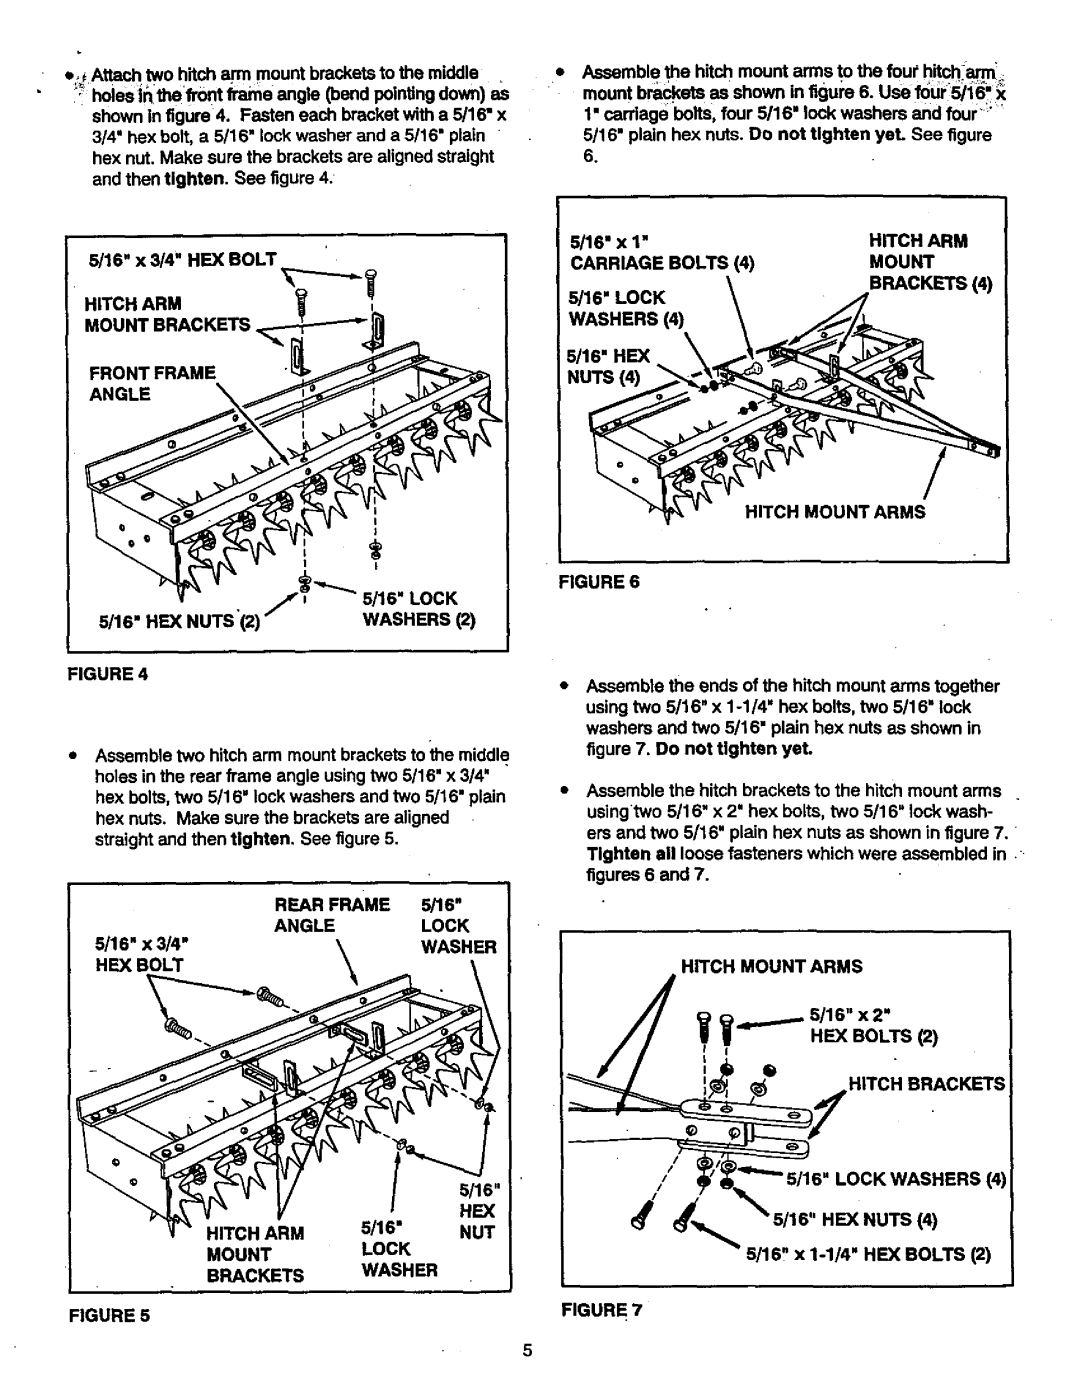
e_÷Attach two hitcharm mount brackets to the middle
_; holes ir_thefr0nt frame angle (bend pointing down) as shown in figure 4. Fasten each bracket with a 5/16" x 3/4" hex bolt, a 5/16" lock washer and a 5/16" plain hex nut. Make sure the brackets are aligned straight and then tighten. See figure 4.
6/16" x 3/4" HEX BOLT
HITCH ARM | _ |
MOUNT BRACKETS _
FRONTFRAME
ANGLE
FIGURE 4
•Assemble two hitch arm mount brackets to _e middle holes in the rear frame angle using two 5/16" x 3/4" hex bolts, two 5/16" lock washers and two 5/16" plain hex nuts. Make sure the brackets are aligned straight and then tighten. See figure 5.
| REAR FRAME | 5/'16" |
| ANGLE | LOCK |
5/16" x 3/4" | \ | WASHER |
HEX BOLT | \ |
|
|
|
•Assemble the hitch mount arms to the foul hitch arm_
mount brackets as shown in figura 6. Use f0_5/16! _ 1" carriage bolts, four 5/16" lock washers and four "; '
5/16" plain hex nuts. Do not tighten yeL See figure 6.
5/16" x 1" |
| HITCH ARM |
CARRIAGE | BOLTS (4) | MOUNT |
5/16" LOCK |
| BRACKETS (4) |
|
| |
WASHERS | (4) |
|
5/16" HEX |
|
|
NUTS(4) |
|
|
HITCH MOUNT ARMS
FIGURE6
Assemble the ends of the hitch mount arms together using two 5/16" x
Assemble the hitch brackets to the hitch mount arms usingtwo 5/16" x 2" hex bolts, two 5/16" lock wash- ers and two 5/16" plain hex nuts as shown in figure 7.
Tighten ell loose fasteners which were assembled in figures 6 and 7.
HITCH MOUNT ARMS
i!
.___)_5/16" x2"
|
| 5/16" | /' | LOCKWASHERS(4) |
| 5/16" | HEX | _1(_ | 5/16" HEX NUTS (4) |
HITCH ARM | NUT |
MOUNT | LOCK | 5/16" x | ||
WASHER | ||||
BRACKETS |
|
| ||
|
|
| ||
FIGURE 5 |
| FIGURE 7 |
| |
|
|
|