TOOLS | REQUIRED FOR ASSEMBLY | STEP 2: (SEE FIGURE 2) | |||
|
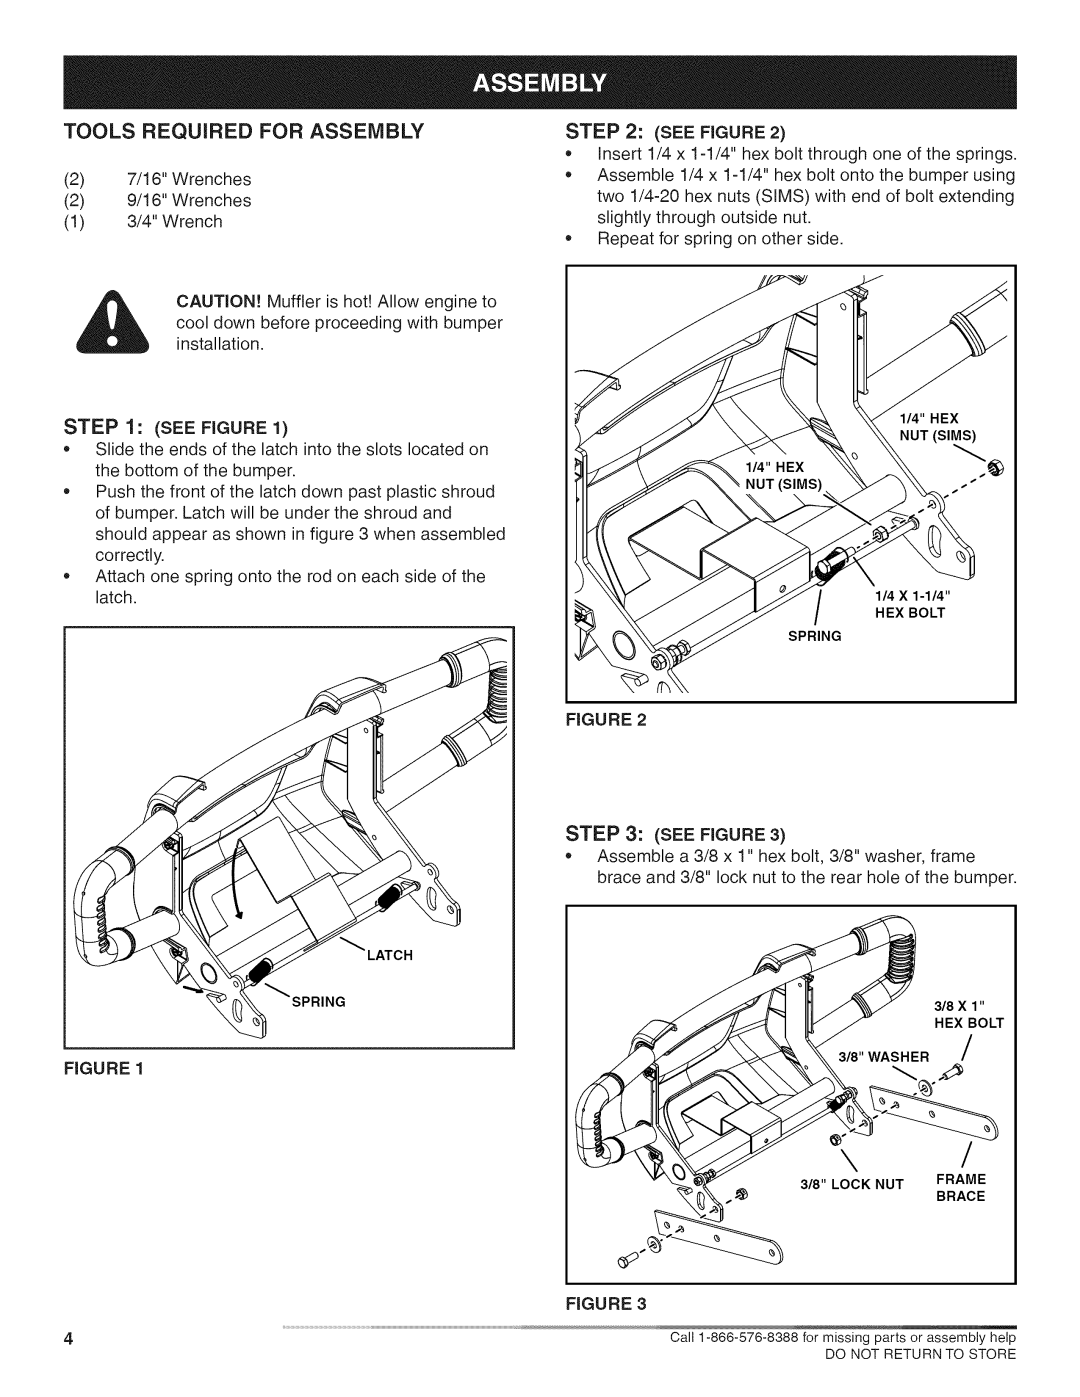
| * | insert 1/4 x | bolt through one of the springs. | |
(2) | 7/16" Wrenches | * | Assemble | 1/4 x | hex bolt onto the bumper using |
(2) | 9/16" Wrenches |
| two | hex nuts (SIMS) with end of bolt extending | |
(1) | 3/4" Wrench |
| slightly through outside | nut. | |
|
| * | Repeat for spring on other side. | ||
CAUTION! Muffler is hot! Allow engine to cool down before proceeding with bumper installation.
STEP 1: (SEE FIGURE 1)
•Slide the ends of the latch into the slots located on the bottom of the bumper.
Push the front of the latch down past plastic shroud of bumper. Latch will be under the shroud and should appear as shown in figure 3 when assembled correctly'.
Attach one spring onto the rod on each side of the latch.
1/4" HEX NUT (SIMS)
114 X
HEX BOLT
SPRING
FIGURE 2
STEP 3: (SEE FIGURE 3)
Assemble a 3/8 x 1" hex bolt, 3/8" washer, frame brace and 3/8" lock nut to the rear hole of the bumper.
LATCH
_SPRING
318 X 1"
HEX BOLT
318" WASHER /
FIGURE 1
\ /
318" LOCK NUT FRAME
BRACE
FIGURE | 3 |
4 | Call |
| DO NOT RETURN TO STORE |
