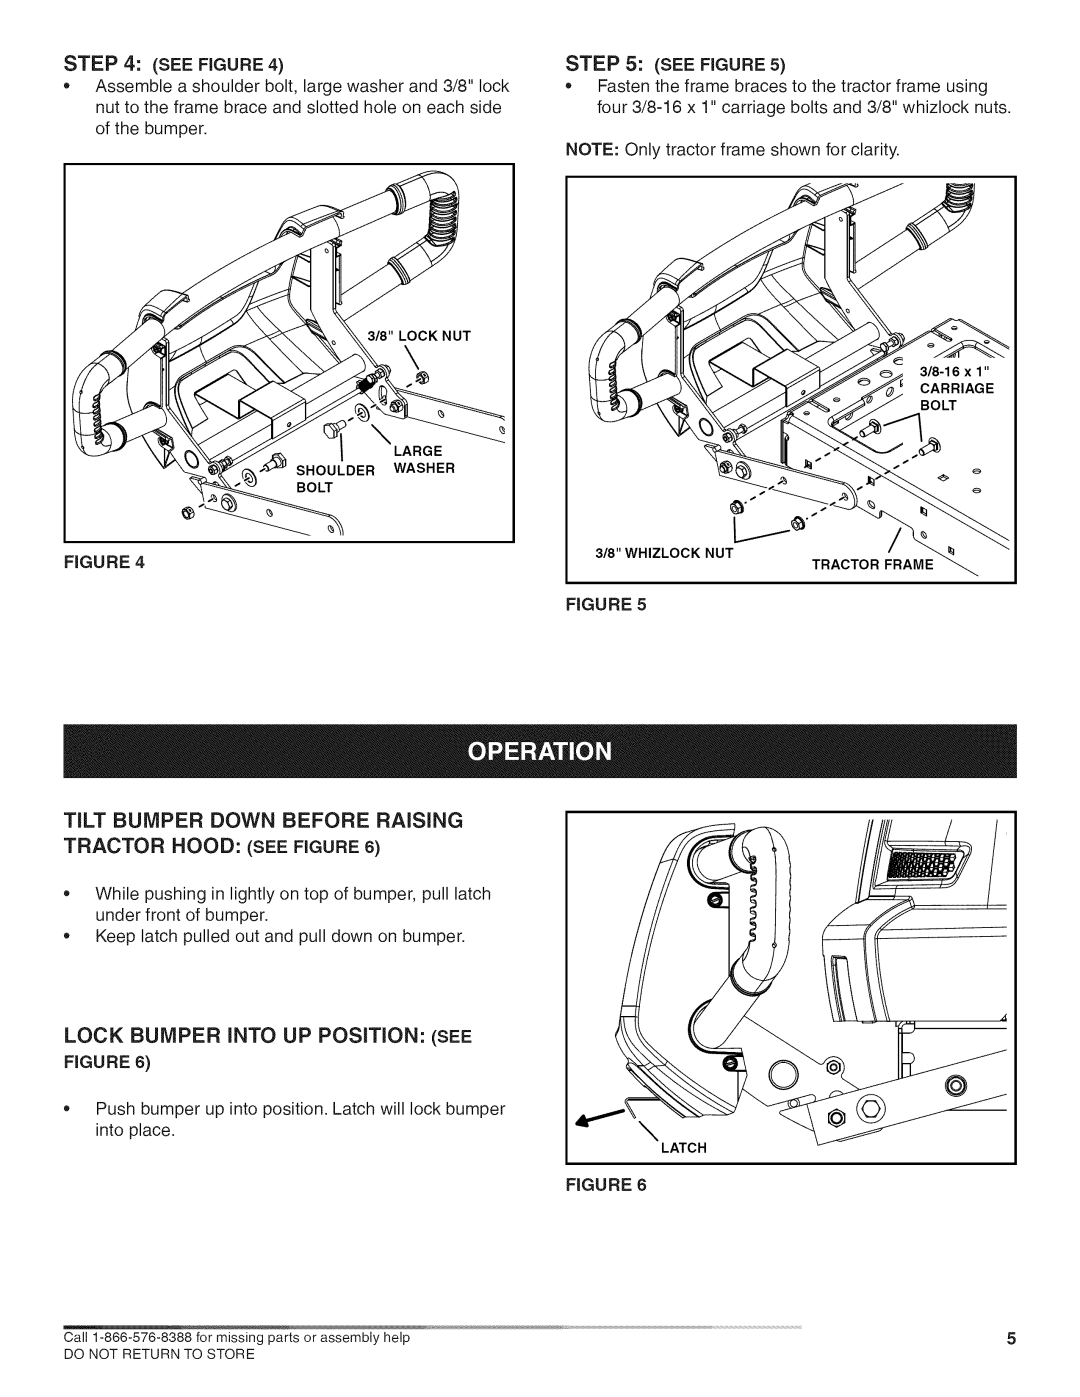
STEP 4: (SEE FIGURE 4)
*Assemble a shoulder bolt, large washer and 3/8" lock nut to the frame brace and slotted hole on each side
of the bumper.
STEP 5: (SEE FIGURE 5)
*Fasten the frame braces to the tractor frame using four
NOTE: Only tractor frame shown for clarity.
3/8" LOCK NUT
| \ |
| |
| CARRIAGE |
| BOLT |
| \ |
| LARGE |
"_ SHOULDER | WASHER |
BOLT | s |
|
LJ | / |
3/8" WHIZLOCK NUT | ._ |
FIGURE 4 | TRACTOR FRAME |
FIGURE 5
TiLT BUMPER DOWN BEFORE RAiSiNG
TRACTOR HOOD: (SEE FIGURE 6)
*While pushing in lightly on top of bumper, pull latch under front of bumper.
*Keep latch pulled out and pull down on bumper.
LOCK BUMPER iNTO UP POSiTiON: (SEE
FIGURE 6)
*Push bumper up into position. Latch will lock bumper into place.
©
\
LATCH
FIGURE 6
Call | 5 |
DO NOT RETURN TO STORE |
|
