CAUTION: DO NOT ASSEMBLE WITH
POWER RAKE PLUGGED iNTO A
POWER SOURCE
STEP 1 : (SEE FIGURE 1)
eTurn the Power Rake housing upside down.
eFasten the end of the lower handle tube with air intake holes to the side of the Power Rake housing with the large hole. Use the right handle bracket (H), hex bolt (A), right handle clamp (J) and wing knob
(D). Align the pin in the bracket with the slot in the housing and tighten the wing knob.
AIR INTAKE HOLES
SLOT
LARGE HOLE
FIGURE 1
STEP 2: (SEE FIGURE 2)
•Fasten the lower handle tube to the left side of the Power Rake housing. Use the left handle bracket (I), carriage bolt (B), left handle clamp (G) and wing knob
(D). Align the pin in the bracket with the slot in the housing and tighten the wing knob
SLOT
I
FIGURE 2
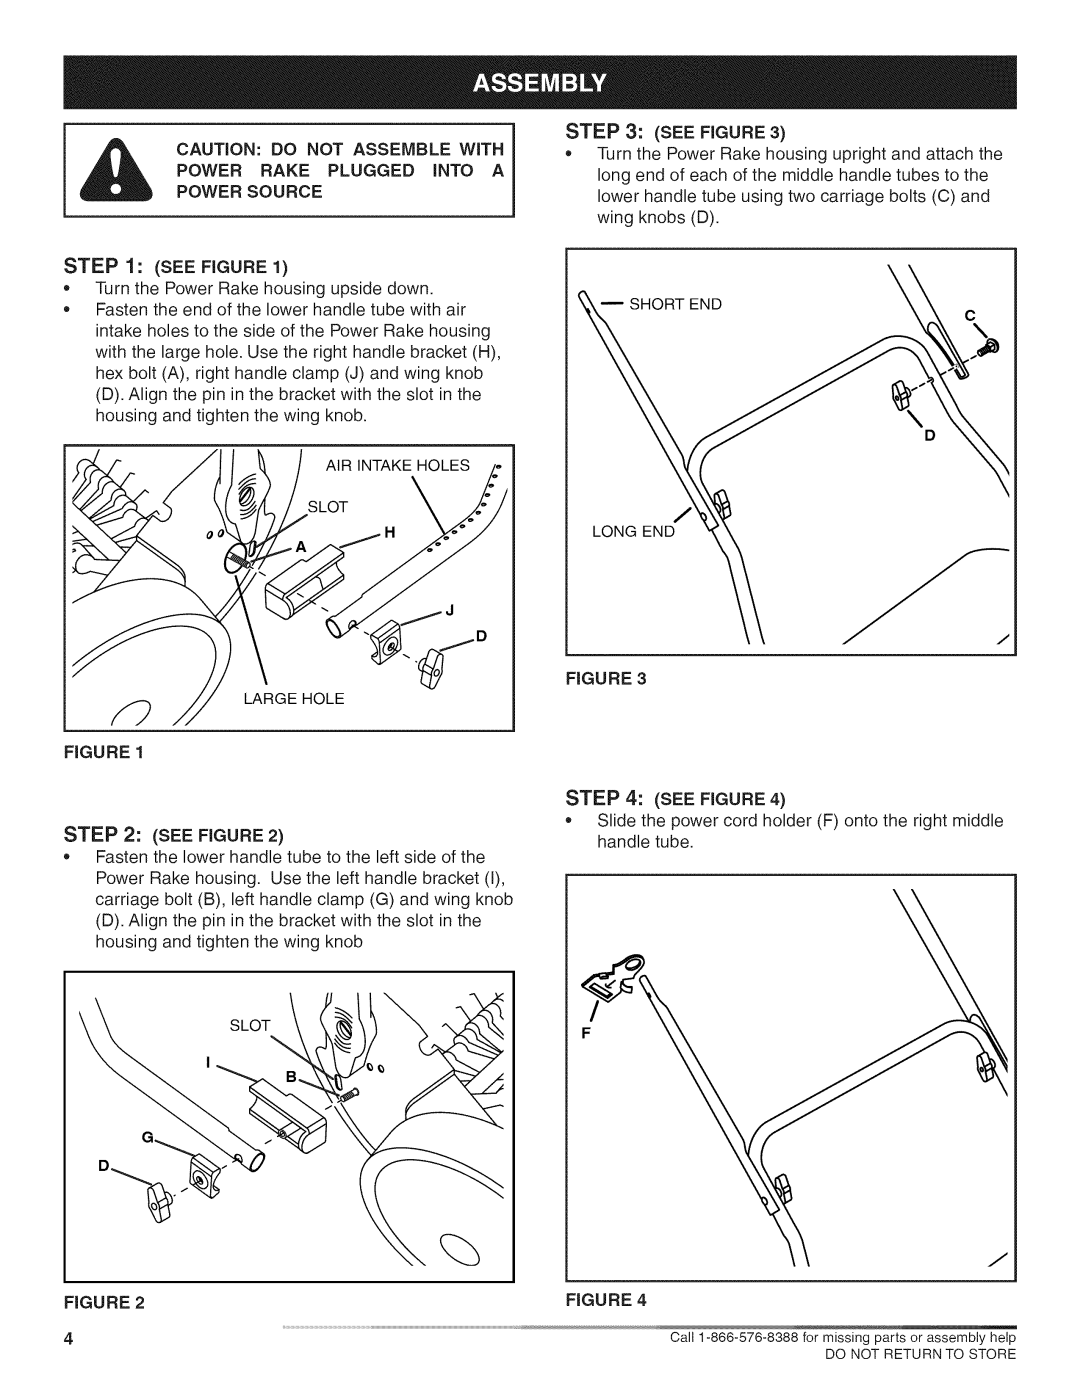
STEP 3: (SEE FIGURE 3)
,Turn the Power Rake housing upright and attach the long end of each of the middle handle tubes to the lower handle tube using two carriage bolts (C) and wing knobs (D).
\
SHORT END
c
/
LONG END
FIGURE 3
STEP 4: (SEE FIGURE 4)
Slide the power cord holder (F) onto the right middle handle tube.
F
FIGURE 4
4 | Call |
| DO NOT RETURN TO STORE |