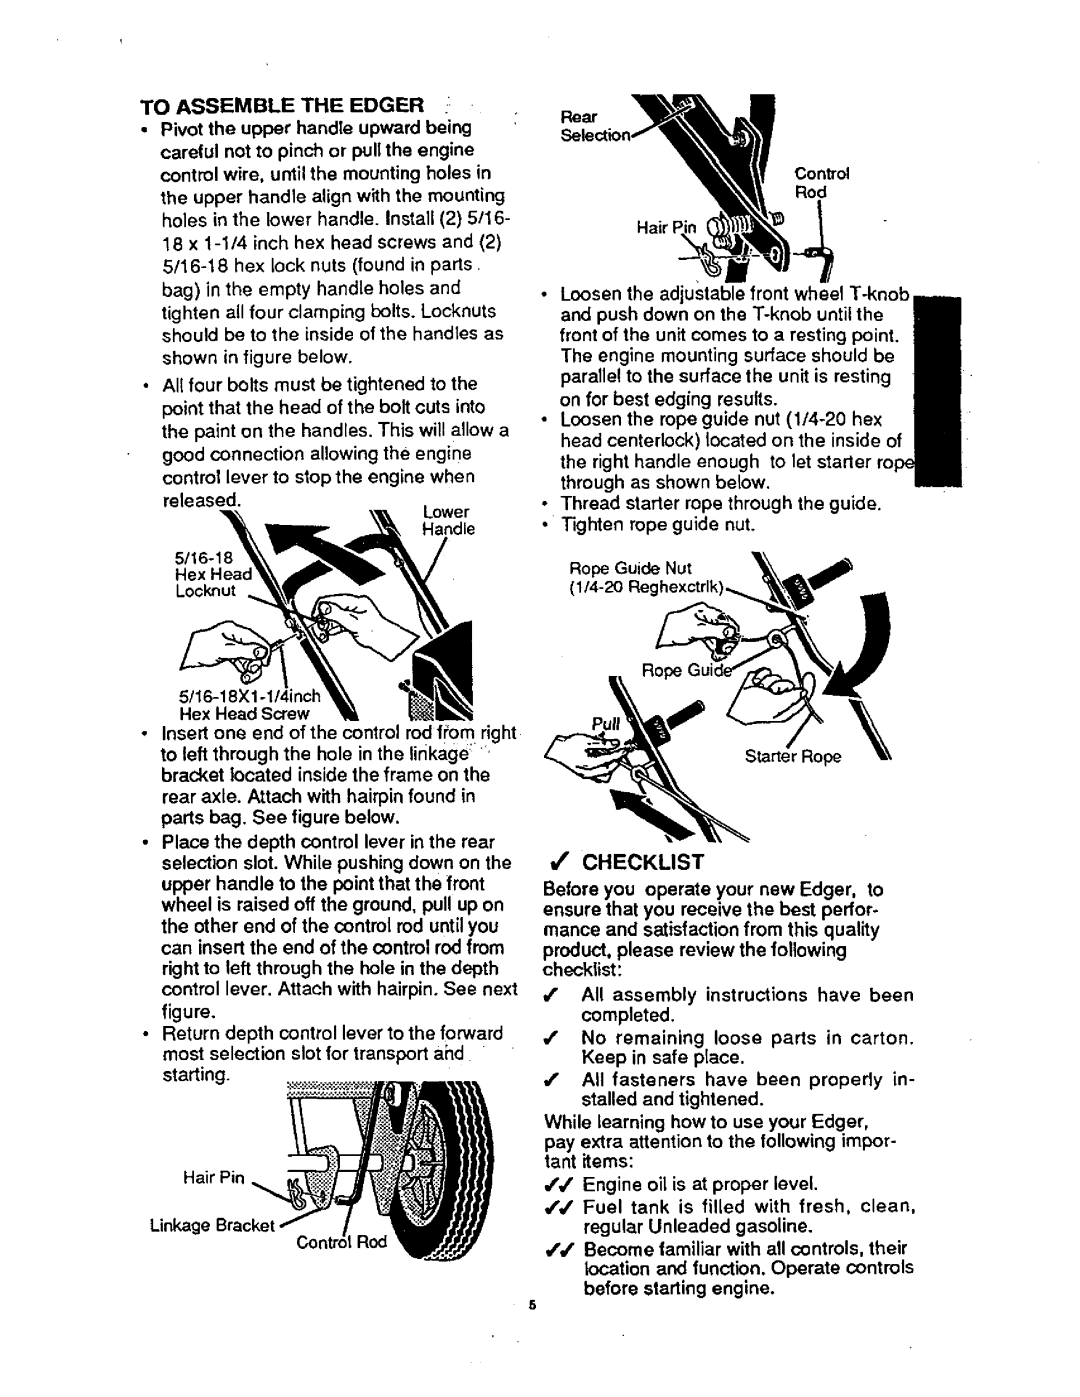
TO ASSEMBLE THE EDGER '
:
•Pivot the upper handle upward being careful not to pinch or pull the engine control wire, until the mounting holes in the upper handle align with the mounting holes in the lower handle. Install (2) 5/16- 18 x
•All four bolts must be tightened to the point that the head of the bolt cuts into the paint on the handles. This will allow a good connection allowing the engine control lever to slop the engine when released.
Lower
Handle
Rear
Con_ol
Rod
Hair F
•Loosen the adjustable front wheel
•Loosen the rope guide nut
•Thread starter rope through the guide.
•Tighten rope guide nut.
Rope Guide Nut
Hex Head Screw
•Insert one end of the control rod ft'0m right to left through the hole in the linkage ' bracket located inside the frame on the
rear axle. Attach with hairpin found in parts bag. See figure below.
•Place the depth control lever in the rear selection slot. While pushing down on the upper handle to the point that the front wheel is raised off the ground, pull up on the other end of the control rod until you can insert the end of the control rod from right to left through the hole in the depth control lever. Attach with hairpin. See next figure.
•Return depth control lever to the forward most selection slot for transport and starting.
Linkage Brack_
Starter Rope
J' CHECKLIST
Before you operate your new Edger, to ensure that you receive the best perfor-
mance and satisfaction from this quality
product, please review the following checklist:
/All assembly instructions have been completed.
/No remaining loose parts in carton. Keep in safe p[ace.
,f All fasteners have been properly in- stalled and tightened.
While learning how to use your Edger, pay extra attention to the following impor- tant items:
JJEngine oil is at proper level.
/,/ Fuel tank is filled with fresh, clean, regular Unleaded gasoline.
#'#' Become familiar with all controls, their location and function. Operate controls before starting engine.
5