ASSEMBLY
!![]() WARNING
WARNING
1.DO NOT assemble the Air Cleaner until you are sure the tool IS NOT plugged in.
2.DO NOT assemble the Air Cleaner until you are sure the power switch is in the “OFF” position.
3.For your own safety, DO NOT connect the machine to the power source until the machine is completely assembled and you read and understand the entire Owner’s Manual.
The Air Cleaner can be used as a portable or stationary unit. As a portable unit it can be moved and placed near the work to be done. As a stationary unit it can be hung overhead in the shop. Determine which type of use is best fitted for your applications and proceed to that section in the assembly instructions.
PORTABLE UNIT ASSEMBLY
MAKE CERTAIN THE AIR CLEANER IS DISCON- NECTED FROM THE POWER SOURCE.
1.Place the Air Cleaner on its side. Locate the self- adhesive rubber pads supplied with the unit. Carefully place one rubber pad on each bottom corner of the Air Cleaner. The rubber pads will help eliminate vibration and noise.
CAUTION: For operator safety, we sugest that the unit be clamped down when used on a workbench or positioned on sawhorses.
2.There are two lifting handles located on each side of the air cleaner. These handles should be used to carry the Air Cleaner from place to place. To avoid damage to the air filters, carry the air cleaner with the filters positioned away from your body. CAUTION: This Air Cleaner weighs approximately 55 pounds.
STATIONARY UNIT ASSEMBLY
!![]() WARNING
WARNING
THIS TOOL WEIGHS APPROXIMATELY 55 POUNDS. MAKE CERTAIN THE UNIT IS SECURELY SUPPORT- ED WHEN MOUNTING TO A CEILING OR OVER- HEAD SUPPORT.
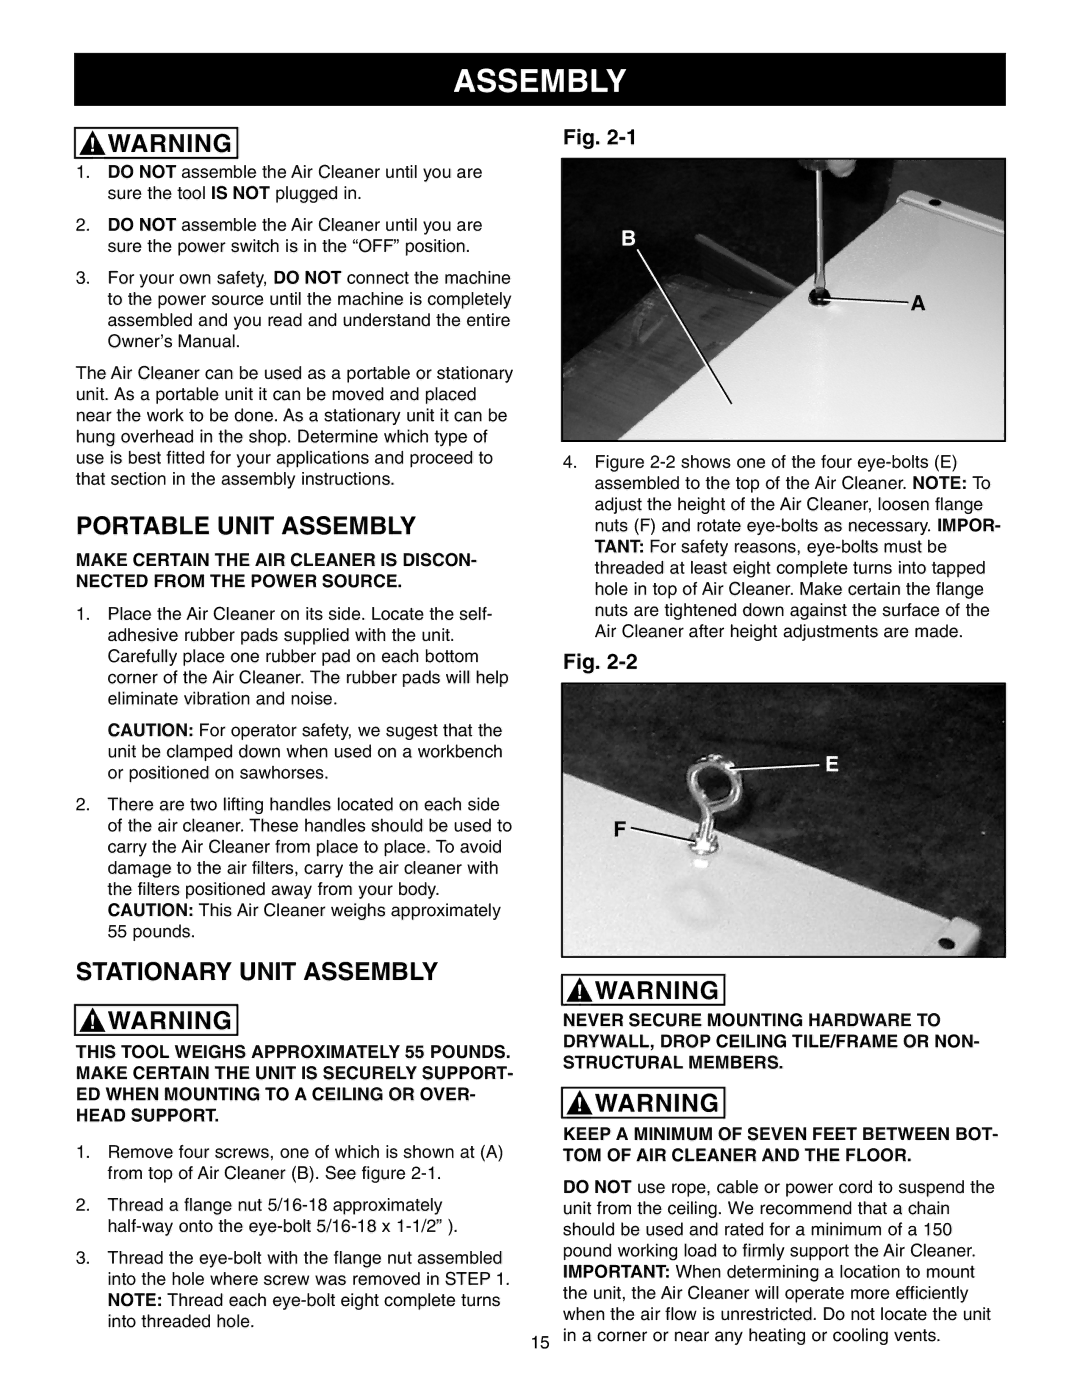
1.Remove four screws, one of which is shown at (A) from top of Air Cleaner (B). See figure
2.Thread a flange nut
3.Thread the
Fig.
B
![]() A
A
4.Figure 2-2 shows one of the four eye-bolts (E) assembled to the top of the Air Cleaner. NOTE: To adjust the height of the Air Cleaner, loosen flange nuts (F) and rotate eye-bolts as necessary. IMPOR- TANT: For safety reasons, eye-bolts must be threaded at least eight complete turns into tapped hole in top of Air Cleaner. Make certain the flange nuts are tightened down against the surface of the Air Cleaner after height adjustments are made.
Fig.
![]() E
E
F ![]()
!![]() WARNING
WARNING
NEVER SECURE MOUNTING HARDWARE TO DRYWALL, DROP CEILING TILE/FRAME OR NON- STRUCTURAL MEMBERS.
!![]() WARNING
WARNING
KEEP A MINIMUM OF SEVEN FEET BETWEEN BOT- TOM OF AIR CLEANER AND THE FLOOR.
DO NOT use rope, cable or power cord to suspend the unit from the ceiling. We recommend that a chain should be used and rated for a minimum of a 150 pound working load to firmly support the Air Cleaner. IMPORTANT: When determining a location to mount the unit, the Air Cleaner will operate more efficiently when the air flow is unrestricted. Do not locate the unit
15 in a corner or near any heating or cooling vents.