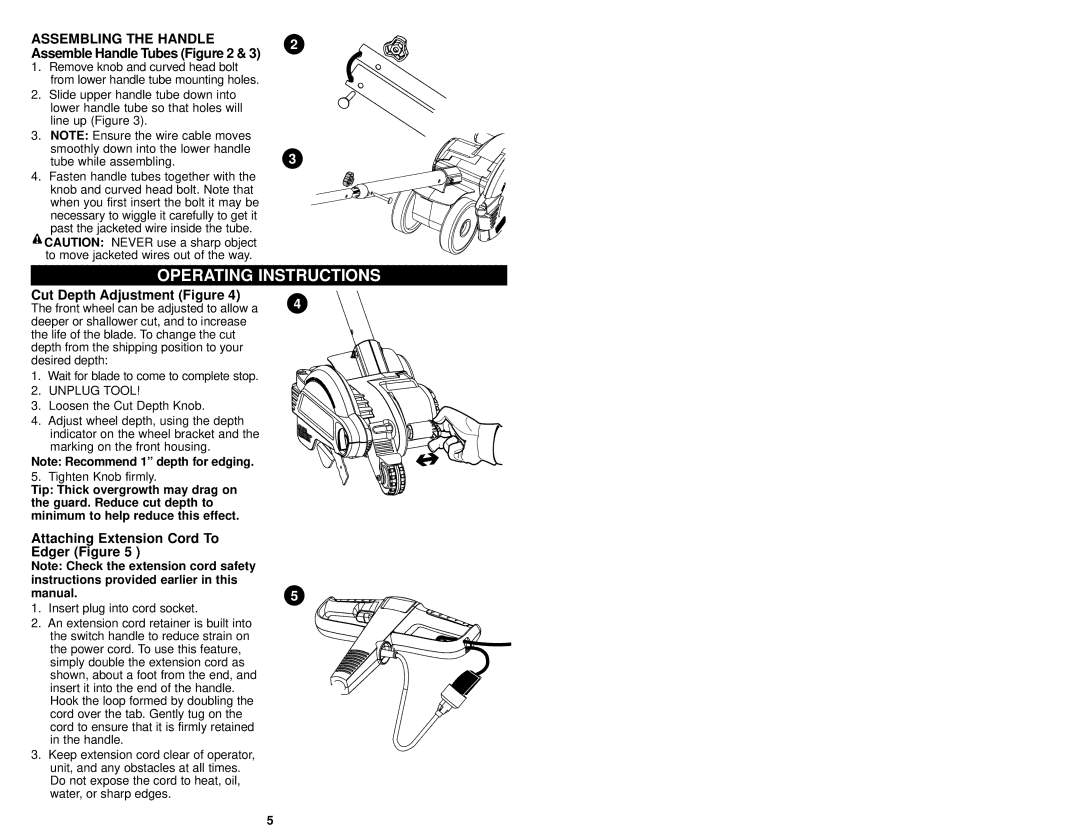
ASSEMBLING THE HANDLE Assemble Handle Tubes (Figure 2 & 3)
1.Remove knob and curved head bolt from lower handle tube mounting holes.
2.Slide upper handle tube down into lower handle tube so that holes will line up (Figure 3).
3.NOTE: Ensure the wire cable moves smoothly down into the lower handle tube while assembling.
4.Fasten handle tubes together with the knob and curved head bolt. Note that when you first insert the bolt it may be necessary to wiggle it carefully to get it past the jacketed wire inside the tube.
![]() CAUTION: NEVER use a sharp object to move jacketed wires out of the way.
CAUTION: NEVER use a sharp object to move jacketed wires out of the way.
2
3
OPERATING INSTRUCTIONS
Cut Depth Adjustment (Figure 4) | 4 |
The front wheel can be adjusted to allow a |
deeper or shallower cut, and to increase the life of the blade. To change the cut depth from the shipping position to your desired depth:
1. Wait for blade to come to complete stop.
2. UNPLUG TOOL!
3.Loosen the Cut Depth Knob.
4.Adjust wheel depth, using the depth
indicator on the wheel bracket and the marking on the front housing.
Note: Recommend 1” depth for edging.
5. Tighten Knob firmly.
Tip: Thick overgrowth may drag on the guard. Reduce cut depth to minimum to help reduce this effect.
Attaching Extension Cord To
Edger (Figure 5 )
Note: Check the extension cord safety instructions provided earlier in this
manual.5
1. Insert plug into cord socket.
2. An extension cord retainer is built into the switch handle to reduce strain on the power cord. To use this feature, simply double the extension cord as shown, about a foot from the end, and insert it into the end of the handle. Hook the loop formed by doubling the cord over the tab. Gently tug on the cord to ensure that it is firmly retained in the handle.
3.Keep extension cord clear of operator, unit, and any obstacles at all times. Do not expose the cord to heat, oil, water, or sharp edges.
5