To Attach New Blade:
1.Ensure inner spacer is on shaft— "flats" in spacer hole must engage with "flats" on shaft.
2.Holding the spacer in place, put the blade on the shaft, as shown (Figure 7B).
3.Hold the blade against the spacer and install the outer spacer, again aligning the flats in the spacer with the flats on the shaft.
4.Install the hex head nut and conical washer, then tighten with a wrench (140 in. pounds).
NOTE: Replace hex head nut and conical washer only with identical replacement parts; see Parts List.
5.Close guard door; knob must be in locking position.
Trigger Switch Operation
To turn tool ON, squeeze the trigger switch. The trigger has been designed so that it is very easy to hold in the ON position. To turn tool OFF, release the trigger.
NOTE: The edger is a major appliance and should not be operated simultaneously with other major appliances on the same household circuit.
Edger Operation
![]() WARNING: Make sure that other persons and pets are at least 100 feet away.
WARNING: Make sure that other persons and pets are at least 100 feet away.
1.Set cut depth at 1” and set edge guide to the down position, refer to Assembly Instructions.
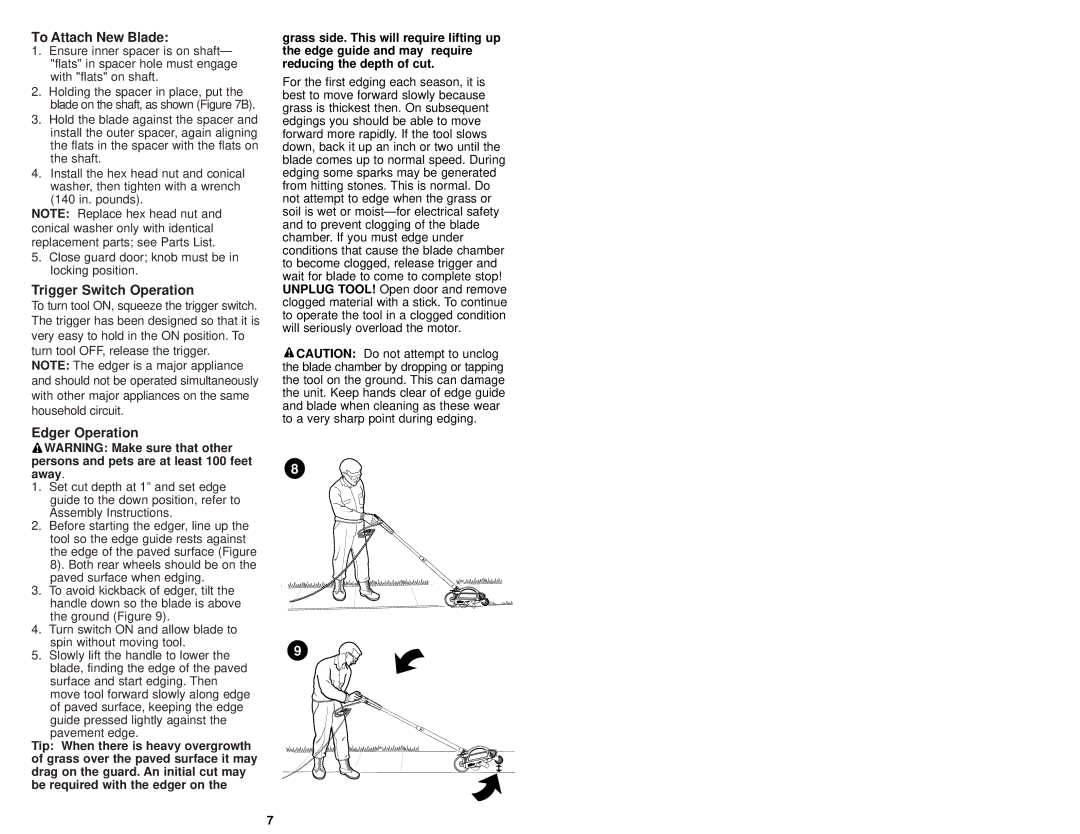
2.Before starting the edger, line up the tool so the edge guide rests against the edge of the paved surface (Figure 8). Both rear wheels should be on the paved surface when edging.
3.To avoid kickback of edger, tilt the handle down so the blade is above the ground (Figure 9).
4.Turn switch ON and allow blade to spin without moving tool.
5.Slowly lift the handle to lower the blade, finding the edge of the paved surface and start edging. Then move tool forward slowly along edge of paved surface, keeping the edge
guide pressed lightly against the pavement edge.
Tip: When there is heavy overgrowth of grass over the paved surface it may drag on the guard. An initial cut may be required with the edger on the
grass side. This will require lifting up the edge guide and may require reducing the depth of cut.
For the first edging each season, it is best to move forward slowly because grass is thickest then. On subsequent edgings you should be able to move forward more rapidly. If the tool slows down, back it up an inch or two until the blade comes up to normal speed. During edging some sparks may be generated from hitting stones. This is normal. Do not attempt to edge when the grass or soil is wet or
![]() CAUTION: Do not attempt to unclog the blade chamber by dropping or tapping the tool on the ground. This can damage the unit. Keep hands clear of edge guide and blade when cleaning as these wear to a very sharp point during edging.
CAUTION: Do not attempt to unclog the blade chamber by dropping or tapping the tool on the ground. This can damage the unit. Keep hands clear of edge guide and blade when cleaning as these wear to a very sharp point during edging.
8
9
7