VTX15 Guitar Amplifier
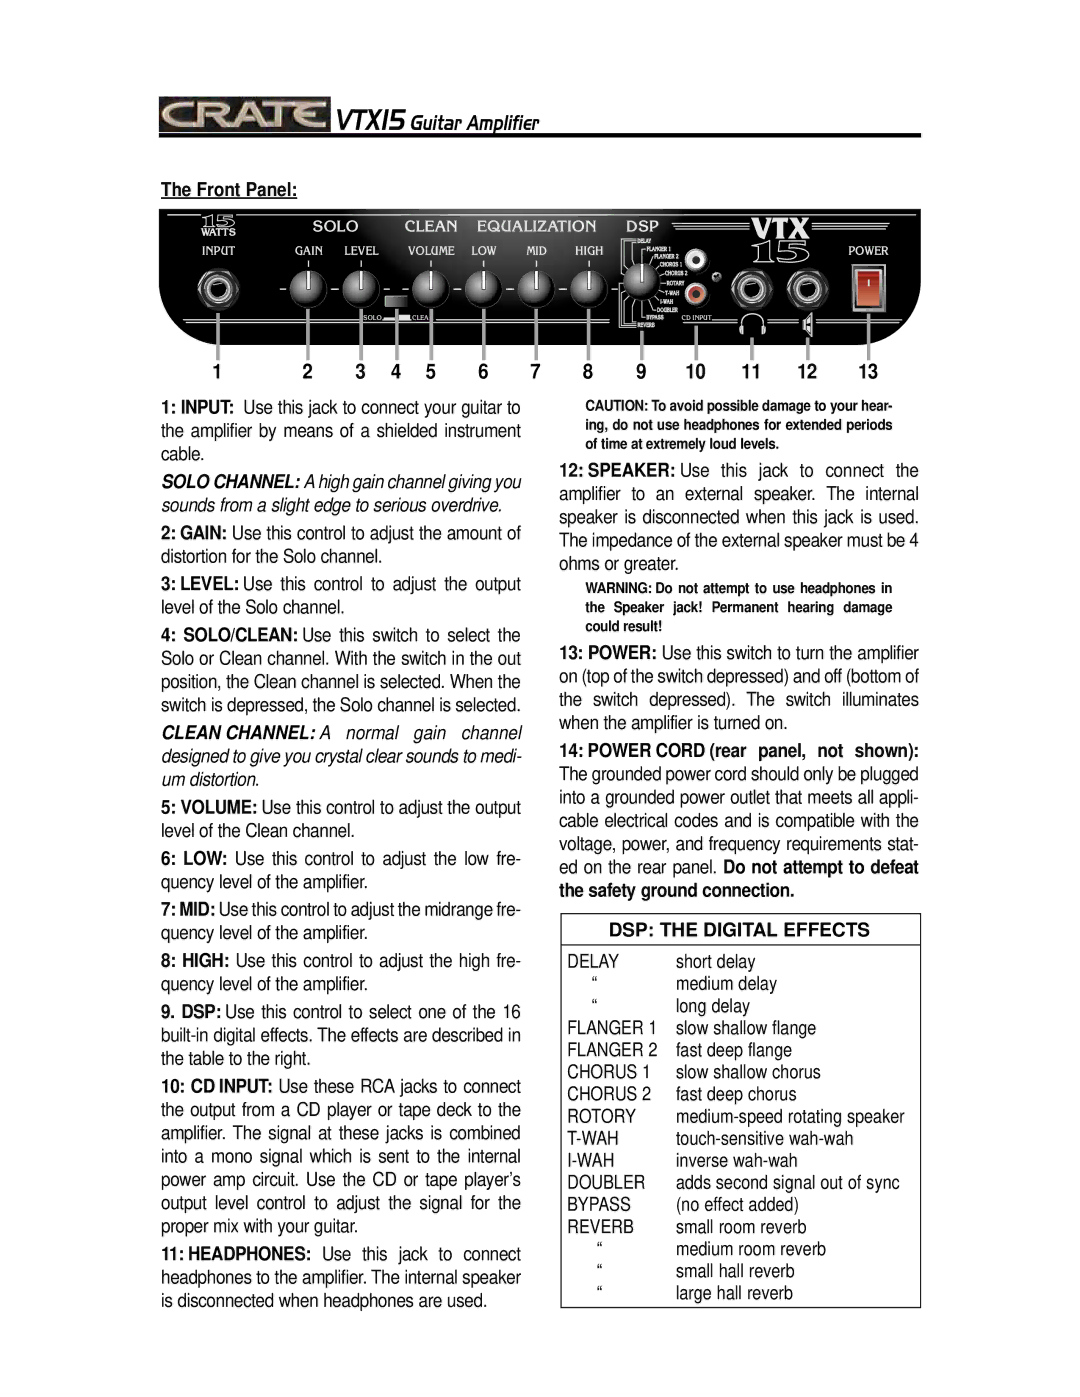
The Front Panel:
| SOLO | CLEAN | EQUALIZATION |
INPUT | GAIN LEVEL | VOLUME | LOW MID HIGH |
SOLO | CLEAN |
DSP |
|
DELAY | POWER |
FLANGER 1 | |
FLANGER 2 |
|
CHORUS 1 |
|
CHORUS 2 |
|
ROTARY |
|
| |
| |
DOUBLER |
|
BYPASS | CD INPUT |
REVERB |
|
1 | 2 | 3 | 4 | 5 | 6 | 7 | 8 | 9 | 10 | 11 | 12 | 13 |
1:INPUT: Use this jack to connect your guitar to the amplifier by means of a shielded instrument cable.
SOLO CHANNEL: A high gain channel giving you sounds from a slight edge to serious overdrive.
2:GAIN: Use this control to adjust the amount of distortion for the Solo channel.
3:LEVEL: Use this control to adjust the output level of the Solo channel.
4:SOLO/CLEAN: Use this switch to select the Solo or Clean channel. With the switch in the out position, the Clean channel is selected. When the switch is depressed, the Solo channel is selected.
CLEAN CHANNEL: A normal gain channel designed to give you crystal clear sounds to medi- um distortion.
5:VOLUME: Use this control to adjust the output level of the Clean channel.
6:LOW: Use this control to adjust the low fre- quency level of the amplifier.
7:MID: Use this control to adjust the midrange fre- quency level of the amplifier.
8:HIGH: Use this control to adjust the high fre- quency level of the amplifier.
9.DSP: Use this control to select one of the 16
10:CD INPUT: Use these RCA jacks to connect the output from a CD player or tape deck to the amplifier. The signal at these jacks is combined into a mono signal which is sent to the internal power amp circuit. Use the CD or tape player’s output level control to adjust the signal for the proper mix with your guitar.
11:HEADPHONES: Use this jack to connect headphones to the amplifier. The internal speaker is disconnected when headphones are used.
CAUTION: To avoid possible damage to your hear- ing, do not use headphones for extended periods of time at extremely loud levels.
12:SPEAKER: Use this jack to connect the amplifier to an external speaker. The internal speaker is disconnected when this jack is used. The impedance of the external speaker must be 4 ohms or greater.
WARNING: Do not attempt to use headphones in the Speaker jack! Permanent hearing damage could result!
13:POWER: Use this switch to turn the amplifier on (top of the switch depressed) and off (bottom of the switch depressed). The switch illuminates when the amplifier is turned on.
14:POWER CORD (rear panel, not shown): The grounded power cord should only be plugged into a grounded power outlet that meets all appli- cable electrical codes and is compatible with the voltage, power, and frequency requirements stat- ed on the rear panel. Do not attempt to defeat the safety ground connection.
DSP: THE DIGITAL EFFECTS
DELAY | short delay |
“medium delay
“long delay
FLANGER 1 slow shallow flange FLANGER 2 fast deep flange CHORUS 1 slow shallow chorus CHORUS 2 fast deep chorus
ROTORY | |
inverse | |
DOUBLER | adds second signal out of sync |
BYPASS | (no effect added) |
REVERB | small room reverb |
“medium room reverb
“small hall reverb
“large hall reverb