
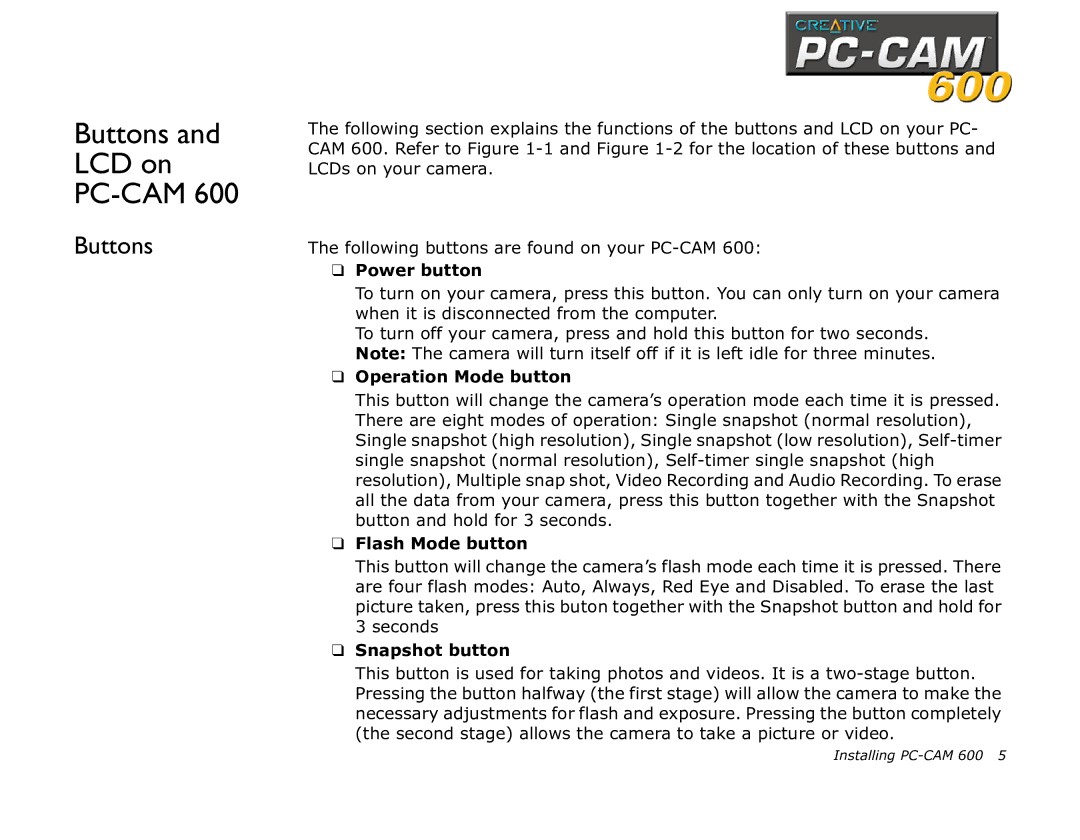
600 specifications
Creative 600 is a revolutionary technology solution designed to meet the growing demands of modern content creation and digital communication. Offering a robust suite of features, Creative 600 is aimed at enhancing productivity, creativity, and collaboration, making it an essential tool for professionals across various industries.One of the standout characteristics of Creative 600 is its intuitive user interface, designed to facilitate ease of use for both novice and experienced users. The platform operates seamlessly across multiple devices, ensuring that users can access their projects anytime and anywhere. This flexibility empowers users to work on the go, enhancing creativity and promoting a dynamic workflow.
At the heart of Creative 600 lies its advanced collaborative features. Users can easily share their work in real-time with colleagues and clients, allowing for instant feedback and adjustments. This collaborative approach not only streamlines the creative process but also fosters a sense of community among users, leading to more innovative ideas and solutions.
The technology that powers Creative 600 is state-of-the-art, incorporating artificial intelligence and machine learning algorithms that help automate repetitive tasks. These technologies analyze user behavior and preferences, enabling the platform to suggest relevant tools and resources that optimize the creative process. This smart assistance is especially beneficial for users juggling multiple projects, as it minimizes distractions and maximizes focus.
Creative 600 also boasts a diverse range of multimedia capabilities. It allows users to integrate graphics, video, and audio seamlessly, making it a one-stop solution for all content creation needs. Furthermore, it supports various file formats, ensuring compatibility with traditional software systems and enabling easy sharing across different platforms.
Security is a top priority for Creative 600, which employs advanced encryption and data protection protocols. Users can trust that their work is safe and secure, giving them peace of mind as they create and collaborate on sensitive projects.
In summary, Creative 600 stands out as a versatile, powerful, and user-friendly tool designed to enhance the creative workflow. With its focus on collaboration, integration of advanced technologies, and robust security features, it is poised to reshape the way content creators engage with their work and each other. Whether used in graphics design, video production, or digital marketing, Creative 600 is undoubtedly a game-changer in the realm of creative technology.