vii. Levelling...
Adjust the feet until all four feet are in firm contact with the floor ensuring the appliance stands level in every direction. You can check this using a spirit level.
We recommend you level the appliance to prevent vibration being transmitted to the surrounding furniture, check that the sides and the top of the appliance are unable to touch the furniture.
Accessories provided for height adjustment
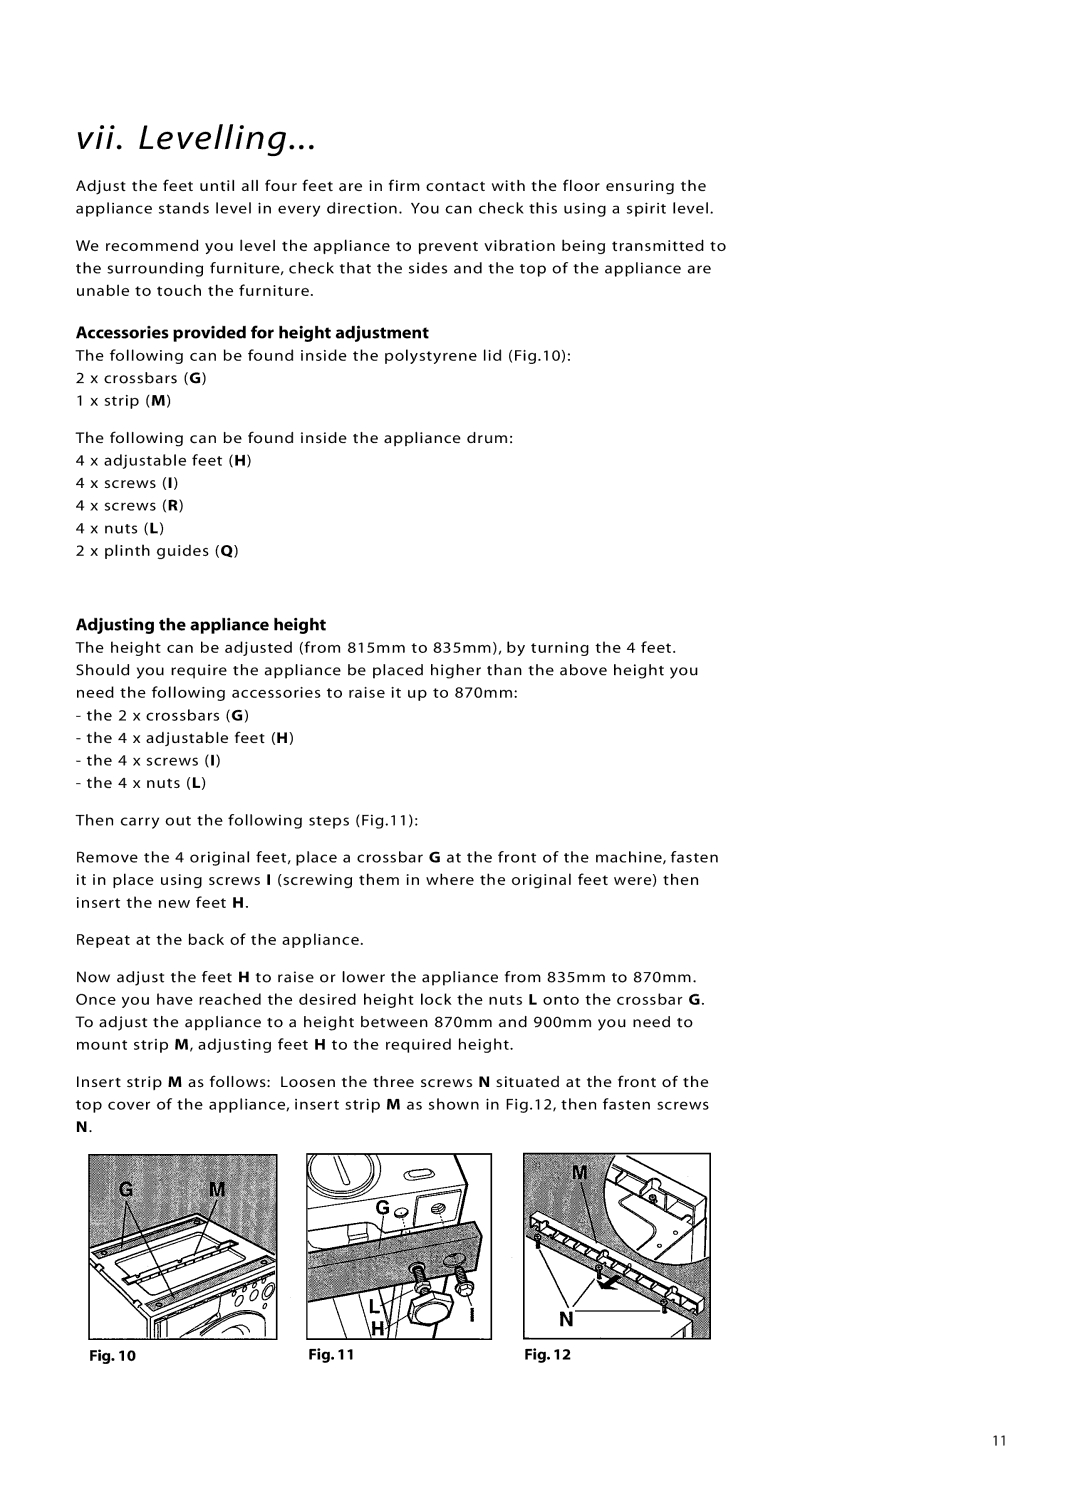
The following can be found inside the polystyrene lid (Fig.10):
2x crossbars (G)
1x strip (M)
The following can be found inside the appliance drum:
4x adjustable feet (H)
4x screws (I)
4x screws (R)
4x nuts (L)
2x plinth guides (Q)
Adjusting the appliance height
The height can be adjusted (from 815mm to 835mm), by turning the 4 feet. Should you require the appliance be placed higher than the above height you need the following accessories to raise it up to 870mm:
-the 2 x crossbars (G)
-the 4 x adjustable feet (H)
-the 4 x screws (I)
-the 4 x nuts (L)
Then carry out the following steps (Fig.11):
Remove the 4 original feet, place a crossbar G at the front of the machine, fasten it in place using screws I (screwing them in where the original feet were) then insert the new feet H.
Repeat at the back of the appliance.
Now adjust the feet H to raise or lower the appliance from 835mm to 870mm. Once you have reached the desired height lock the nuts L onto the crossbar G. To adjust the appliance to a height between 870mm and 900mm you need to mount strip M, adjusting feet H to the required height.
Insert strip M as follows: Loosen the three screws N situated at the front of the top cover of the appliance, insert strip M as shown in Fig.12, then fasten screws
Fig. 10 | Fig. 11 | Fig. 12 |
11