Care and Cleaning
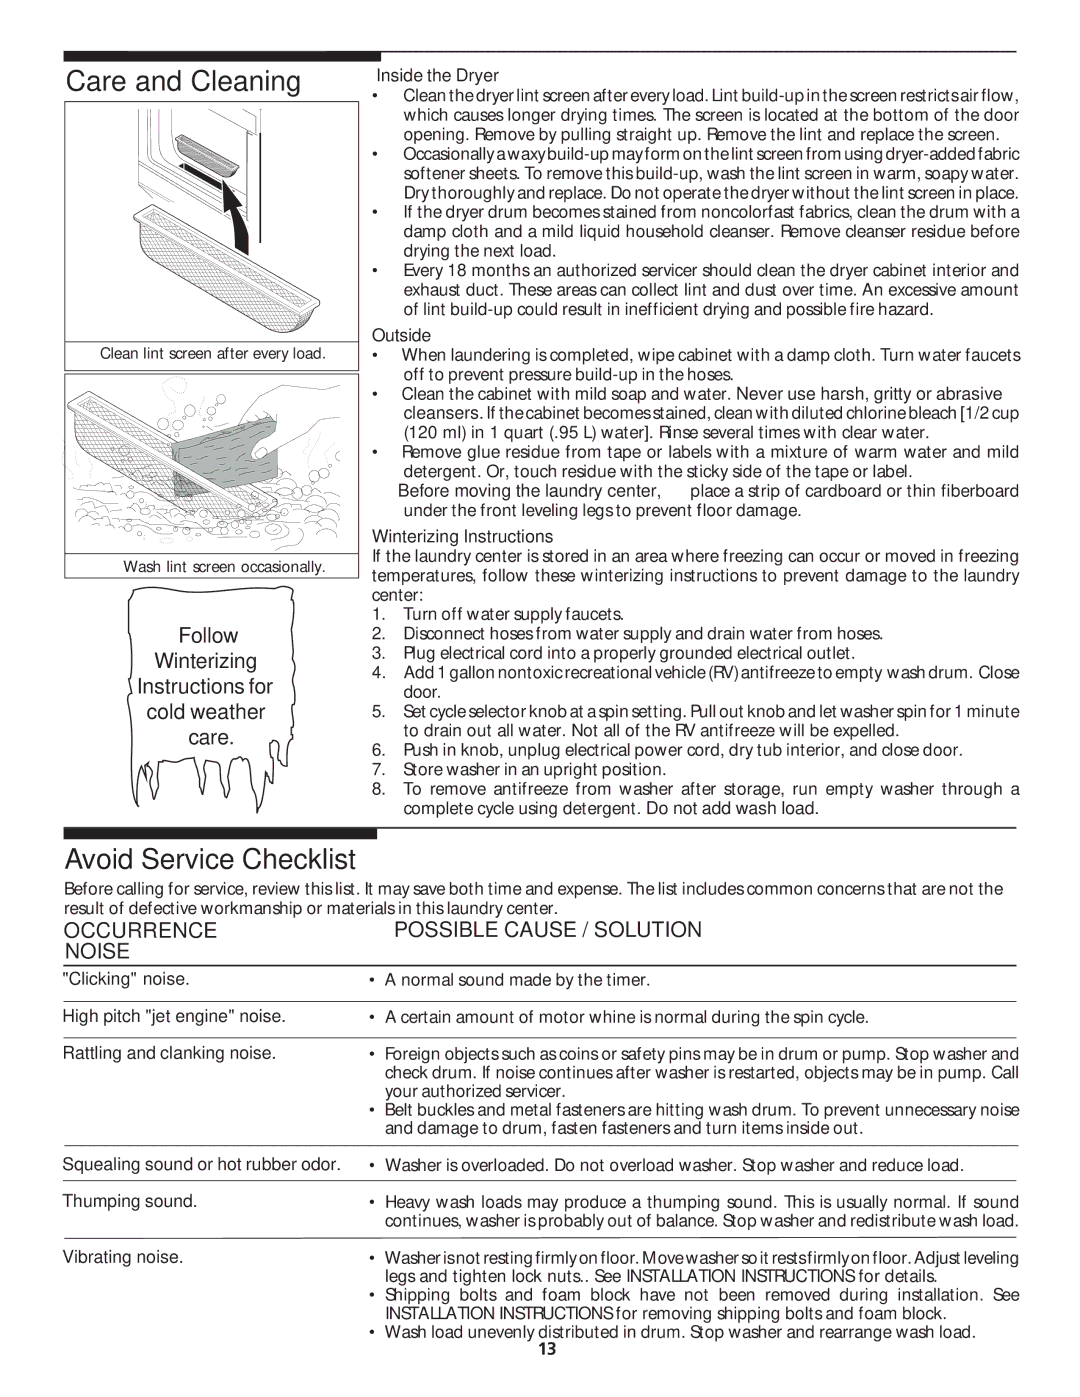
Clean lint screen after every load.
Wash lint screen occasionally. |
Follow
Winterizing
Instructions for
cold weather
care.
Inside the Dryer
•Clean the dryer lint screen after every load. Lint
•Occasionally a waxy
•If the dryer drum becomes stained from noncolorfast fabrics, clean the drum with a damp cloth and a mild liquid household cleanser. Remove cleanser residue before drying the next load.
•Every 18 months an authorized servicer should clean the dryer cabinet interior and exhaust duct. These areas can collect lint and dust over time. An excessive amount of lint
Outside
•When laundering is completed, wipe cabinet with a damp cloth. Turn water faucets off to prevent pressure
•Clean the cabinet with mild soap and water. Never use harsh, gritty or abrasive cleansers. If the cabinet becomes stained, clean with diluted chlorine bleach [1/2 cup (120 ml) in 1 quart (.95 L) water]. Rinse several times with clear water.
•Remove glue residue from tape or labels with a mixture of warm water and mild detergent. Or, touch residue with the sticky side of the tape or label.
•Before moving the laundry center, place a strip of cardboard or thin fiberboard under the front leveling legs to prevent floor damage.
Winterizing Instructions
If the laundry center is stored in an area where freezing can occur or moved in freezing temperatures, follow these winterizing instructions to prevent damage to the laundry center:
1.Turn off water supply faucets.
2.Disconnect hoses from water supply and drain water from hoses.
3.Plug electrical cord into a properly grounded electrical outlet.
4.Add 1 gallon nontoxic recreational vehicle (RV) antifreeze to empty wash drum. Close door.
5.Set cycle selector knob at a spin setting. Pull out knob and let washer spin for 1 minute to drain out all water. Not all of the RV antifreeze will be expelled.
6.Push in knob, unplug electrical power cord, dry tub interior, and close door.
7.Store washer in an upright position.
8.To remove antifreeze from washer after storage, run empty washer through a complete cycle using detergent. Do not add wash load.
Avoid Service Checklist
Before calling for service, review this list. It may save both time and expense. The list includes common concerns that are not the result of defective workmanship or materials in this laundry center.
OCCURRENCE | POSSIBLE CAUSE / SOLUTION |
NOISE |
|
"Clicking" noise. | • A normal sound made by the timer. |
|
|
High pitch "jet engine" noise. | • A certain amount of motor whine is normal during the spin cycle. |
Rattling and clanking noise. • Foreign objects such as coins or safety pins may be in drum or pump. Stop washer and check drum. If noise continues after washer is restarted, objects may be in pump. Call your authorized servicer.
•Belt buckles and metal fasteners are hitting wash drum. To prevent unnecessary noise and damage to drum, fasten fasteners and turn items inside out.
Squealing sound or hot rubber odor. Thumping sound.
Vibrating noise.
•Washer is overloaded. Do not overload washer. Stop washer and reduce load.
•Heavy wash loads may produce a thumping sound. This is usually normal. If sound continues, washer is probably out of balance. Stop washer and redistribute wash load.
•Washer is not resting firmly on floor. Move washer so it rests firmly on floor. Adjust leveling legs and tighten lock nuts.. See INSTALLATION INSTRUCTIONS for details.
•Shipping bolts and foam block have not been removed during installation. See INSTALLATION INSTRUCTIONS for removing shipping bolts and foam block.
•Wash load unevenly distributed in drum. Stop washer and rearrange wash load.
13