Getting Started
Control Locator
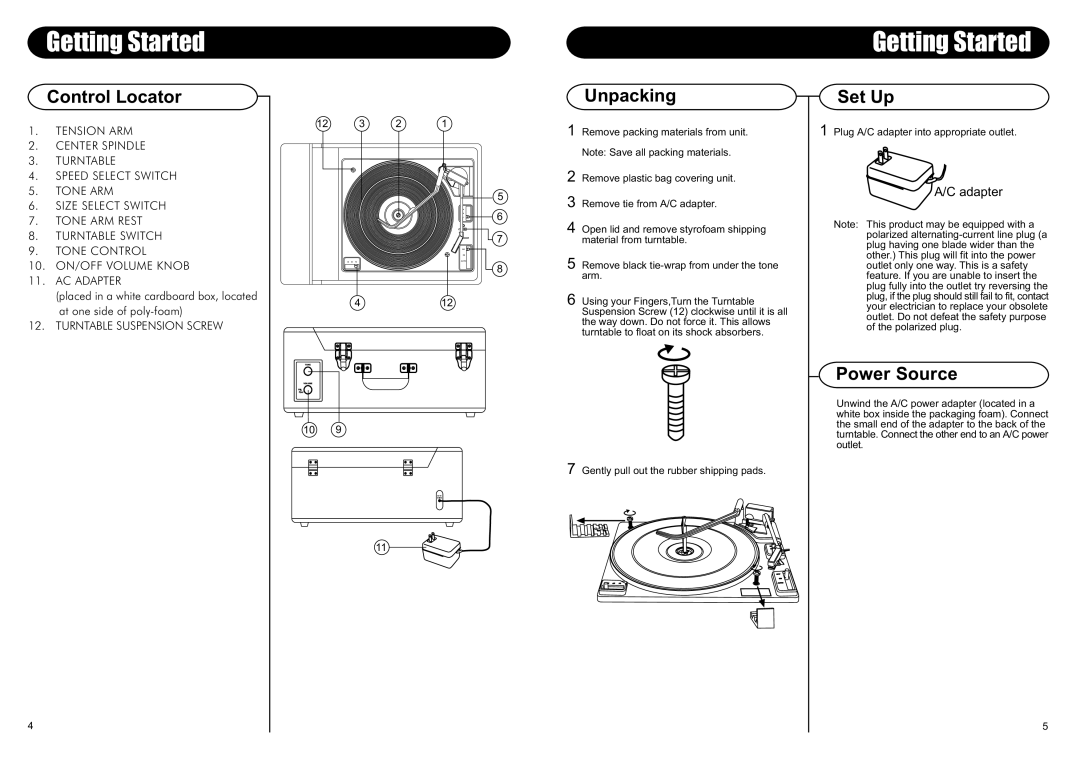
1.TENSION ARM
2.CENTER SPINDLE
3.TURNTABLE
4.SPEED SELECT SWITCH
5.TONE ARM
6.SIZE SELECT SWITCH
7.TONE ARM REST
8.TURNTABLE SWITCH
9.TONE CONTROL
10.ON/OFF VOLUME KNOB
11.AC ADAPTER
(placed in a white cardboard box, located at one side of
12.TURNTABLE SUSPENSION SCREW
|
|
|
| Unpacking |
12 | 3 | 2 | 1 | 1 Remove packing materials from unit. |
|
|
|
|
Note: Save all packing materials.
2 Remove plastic bag covering unit.
53 Remove tie from A/C adapter.
6
4 Open lid and remove styrofoam shipping
7material from turntable.
| 8 | 5 | Remove black |
|
|
| arm. |
4 | 12 | 6 | Using your Fingers,Turn the Turntable |
|
|
| Suspension Screw (12) clockwise until it is all |
the way down. Do not force it. This allows turntable to float on its shock absorbers.
Getting Started
Set Up
1Plug A/C adapter into appropriate outlet.
A/C adapter
Note: This product may be equipped with a polarized
10 9
7 Gently pull out the rubber shipping pads.
11
Power Source
Unwind the A/C power adapter (located in a white box inside the packaging foam). Connect the small end of the adapter to the back of the turntable. Connect the other end to an A/C power outlet.
4
5