Manuals
/
Crosley
/
Kitchen Appliance
/
Refrigerator
Crosley
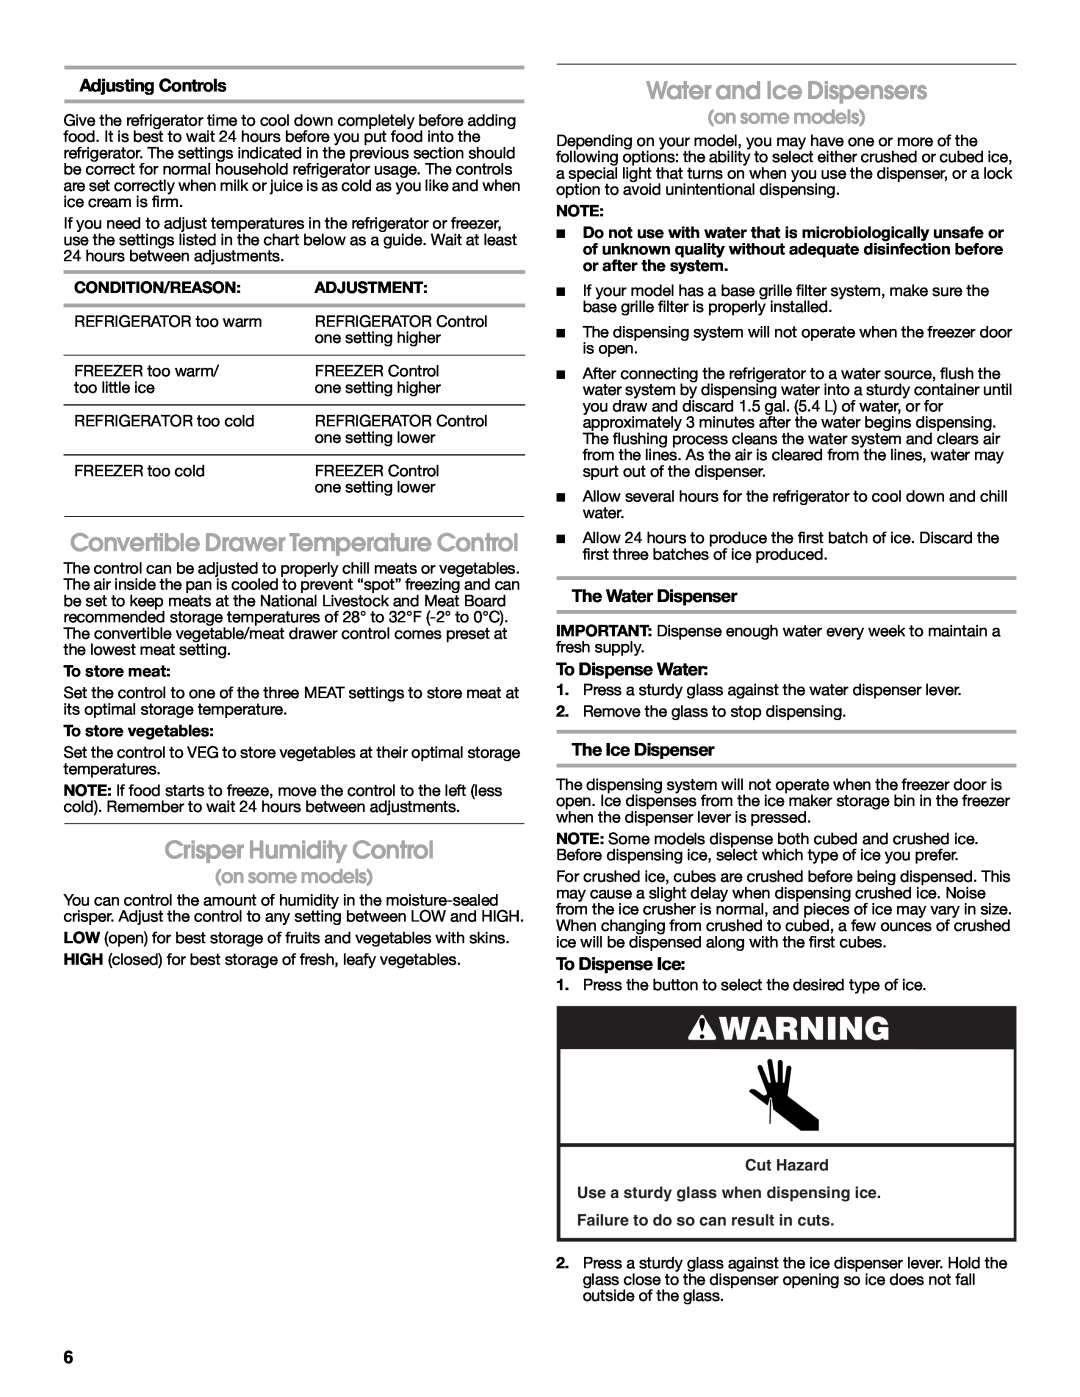
CS25AFXKQ05 Convertible Drawer Temperature Control, Crisper Humidity Control, Adjustment
Models:
CS25AFXKQ05
CS22AFXKT06
CS22AFXKS06
CS22AFXKQ06
CS22AFXKB06
CS25AFXKT05
CS22AFXKT00
1
6
40
40
Download
40 pages
36.42 Kb
3
4
5
6
7
8
9
10
Troubleshooting
Install
Product Data Sheets
Warranty
Solución De Problemas
Accessoires
Utilisation des commandes
Adjusting Controls
Cleaning
Exigences demplacement
Page 6
Image 6
Page 5
Page 7
Page 6
Image 6
Page 5
Page 7
Contents
Accessories
Table of Contents / Índice / Table des matières
Assistance or Service
Crosley Corporation c/o Service Dept 675 N. Main St Winston-Salem, NC
IMPORTANT SAFETY INSTRUCTIONS
REFRIGERATOR SAFETY
Your safety and the safety of others are very important
DANGER
Use two or more people to move and install refrigerator
INSTALLATION INSTRUCTIONS
Excessive Weight Hazard
When Moving Your Refrigerator
Water Pressure
Water Supply Requirements
Connect Water Supply
Reverse Osmosis Water Supply
REFRIGERATOR USE
Using the Controls
Complete the Installation
Style
Cut Hazard Use a sturdy glass when dispensing ice
Adjusting Controls
ADJUSTMENT
Convertible Drawer Temperature Control
Ice Maker and Storage Bin
Non-indicator Water Filter on some models
Using the Dispenser Without the Water Filter
Water Filtration System
Explosion Hazard Use nonflammable cleaner
Cleaning
To Clean Your Refrigerator
REFRIGERATOR CARE
The refrigerator will not operate
TROUBLESHOOTING
Refrigerator Operation
The doors will not close completely
Temperature is too warm
Temperature and Moisture
Ice and Water
There is interior moisture buildup
Water is leaking from the dispenser
WATER FILTER CERTIFICATIONS
The water dispenser will not operate properly
The dispenser water is not cool enough
Model WF-NL300/NL300 Capacity 300 Gallons 1136 Liters
PRODUCT DATA SHEETS
Base Grille Water Filtration System
Model WF-L500/L500 Capacity 500 Gallons 1893 Liters
ITEMS WHIRLPOOL WILL NOT PAY FOR
CROSLEY MAJOR APPLIANCE WARRANTY
ONE YEAR LIMITED WARRANTY
DISCLAIMER OF IMPLIED WARRANTIES LIMITATION OF REMEDIES
Limpiador de Acero Inoxidable Pida la pieza No
Ayuda o Servicio Técnico
Accesorios
Cartucho del filtro de la base estándar Pida la pieza
ADVERTENCIA
SEGURIDAD DEL REFRIGERADOR
PELIGRO ADVERTENCIA
Cómo deshacerse adecuadamente de su refrigerador viejo
Requisitos de ubicación
INSTRUCCIONES DE INSTALACIÓN
Desempaque el refrigerador
Requisitos eléctricos
Presión del agua
Requisitos del suministro de agua
Conexión del suministro de agua
Suministro de agua de ósmosis inversa
Conexión al refrigerador Estilo
Estilo
Cómo terminar la instalación
Control de temperatura del cajón convertible
USO DE SU REFRIGERADOR
Uso de los controles
Control de humedad del cajón para verduras
Para despachar agua
Fábrica de hielo y depósito
El despachador de agua
El despachador de hielo
Limpieza
CUIDADO DE SU REFRIGERADOR
Sistema de filtración de agua
Para quitar y volver a colocar el depósito de hielo
Funcionamiento del refrigerador
SOLUCIÓN DE PROBLEMAS
Cómo cambiar los focos
El refrigerador no funciona
Es difícil abrir las puertas
Temperatura y humedad
Hielo y agua
Las luces no funcionan
Hay fugas de agua del despachador
El despachador de hielo no funciona debidamente
El despachador de agua no funciona debidamente
El agua del despachador no está lo suficientemente fría
Modelo WF-NL300/NL300, Capacidad de 300 galones 1136 litros
HOJA DE DATOS DEL PRODUCTO
Sistema de filtración de agua de la rejilla de la base
Modelo WF-L500/L500, Capacidad de 500 galones 1893 litros
WHIRLPOOL NO PAGARÁ POR LOS SIGUIENTES ARTÍCULOS
CROSLEY
GARANTÍA LIMITADA DE UN AÑO
EXCLUSIÓN DE GARANTÍAS IMPLÍCITAS LIMITACIÓN DE RECURSOS
Assistance ou service
Accessoires
Nettoyant et poli pour acier inoxydable
AVERTISSEMENT
SÉCURITÉ DU RÉFRIGÉRATEUR
DANGER AVERTISSEMENT
Mise au rebut de votre vieux réfrigérateur
Déplacement de votre réfrigérateur
INSTRUCTIONS DINSTALLATION
Exigences demplacement
Déballage du réfrigérateur
Spécifications de l’alimentation en eau
Méthode recommandée de mise à la terre
Spécifications électriques
Raccordement de la canalisation deau
Raccordement au réfrigérateur Style
E F G
Achever l’installation
Utilisation des commandes
Commande de température du tiroir convertible
Ajustement des commandes
Distribution deau
Distributeurs d’eau et de glaçons
LIGHT
Le distributeur de glaçons
Machine à glaçons et bac dentreposage
Pour retirer et réinstaller le bac à glaçons
ENTRETIEN DU RÉFRIGÉRATEUR
Système de filtration de leau
Fonctionnement du réfrigérateur
Remplacement des ampoules d’éclairage
DÉPANNAGE
Nettoyage de votre réfrigérateur
Les portes ne ferment pas complètement
Température et humidité
Glaçons et eau
Les portes sont difficiles à ouvrir
Le distributeur deau ne fonctionne pas correctement
Goût, odeur ou couleur grise des glaçons
Le distributeur de glaçons ne fonctionne pas correctement
De leau suinte du distributeur
Modèle WF-NL300/NL300 Capacité 300 gallons 1 136 litres
FEUILLES DE DONNÉES SUR LE PRODUIT
Système de filtration d’eau à la grille de la base
Modèle WF-L500/L500 Capacité 500 gallons 1 893 litres
GARANTIE LIMITÉE DE UN AN
WHIRLPOOL NE PRENDRA PAS EN CHARGE
GARANTIE DES GROS APPAREILS MÉNAGERS CROSLEY
Printed in U.S.A
2315255
1/06
Impreso en EE. UU
Top
Page
Image
Contents