
CR249 specifications
Crosley Radio has long been a pioneer in the realm of vintage-style audio equipment, and the Crosley CR249 is a testament to their commitment to blending classic aesthetics with modern functionality. This compact record player not only pays homage to the golden age of music but also incorporates advanced technologies to meet the needs of today’s audiophiles.One of the standout features of the Crosley CR249 is its unique suitcase design, which enhances portability while adding a charming retro vibe. The durable outer casing is available in various colors, making it a stylish addition to any room or setting. Its lightweight structure allows users to take their music anywhere, perfect for gatherings, parties, or simply enjoying a personal listening experience at home.
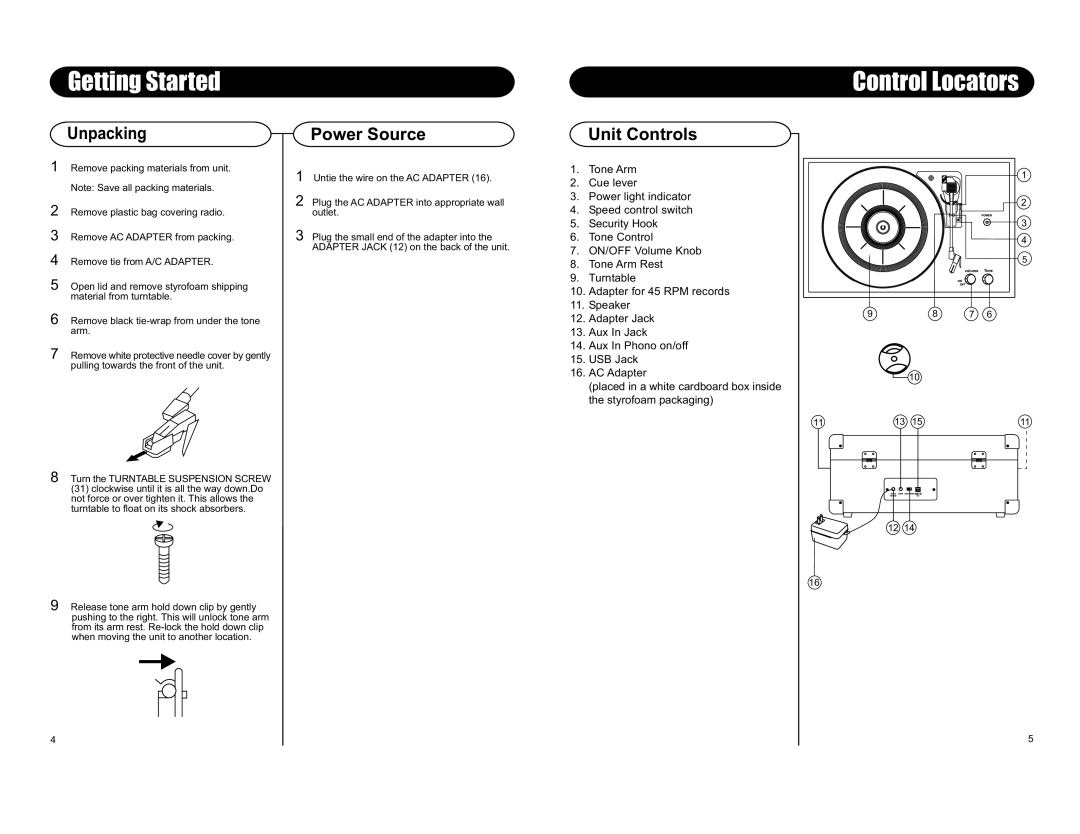
The Crosley CR249 is equipped with a 3-speed turntable, allowing it to playback vinyl records at 33 1/3, 45, and 78 RPM. This adaptability means that listeners can enjoy a wide range of vinyl, from classic LPs to 7-inch singles, ensuring a comprehensive listening experience. The built-in speakers deliver a rich, warm sound that captures the essence of vinyl playback, while a headphone output provides a more intimate listening option.
In terms of connectivity, the Crosley CR249 does not disappoint. It features Bluetooth capability, allowing users to wirelessly connect their smartphones, tablets, or any Bluetooth-enabled device to stream music effortlessly. This modern integration allows vinyl enthusiasts to enjoy their digital music library without compromising the nostalgic experience of using a turntable.
Additionally, the CR249 incorporates an auxiliary input, providing the choice to connect other audio devices for enhanced versatility. The fully automatic return tonearm is designed for ease of use, ensuring that the stylus gently returns to its resting position at the end of playback, protecting your records and the needle over time.
The Crosley CR249 also includes a USB port, making digitization of vinyl records a breeze. Users can easily convert their favorite albums into digital files for preservation and convenience, blending the love of vinyl with modern technology.
In summary, the Crosley Radio CR249 fuses vintage charm with contemporary functionalities, making it an ideal choice for both new vinyl collectors and seasoned enthusiasts. Its stylish design, versatile playback options, Bluetooth connectivity, and additional features stand out in the crowded market of portable turntables, promising an engaging and enjoyable listening experience.