3
Setup and
Adjustment
| IMPORTANT: This unit is shipped without |
| gasoline or oil in the engine. Fill up gasoline and |
A | oil as instructed in the accompanying engine |
manual BEFORE operating your mower. | |
| NOTE: Reference to right or left side of the |
| mower is observed from the operating position. |
B
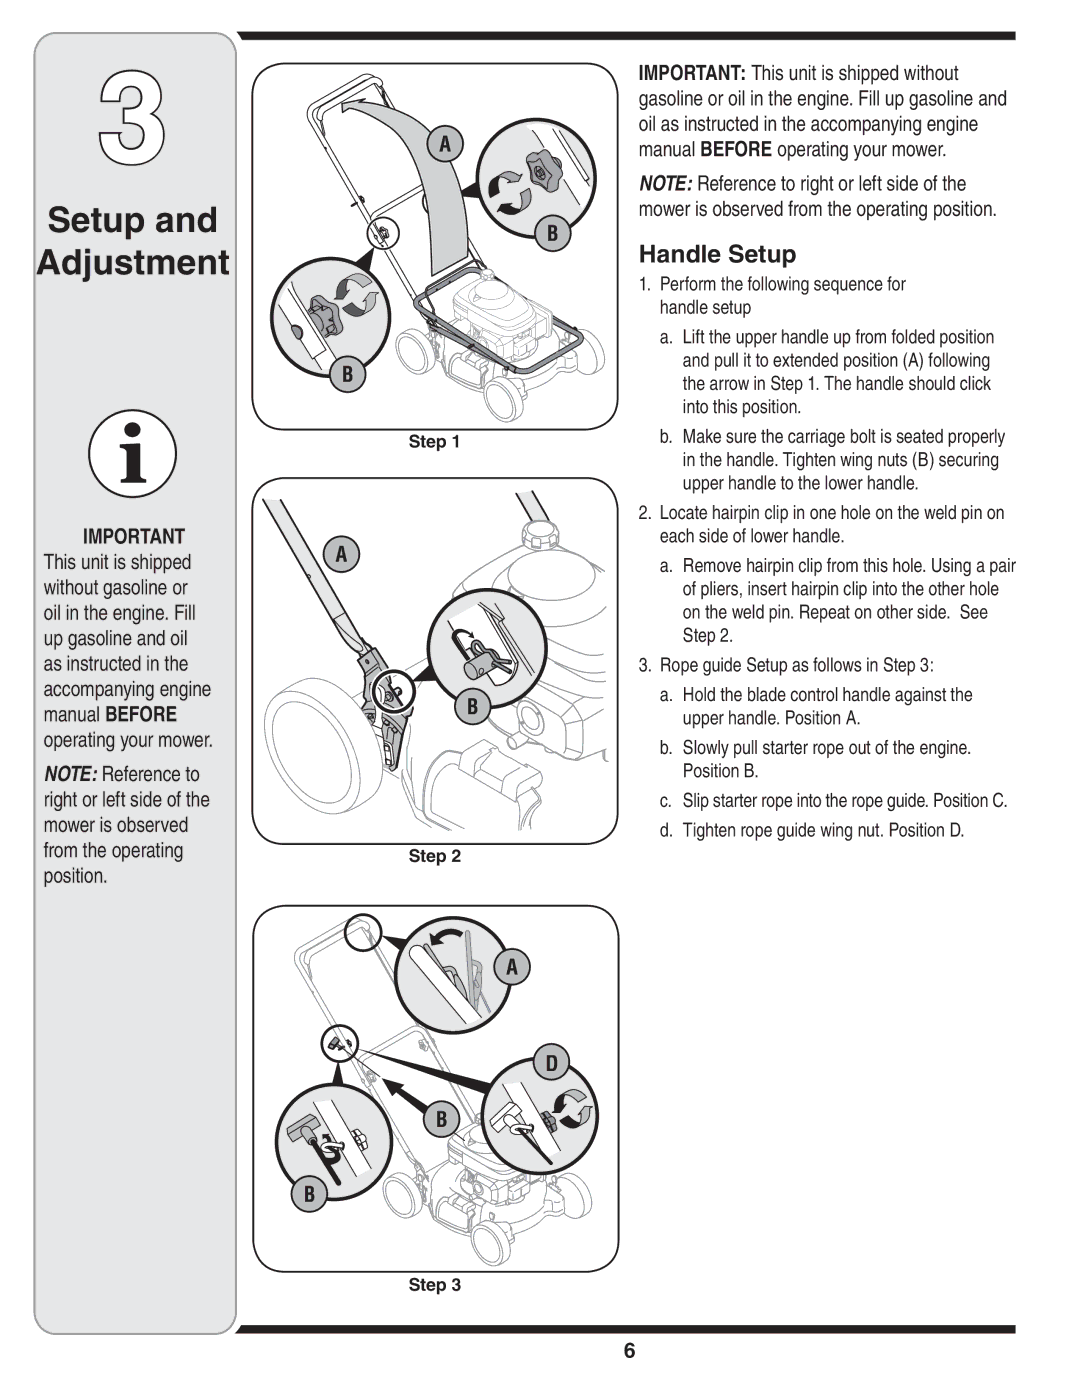
Handle Setup
IMPORTANT This unit is shipped without gasoline or oil in the engine. Fill up gasoline and oil as instructed in the accompanying engine manual BEFORE operating your mower.
NOTE: Reference to right or left side of the mower is observed
B
Step 1
A
B
1.Perform the following sequence for handle setup
a.Lift the upper handle up from folded position and pull it to extended position (A) following the arrow in Step 1. The handle should click into this position.
b.Make sure the carriage bolt is seated properly in the handle. Tighten wing nuts (B) securing upper handle to the lower handle.
2.Locate hairpin clip in one hole on the weld pin on each side of lower handle.
a.Remove hairpin clip from this hole. Using a pair of pliers, insert hairpin clip into the other hole on the weld pin. Repeat on other side. See Step 2.
3.Rope guide Setup as follows in Step 3:
a.Hold the blade control handle against the upper handle. Position A.
b.Slowly pull starter rope out of the engine. Position B.
c.Slip starter rope into the rope guide. Position C.
d.Tighten rope guide wing nut. Position D.
from the operating position.
Step 2
A
D
B
B
Step 3
6