Attaching Discharge Chute
5 | 1. | Lower the deck to its lowest position. |
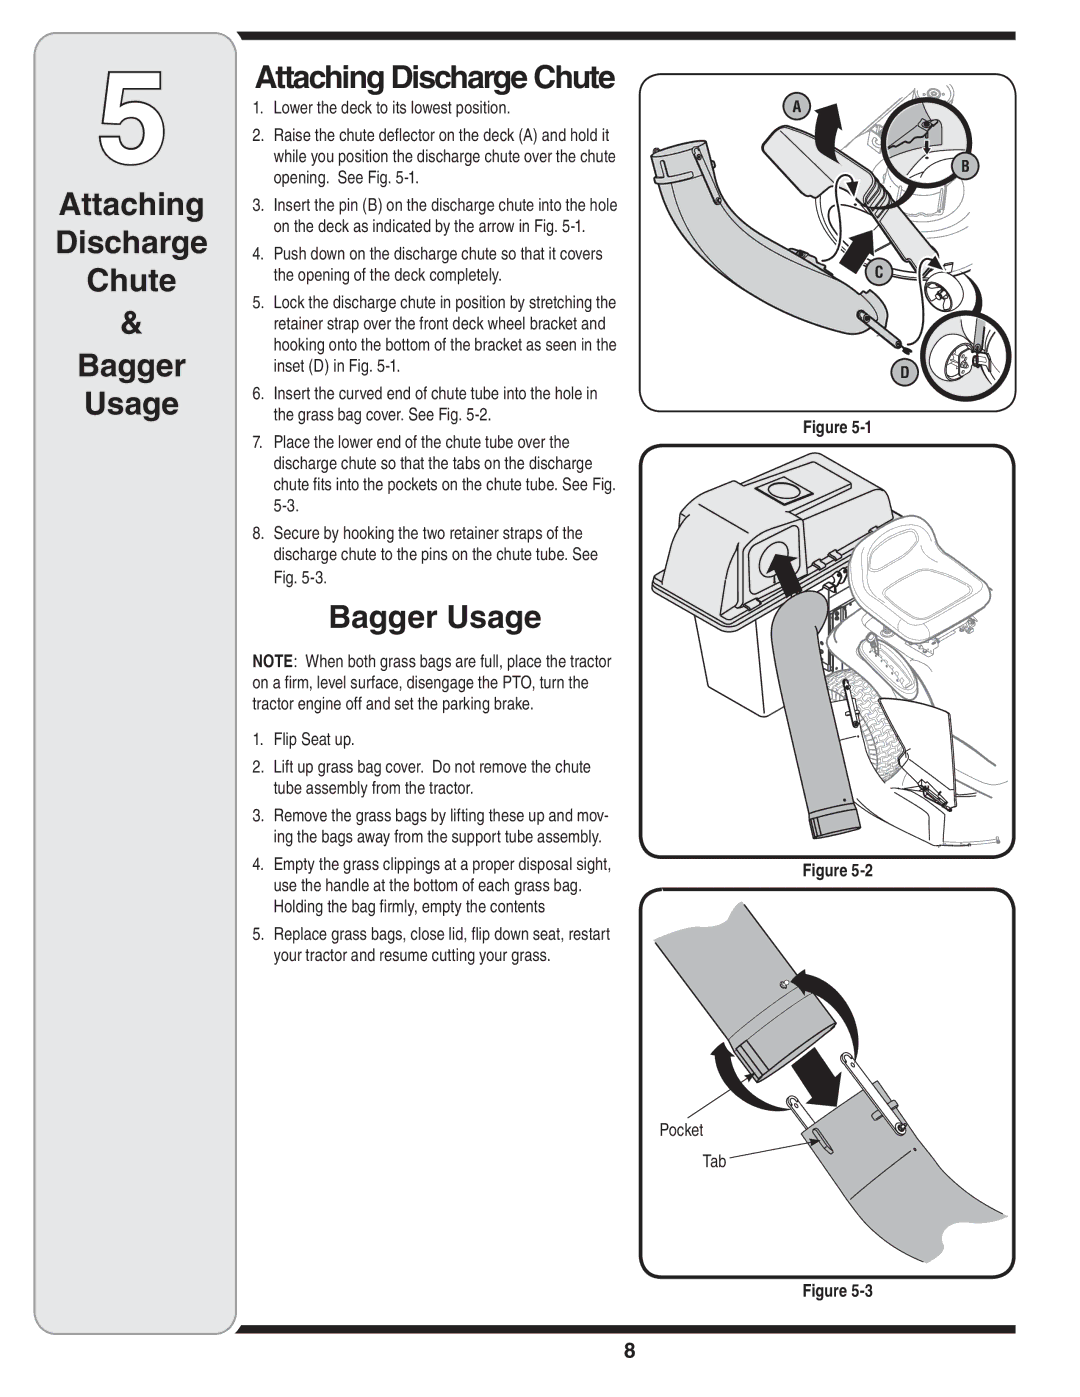
2. | Raise the chute deflector on the deck (A) and hold it | |
| while you position the discharge chute over the chute | |
| opening. See Fig. | |
Attaching | 3. | Insert the pin (B) on the discharge chute into the hole |
Discharge |
| on the deck as indicated by the arrow in Fig. |
4. | Push down on the discharge chute so that it covers | |
Chute |
| the opening of the deck completely. |
|
| |
& | 5. | Lock the discharge chute in position by stretching the |
| retainer strap over the front deck wheel bracket and | |
Bagger |
| hooking onto the bottom of the bracket as seen in the |
| inset (D) in Fig. | |
Usage | 6. | Insert the curved end of chute tube into the hole in |
| the grass bag cover. See Fig. | |
| 7. | Place the lower end of the chute tube over the |
|
| discharge chute so that the tabs on the discharge |
|
| chute fits into the pockets on the chute tube. See Fig. |
|
| |
| 8. | Secure by hooking the two retainer straps of the |
|
| discharge chute to the pins on the chute tube. See |
|
| Fig. |
|
| Bagger Usage |
| NOTE: When both grass bags are full, place the tractor | |
| on a firm, level surface, disengage the PTO, turn the | |
| tractor engine off and set the parking brake. | |
| 1. | Flip Seat up. |
| 2. | Lift up grass bag cover. Do not remove the chute |
|
| tube assembly from the tractor. |
| 3. | Remove the grass bags by lifting these up and mov- |
|
| ing the bags away from the support tube assembly. |
| 4. | Empty the grass clippings at a proper disposal sight, |
|
| use the handle at the bottom of each grass bag. |
|
| Holding the bag firmly, empty the contents |
| 5. | Replace grass bags, close lid, flip down seat, restart |
|
| your tractor and resume cutting your grass. |
Tab
A
B
![]()
![]()
![]() C
C
D
Figure
Figure
Figure
8