3
Assembling
and
Attaching
Mounting
Bracket
IMPORTANT:
Before assembly, place
the tractor on a firm,
level surface, disengage the PTO, stop the tractor engine and set the park- ing brake.
NOTE:
There are two holes in the clevis pin. Be sure to insert the hairpin clip in the upper hole to properly secure the bracket assembly to the hitch plate.
Assembling and Attaching
The Bracket Assembly
(Hardware Group A)
IMPORTANT: Before assembly, place the tractor on a firm, level surface, disengage the PTO, stop the tractor engine and set the parking brake.
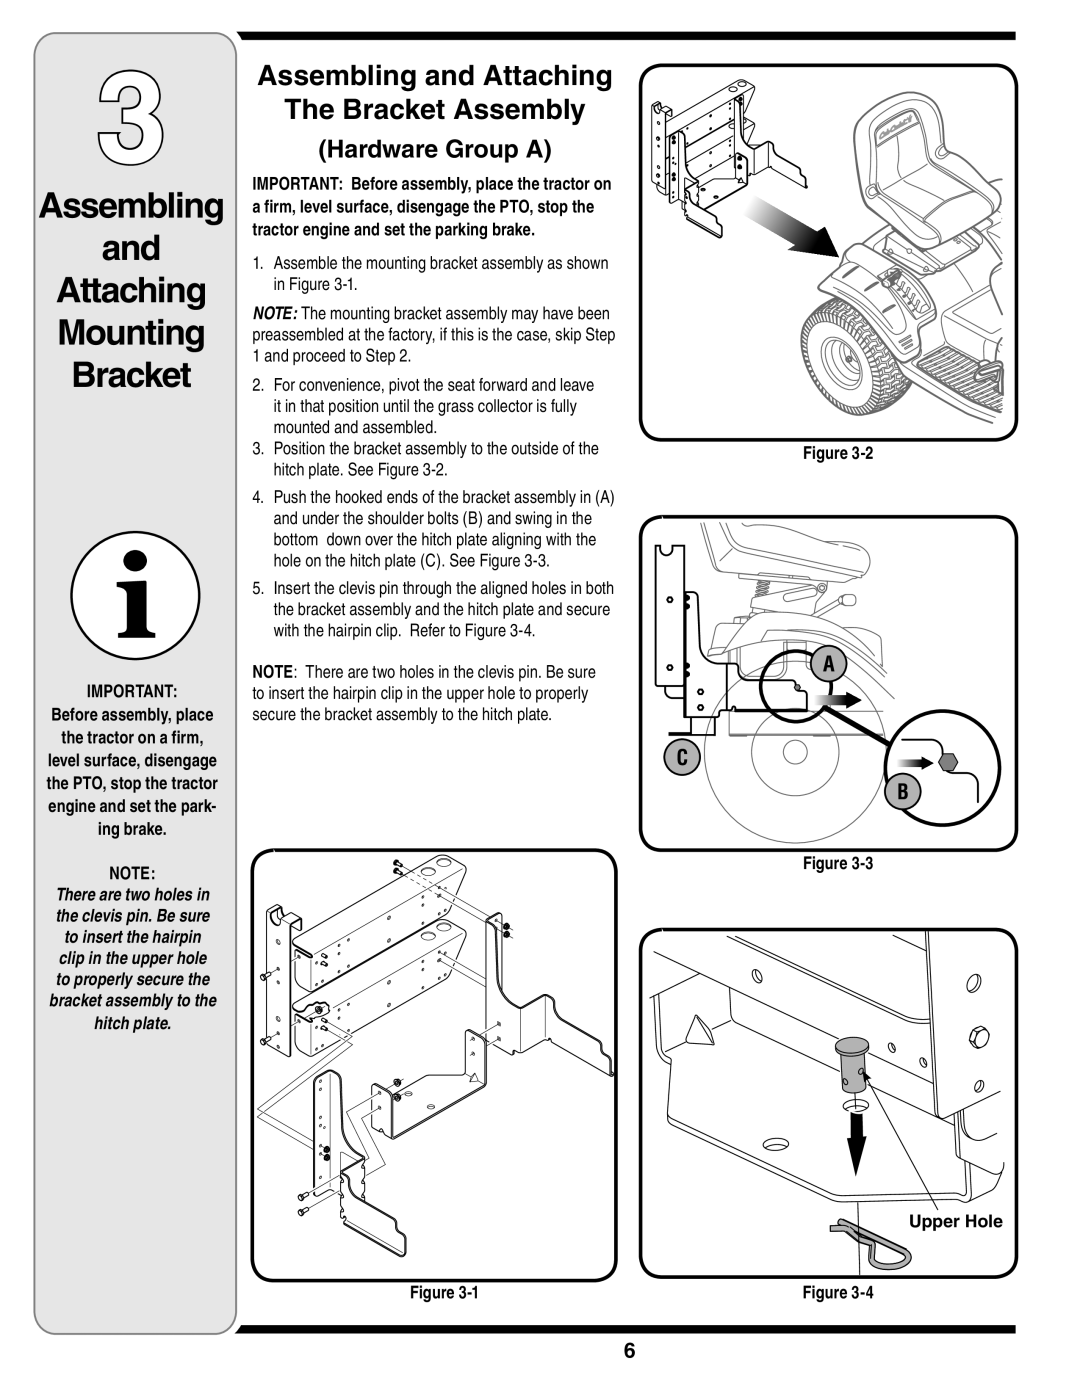
1.Assemble the mounting bracket assembly as shown in Figure
NOTE: The mounting bracket assembly may have been preassembled at the factory, if this is the case, skip Step 1 and proceed to Step 2.
2.For convenience, pivot the seat forward and leave it in that position until the grass collector is fully mounted and assembled.
3.Position the bracket assembly to the outside of the hitch plate. See Figure
4.Push the hooked ends of the bracket assembly in (A) and under the shoulder bolts (B) and swing in the bottom down over the hitch plate aligning with the hole on the hitch plate (C). See Figure
5.Insert the clevis pin through the aligned holes in both the bracket assembly and the hitch plate and secure with the hairpin clip. Refer to Figure
NOTE: There are two holes in the clevis pin. Be sure to insert the hairpin clip in the upper hole to properly secure the bracket assembly to the hitch plate.
Figure
Figure
A
C
B
Figure
![]() Upper Hole
Upper Hole
Figure
6