Quick Starting Guide
GETTING STARTED
1.Open the player by raising the screen.
2.Remove the protective plastic tab
from the disc compartment.
Recommend to load it again to cover the laser mechanism when not use for long time.
3. Press OPEN/CLOSE on the left to ![]() open the compartment door.
open the compartment door. ![]()
4. Place a DVD disc (label side facing ![]() up).
up).![]()
Align the center of the DVD disc with the
Connecting to a TV
SETTING UP YOUR PLAYER
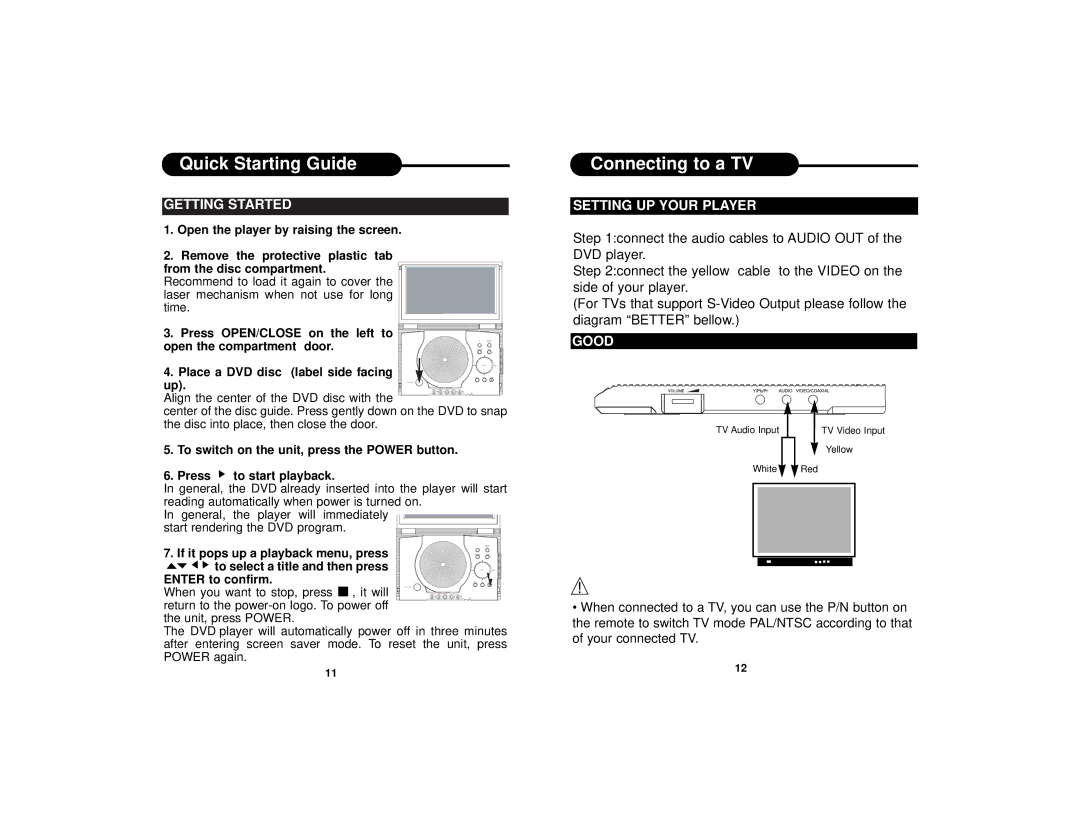
Step 1:connect the audio cables to AUDIO OUT of the DVD player.
Step 2:connect the yellow cable to the VIDEO on the side of your player.
(For TVs that support
GOOD
center of the disc guide. Press gently down on the DVD to snap the disc into place, then close the door.
5.To switch on the unit, press the POWER button.
6.Press ![]() to start playback.
to start playback.
In general, the DVD already inserted into the player will start reading automatically when power is turned on.
In general, the player will immediately start rendering the DVD program.
7. If it pops up a playback menu, press
TV Audio Input
White![]()
TV Video Input
Yellow
![]() Red
Red
![]()
![]()
![]() to select a title and then press ENTER to confirm. When you want to stop, press
to select a title and then press ENTER to confirm. When you want to stop, press ![]() , it will return to the
, it will return to the
the unit, press POWER.
The DVD player will automatically power off in three minutes after entering screen saver mode. To reset the unit, press POWER again.
•When connected to a TV, you can use the P/N button on the remote to switch TV mode PAL/NTSC according to that of your connected TV.
11 | 12 |
|