Getting Started
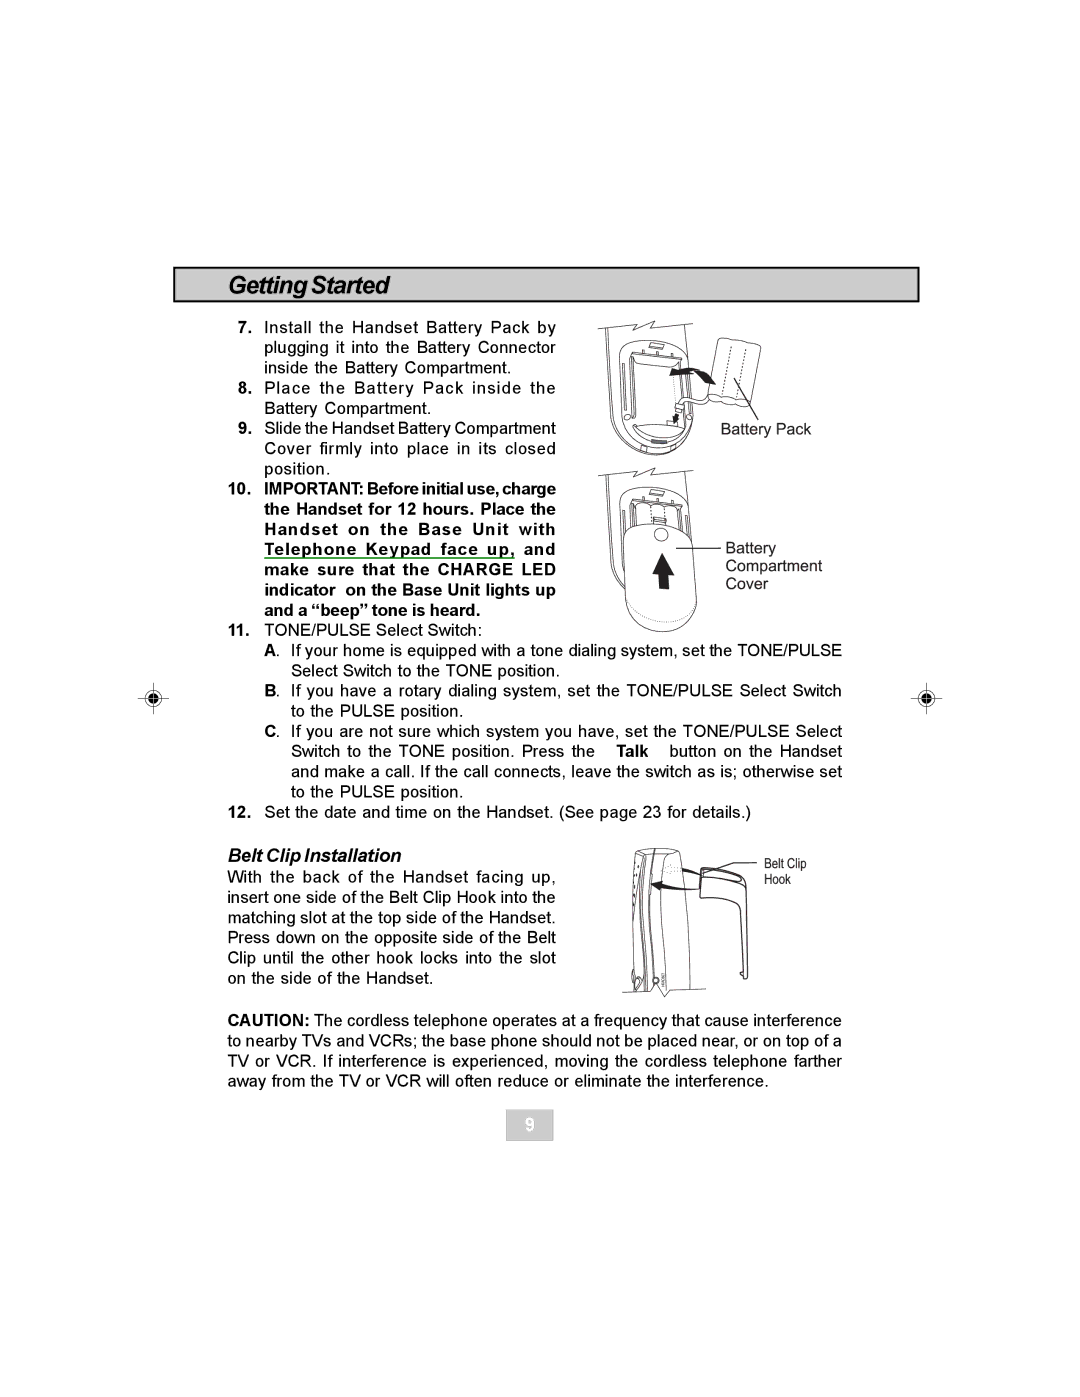
7.Install the Handset Battery Pack by plugging it into the Battery Connector
inside the Battery Compartment.
8.Place the Battery Pack inside the
Battery Compartment.
9. Slide the Handset Battery Compartment
Cover firmly into place in its closed
position.
10.IMPORTANT: Before initial use, charge the Handset for 12 hours. Place the Handset on the Base Unit with Telephone Keypad face up, and
make sure that the CHARGE LED indicator on the Base Unit lights up and a “beep” tone is heard.
11.TONE/PULSE Select Switch:
A. If your home is equipped with a tone dialing system, set the TONE/PULSE Select Switch to the TONE position.
B. If you have a rotary dialing system, set the TONE/PULSE Select Switch
to the PULSE position.
C. If you are not sure which system you have, set the TONE/PULSE Select Switch to the TONE position. Press the Talk button on the Handset and make a call. If the call connects, leave the switch as is; otherwise set to the PULSE position.
12.Set the date and time on the Handset. (See page 23 for details.)
Belt Clip Installation
With the back of the Handset facing up, insert one side of the Belt Clip Hook into the matching slot at the top side of the Handset. Press down on the opposite side of the Belt Clip until the other hook locks into the slot on the side of the Handset.
CAUTION: The cordless telephone operates at a frequency that cause interference to nearby TVs and VCRs; the base phone should not be placed near, or on top of a TV or VCR. If interference is experienced, moving the cordless telephone farther away from the TV or VCR will often reduce or eliminate the interference.
9
