Manuals
/
Daewoo
/
Computer Equipment
/
Computer Monitor
Daewoo
710B IC Removal/Replacement, “Small-Signal” Discrete Transistor Removal/Replacement
Models:
710B
1
7
59
59
Download
59 pages
55.26 Kb
4
5
6
7
8
9
10
11
Troubleshooting
Parts list
Diagram
Symbols in the manual
Pin Connector
Alignment Procedure
Operation & Adjustment
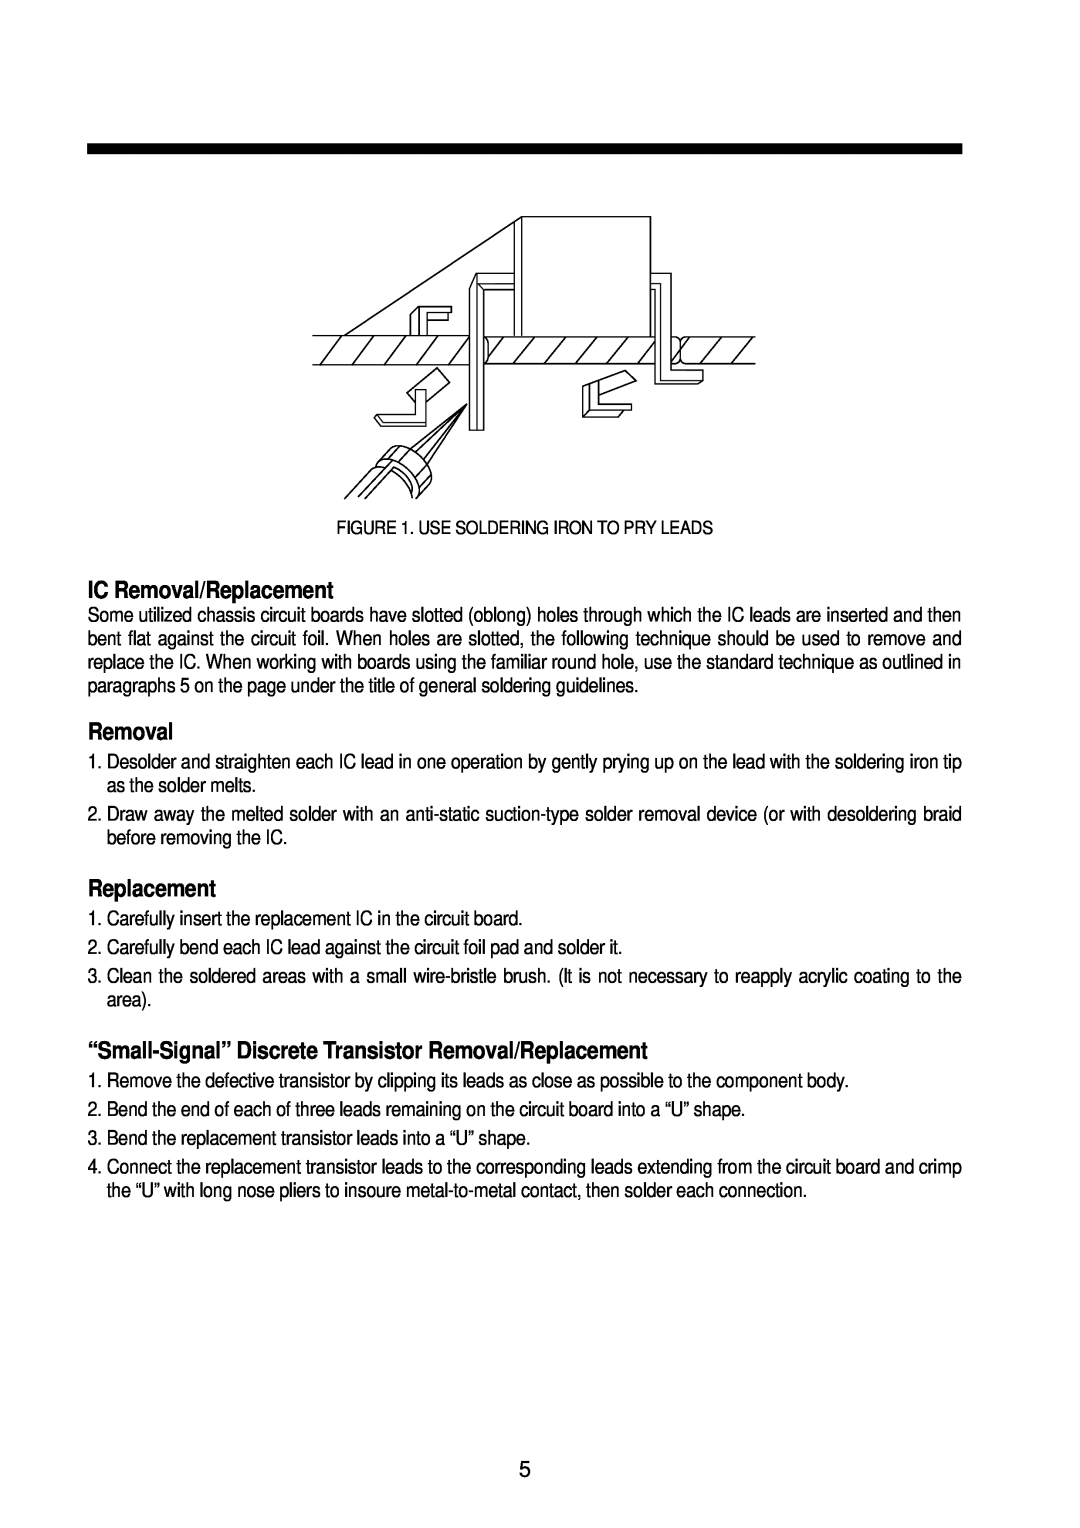
IC Removal/Replacement
Safety Precautions
Power Supply Unit P.S.U
Page 7
Image 7
Page 6
Page 8
Page 7
Image 7
Page 6
Page 8
Contents
XGA COLOR MONITOR Model 710B
Service Manual
CONTENTS
Implosion Protection
SAFETY PRECAUTIONS
Safety Check
Fire & Shock Hazard
Terms in the manual
GENERAL SAFETY INFORMATION
Symbols in the manual
Symbols as marked on equipment
General Servicing Precautions
SERVICING PRECAUTIONS
General Soldering Guidelines
Electrostatically Sensitive ES Devices
Removal
IC Removal/Replacement
Replacement
“Small-Signal” Discrete Transistor Removal/Replacement
Diode Removal/Replacement
Power IC, Transistor or Devices Removal/Replacement
TECHNICAL INFORMATION
Abbreviations
GENERAL INFORMATION
CAUTIONS FOR ADJUSTMENT AND REPAIR
PIN CONNECTOR
Caution For Servicing
ADJUSTMENT KEY
OPERATION & ADJUSTMENT
BRIGHTNESS
ADJUSTMENT PROCESS
RECALL
CONTRAST
OSDOn-Screen Display Menu
ROTATION
Choose different preset color temperatures or set your own customized
Self Diagnosis
1. No Character
TROUBLESHOOTING HINTS
No Character
No Raster
2. No Raster
One color is missing
3. A missing Color
Abnormal OSD Font
4. Abnormal OSD Font
Trouble in Horizontal output circuit No Raster
5. Horizontal Output Circuit
correct?
Unstable picture
Is H.Sync
input pin of IC501
Unstable or Abnormal picture
6-2. V.OSC/Deflection Circuit
Monitor remains unfocused
7. Focus
Focus is poor
7-1. Dynamic Focus
Poor convergence
8. Convergence
1.Check B+ section of TDA9109 and its ambient circuit
9. Abnormal Picture 9-1. Horizontal Size
Abnormal H.Size
changed, is the H.size changed?
Abnormal V.Size
9-2. Vertical Size
Trouble in H.V circuit No Raster
10. High Voltage Circuit
Side-Pincusion distortion is excessive or barrel
11. Side-Pincushion Circuit
Trouble in P.S.U
12. Power Supply Unit P.S.U
13V DC?
of C104 13V DC?
8.7V DC?
Main Adjustment
ALIGNMENT PROCEDURE
Standard Adjustment Conditions
Pre-Adjustment
l Repeat e,f,g,h,i,j
DIAGRAM
Main PCB Component Side
PCB LAYOUT
Main PCB Solder Side
Video PCB Component Side Video PCB Solder Side
Page
EXPLODED VIEW DIAGRAM
Important Safety Notice
REPLACEMENT PARTS LIST
Abbreviation of Description
PART-DESC
CIRCUIT BOARD ELECTRICAL PARTS LIST
PART-CODE
PART-NAME
PART-NAME
PART-CODE
PART-DESC
PART-NAME
PART-CODE
PART-DESC
PART-NAME
PART-CODE
PART-DESC
PART-NAME
PART-CODE
PART-DESC
PART-NAME
PART-CODE
PART-DESC
PART-NAME
PART-CODE
PART-DESC
PART-NAME
PART-CODE
PART-DESC
PART-NAME
PART-CODE
PART-DESC
PART-NAME
PART-CODE
PART-DESC
PART-NAME
PART-CODE
PART-DESC
PART-NAME
PART-CODE
PART-DESC
PART-NAME
PART-NAME
PART-NAME
PART-CODE
PART-DESC
PART-NAME
PART-CODE
PART-DESC
PART-NAME
DAEWOO ELECTRONICS CO
OVERSEAS SERVICE DEPT
Serv ce Manual
PRINTED DATE NOV.1998
Top
Page
Image
Contents