Overview of the equipment
This section summarizes the buttons, controls, and terminals that you will use with your VCR.
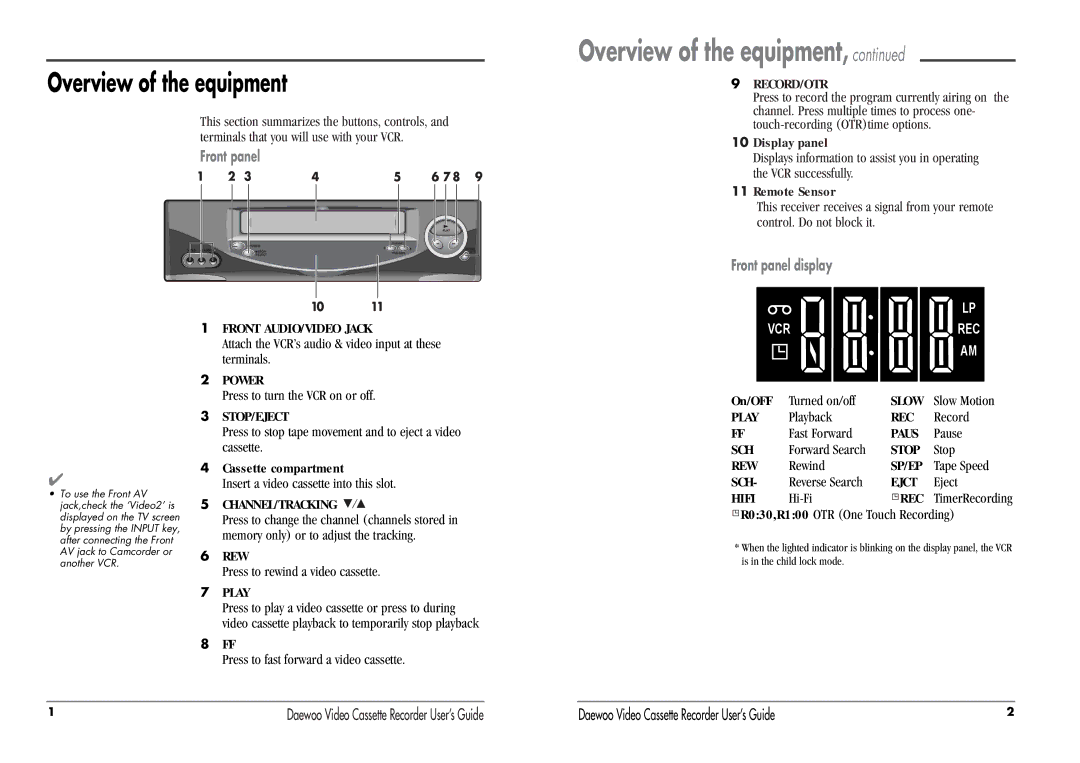
Front panel
L ![]()
![]()
![]()
![]()
![]() R
R
1FRONT AUDIO/VIDEO JACK
Overview of the equipment, continued
9RECORD/OTR
Press to record the program currently airing on the channel. Press multiple times to process one-
10Display panel
Displays information to assist you in operating the VCR successfully.
11Remote Sensor
This receiver receives a signal from your remote control. Do not block it.
Front panel display
| LP |
VCR | REC |
✔
•To use the Front AV jack,check the ‘Video2’ is displayed on the TV screen by pressing the INPUT key, after connecting the Front AV jack to Camcorder or another VCR.
Attach the VCR’s audio & video input at these terminals.
2POWER
Press to turn the VCR on or off.
3STOP/EJECT
Press to stop tape movement and to eject a video cassette.
4Cassette compartment
Insert a video cassette into this slot.
5CHANNEL/TRACKING ![]()
![]()
Press to change the channel (channels stored in memory only) or to adjust the tracking.
6REW
Press to rewind a video cassette.
7PLAY
Press to play a video cassette or press to during video cassette playback to temporarily stop playback
8FF
Press to fast forward a video cassette.
AM |
On/OFF | Turned on/off | SLOW | Slow Motion |
PLAY | Playback | REC | Record |
FF | Fast Forward | PAUS | Pause |
SCH | Forward Search | STOP | Stop |
REW | Rewind | SP/EP | Tape Speed |
SCH- | Reverse Search | EJCT | Eject |
HIFI | REC | TimerRecording |


 R0:30,R1:00 OTR (One Touch Recording)
*When the lighted indicator is blinking on the display panel, the VCR is in the child lock mode.
1 | Daewoo Video Cassette Recorder User’s Guide | Daewoo Video Cassette Recorder User’s Guide | 2 |