OPERATING INSTRUCTIONS (cont’d)
TURNING ON
THE APPLIANCE
Starting a wash cycle. . .
1)Make sure that the plug for the appliance is inserted into the wall socket.
2)Make sure that the water supply is turned on to full pressure.
3)Load the dishwasher (see "Loading Dishwasher Racks"on previous page).
4)Pour in the detergent (see "Detergent Dispenser" on page 3).
5)Turn the dial located on the right of the control panel in the clockwise direction until the number or the symbol for the cycle setting is aligned with the reference mark (see "Wash Cycles" on page 2).
6)Press the ON/ OFF button, and the ON/OFF light will turn on. At this point, the wash cycle will begin.
Cancelling or Modifying a Wash Cycle Setting...
A cycle that is underway can only be modified if it has only been running for a short time. Otherwise, the detergent may have already been released, and the appliance may have already drained the wash water. If this is the case, the detergent dispenser must be refilled (see “Detergent Dispenser” on page 3). Press the ON/OFF button, and the ON light will turn off. Rotate the dial in the clockwise direction to the desired cycle setting (see " Starting a wash cycle. . . " above). Then, turn the dishwasher back on using the ON/OFF button.
Forgot to Add a Dish?
A forgotten dish can be added any time before the detergent cup opens.
1)Pull the door handle.
2)Do not open the door until the water spray action stops. Steam may rise out of the dishwasher.
3)Add forgotten dish(es).
4)Push the door closed. When the door is properly closed, a click will sound.
FILTERING
SYSTEM
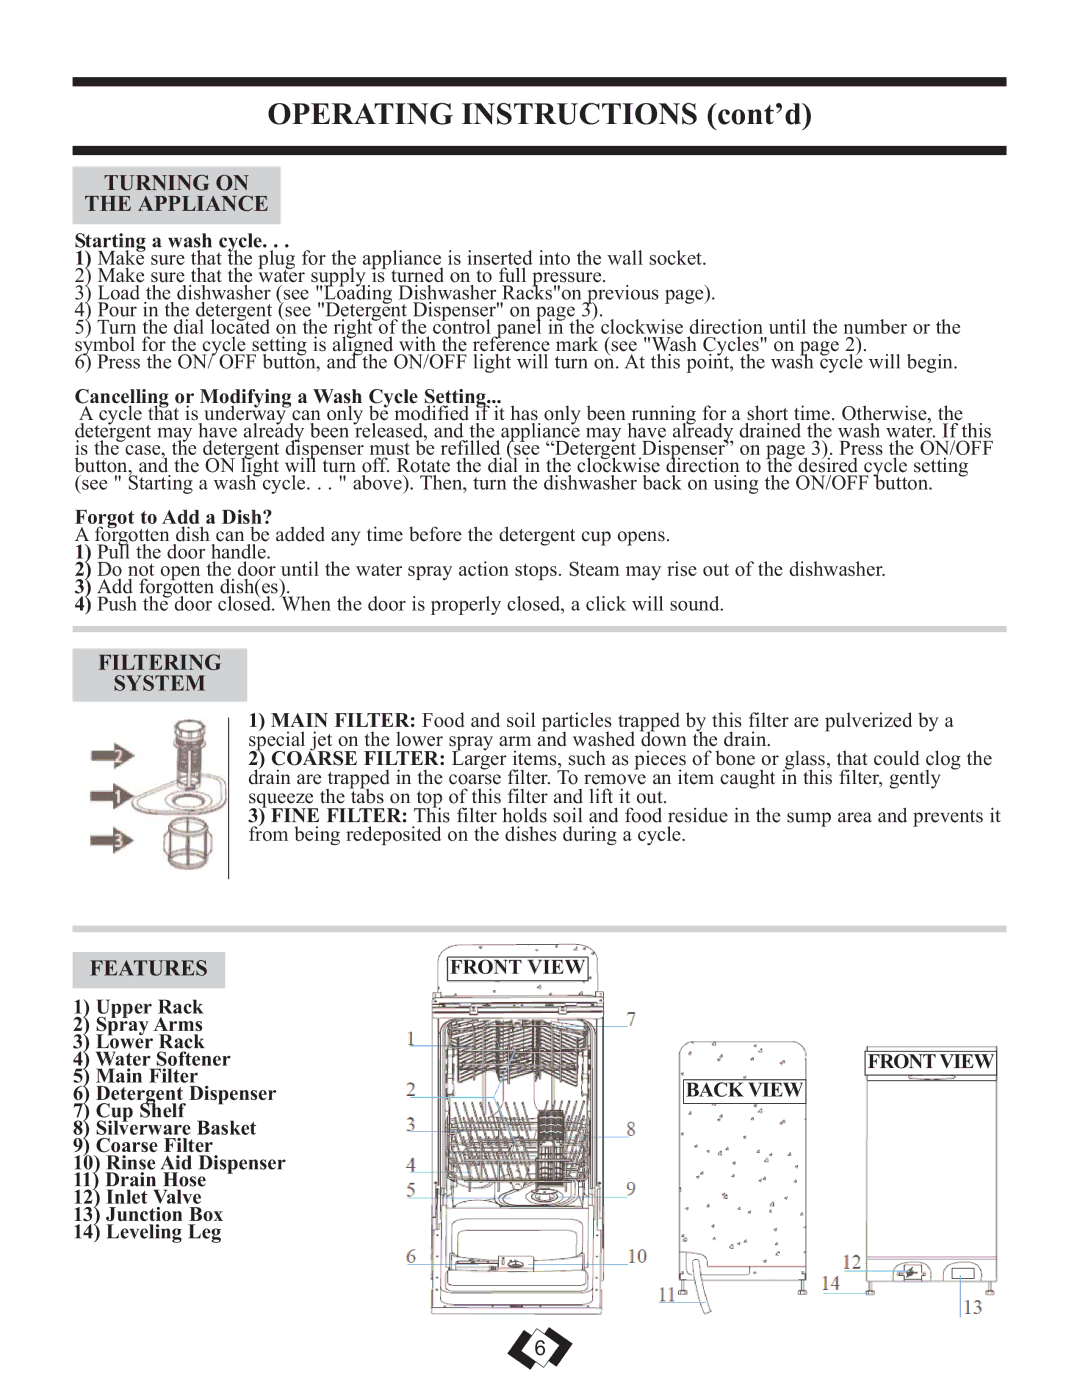
1)MAIN FILTER: Food and soil particles trapped by this filter are pulverized by a special jet on the lower spray arm and washed down the drain.
2)COARSE FILTER: Larger items, such as pieces of bone or glass, that could clog the drain are trapped in the coarse filter. To remove an item caught in this filter, gently squeeze the tabs on top of this filter and lift it out.
3)FINE FILTER: This filter holds soil and food residue in the sump area and prevents it from being redeposited on the dishes during a cycle.
FEATURES
1)Upper Rack
2)Spray Arms
3)Lower Rack
4)Water Softener
5)Main Filter
6)Detergent Dispenser
7)Cup Shelf
8)Silverware Basket
9)Coarse Filter
10)Rinse Aid Dispenser
11)Drain Hose
12)Inlet Valve
13)Junction Box
14)Leveling Leg
FRONT VIEW
FRONTVIEW
BACK VIEW
6
