
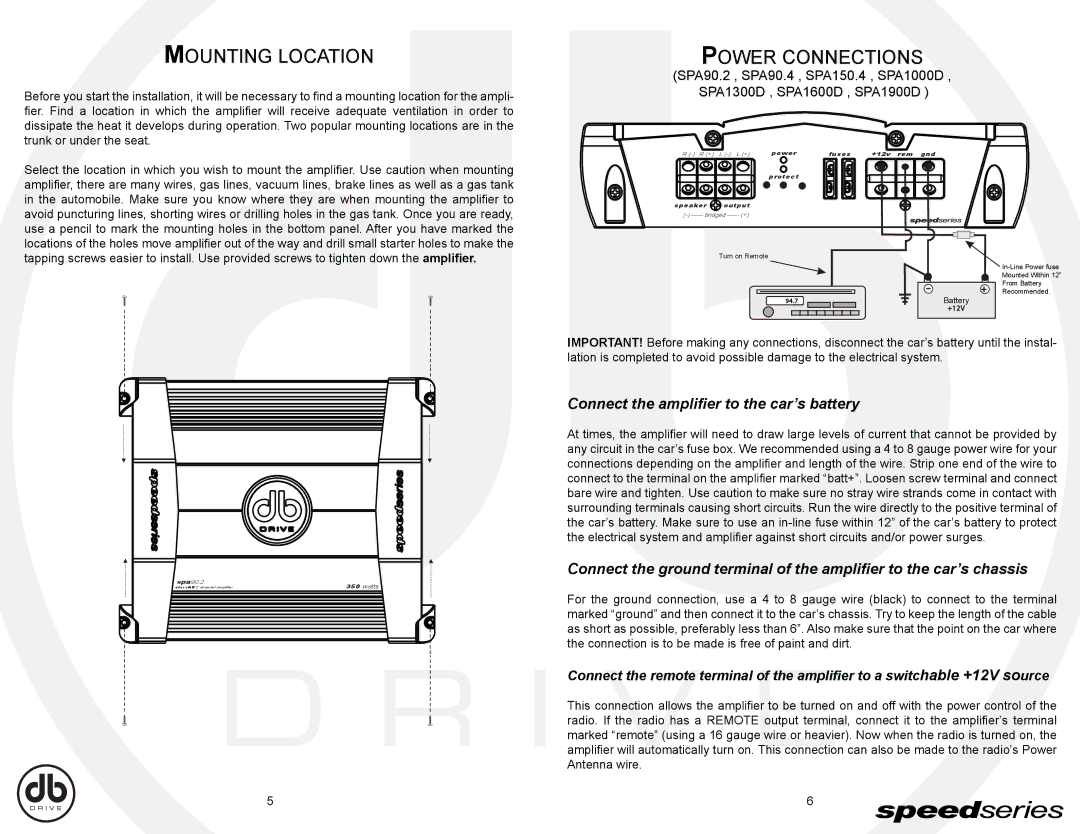
SPA1300D, SPA1900D, SPA1000D, SPA90.2, SPA1600D specifications
DB Drive is renowned for its high-performance audio amplifiers, and the SPA series exemplifies this reputation. The SPA90.2, SPA150.4, SPA1000D, SPA1300D, and SPA90.4 are notable models that deliver robust power, innovative technologies, and superior sound quality, catering to the needs of audio enthusiasts and professionals alike.The SPA90.2 is a compact yet powerful 2-channel amplifier that produces up to 90 watts per channel at 4 ohms. It features high-level inputs, allowing seamless integration into existing audio systems without requiring external converters. This model is designed with enhanced thermal management to ensure reliability even during extended use.
Next, the SPA150.4 is a versatile 4-channel amplifier, rated at 150 watts per channel at 4 ohms. It includes various crossover options, allowing users to fine-tune their sound experience, whether powering speakers or subwoofers. This model integrates a low-pass filter that enhances bass response for a more immersive listening experience.
The SPA1000D is a dedicated monoblock subwoofer amplifier that produces a staggering 1000 watts RMS at 1 ohm. It is designed with advanced Class D technology, ensuring high efficiency and low thermal output. The variable low-pass filter and phase control features allow users to optimize subwoofer performance, making it ideal for deep bass enthusiasts.
On the other hand, the SPA1300D is another monoblock amplifier that delivers an impressive 1300 watts RMS, also at 1 ohm. It includes a bass boost feature, which lets users amplify bass frequencies for an impactful low-end experience. The SPA1300D is built with a heavy-duty aluminum heat sink for efficient dissipation of heat, ensuring sustained performance.
Finally, the SPA90.4 combines power and versatility, offering 90 watts per channel across its four channels. Its bridgeable design allows users to create a more powerful two-channel output when needed. The SPA90.4 employs advanced circuit protection technology, ensuring longevity and safety in various sound setups.
In summary, the DB Drive SPA series of amplifiers provides powerful audio solutions with advanced technologies, including Class D efficiency, various crossover options, and extensive circuit protection features. Each model caters to different audio needs, from compact setups to powerful subwoofer configurations, making them a perfect choice for both casual listeners and serious audiophiles.